Introduction
I had a task to export data from tables in a database on SQL Server to an XML file. Here is a simple way to do it using SSIS. No Script components!
Background
No doubt, SSIS is the most natural tool to do such a task. One of the core purposes of SSIS is to transfer data from a database to a file. Usually in SSIS it's done by a "Data Flow Task" building block. This block consists of two sub-blocks: one for a database (source) and another one for a file (destination). The first sub-block is picked from the "Data Flow Sources" in the Toolbox. The second sub-block you might expect to find in the "Data Flow Destinations" section of the Toolbox. But... there is no "XML file" in this section! Thus unfortunately SSIS does not have a "buit-in" way to export data from database tables to a XML file. It still can be done using a "Flat File Destination" as a destination sub-block to create a regular text file. Then some additional manipulation is needed to format the text inside the file as XML. After all XML is nothing more than a formatted text.
Most of the articles that I found on the internet suggest to use a "Scripting Task" block and to write code that make a use of .NET libraries to build XML output. It's a flexible and powerful way though in my opinion there is no need in such as there is no need to use a gun to kill a mosquito. You can perform such a simple task with you "built-in" bare hands.
The SSIS presented here uses a standard "Data Flow Task" building block without any .NET code. It uses standard T-SQL (SQL for SQL Server). A nested SELECT command with FOR XML clause is used to represent
the hierarchy of tables as XML. It is also used to add custom opening and closing XML tags.
Data Example
The source data is organized in a hierarchy of two database tables: Employees who serve Customers with relations "many-to-many" stored
in the third table called EmployeesCustomers. This table describes which employee serves which customer. Usually one employee serves several customers.
Some customers can be served by more than one Employee. SSIS exports this data to a single XML file which looks like this:
<Company>
  <Employees>
    <Employee Id="..." Name="...">
      <Customers>
        <Customer Id="..." Name="...">
        ...
      </Customers>
    </Employee>
    ...
  </Employees>
</Company>
Note that customers who are served by more than one employee appear more than once in the XML file each time under a different employee.
Now let's build the example data. Run these SQL commands in your SQL Server Management Studio to build the example tables. (I used the Bible characters as employees
and contemporary celebrities as customers to make it amusing. This is just an example to illustrate how it works. Of course you can use your own data and your own hierarchy):
CREATE TABLE [dbo].[Employees](
        [EmployeeID] [bigint] NOT NULL,
        [FirstName] [varchar](20) NULL,
        [Title] [varchar](50) NULL,
        [BirthDate] [datetime] NULL,
        [Salary] [money] NULL,
CONSTRAINT [PK_Employees] PRIMARY KEY CLUSTERED
(
        [EmployeeID] ASC
))

CREATE TABLE [dbo].[Customers](
        [CustomerID] [int] NOT NULL,
        [CustomerName] [varchar](50) NULL,
CONSTRAINT [PK_Customers] PRIMARY KEY CLUSTERED
(
        [CustomerID] ASC
))

CREATE TABLE [dbo].[EmployeesCustomers](
        [EmployeeID] [int] NOT NULL,
        [CustomerID] [int] NOT NULL,
CONSTRAINT [PK_EmployeesCustomers] PRIMARY KEY CLUSTERED
(
        [EmployeeID] ASC,
        [CustomerID] ASC
))

INSERT INTO Employees VALUES (1,'Abraham','Team Leader'   ,'1947-11-25', 100.00)
INSERT INTO Employees VALUES (2,'Sarah'  ,'HR Manager'    ,'1967-04-20', 100.00)
INSERT INTO Employees VALUES (3,'Hagar'  ,'Office Cleaner','1978-08-03', 10.00)
INSERT INTO Employees VALUES (4,'Ishmael','Mail Deliverer','1989-12-01', 20.00)
INSERT INTO Employees VALUES (5,'Isaac'  ,'Developer'     ,'1995-01-01', 50.00)
INSERT INTO Employees VALUES (6,'Rebekah','QA Person'     ,'1995-05-13', 50.00)

INSERT INTO Customers VALUES (1,'Serena Williams')
INSERT INTO Customers VALUES (2,'Pat Robertson')
INSERT INTO Customers VALUES (3,'Paris Hilton')
INSERT INTO Customers VALUES (4,'Barak Obama')
INSERT INTO Customers VALUES (5,'Arnold Schwarzenegger')
INSERT INTO Customers VALUES (6,'Oprah Winfrey')
INSERT INTO Customers VALUES (7,'Prince El Saudi')

INSERT INTO EmployeesCustomers VALUES (1,5)
INSERT INTO EmployeesCustomers VALUES (1,6)
INSERT INTO EmployeesCustomers VALUES (1,7)
INSERT INTO EmployeesCustomers VALUES (2,1)
INSERT INTO EmployeesCustomers VALUES (2,2)
INSERT INTO EmployeesCustomers VALUES (3,3)
INSERT INTO EmployeesCustomers VALUES (3,4)
Using SSIS
Open a new SSIS project. Right click in the empty space in "Connection Managers" window which is usually at the bottom of the screen.
We are going to add two connection managers: one for a resulting XML file and another for a SQL Server command as a data source:
Select from the menu "New Flat File Connection…". In General section fill the fields "Connection manager name" as FileOut and "File name" with the name
of your resulting XML file. Tick "Unicode" to avoid complications with code pages. The field "Locale" is selected automatically depending on your
local language and your country. Mine is Hebrew (Israel). Leave the rest of the fields to their default values:

Click on "Advanced" under "Description" on the left side. Click on the arrows down inside the "New" button and select
"Add column" from the menu:
A new column is now added. Fill the field "Name" as COL_XML and the field "DataType" as Unicode text stream [DT_NTEXT]. Click OK:
Now to the data source. Right click on the "Connection Managers" and select from the menu "New OLE DB Connection…". Give it the name SQLIn.
In the "Connection Manager" window fill the fields "Server name" and "Select or enter a database name". Click on "Test Connection" button
to see that everything is fine with the database connection. Click OK.
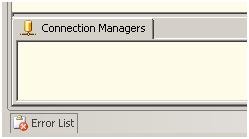
By now you must have two connection managers that look like this:
Now we are going to add the one and only building block which is going to do the job. From the Toolbox select "Data Flow Task":
Double click on it:
From the Toolbox in the section "Data Flow Sources" select "OLE DB Source". Right click on it and select "Edit...".
In the "OLE DB Source Editor" select SQLIn for "OLE DB connection manager" and select "SQL command" for "Data access mode".
Now comes the most important part of the task: the nested SQL SELECT command with FOR XML clause:
SELECT (
  SELECT TOP 1 NULL as N,
    (SELECT Employee.EmployeeId as Id, Employee.FirstName as Name,
      (SELECT TOP 1 NULL as N,
        (SELECT Customer.CustomerID as Id, CustomerName as Name
         FROM EmployeesCustomers INNER JOIN Customers Customer
         ON EmployeesCustomers.CustomerID = Customer.CustomerID
         WHERE EmployeesCustomers.EmployeeId = Employee.EmployeeId
         ORDER BY Customer.CustomerID
         FOR XML AUTO, TYPE)
       FROM Customers
       FOR XML AUTO, TYPE)
     FROM EmployeesCustomers INNER JOIN Employees Employee
     ON EmployeesCustomers.EmployeeID = Employee.EmployeeID
     GROUP BY Employee.EmployeeId, Employee.FirstName
     ORDER BY Employee.EmployeeId
     FOR XML AUTO, TYPE)
  FROM Employees
  FOR XML AUTO, ROOT('Company')
) AS COL_XML
Basically this SQL statement is a variation of a standard join between the three tables: Customers and EmployeesCustomers and Employees in order to get the Employee who takes care of certain customers as well as customers who are taken care by several employees in what is called "many-to-many" relationship. Note the two INNER JOIN clauses which connect between the three tables. If your task requires more simple relationship such as "one-to-many" then you will need just one INNER JOIN clause and the whole SQL will be much shorter. After getting the relationships employees are grouped to get rid of multiple instances of the same employee. For this I used an ORDER BY clause.
Copy and paste this text into the "SQL command text":
Click "Preview" button. You will see XML text inside a single column COL_XML:
Note that our SELECT statement is enclosed in SELECT (...) AS COL_XML to make the output to be text. Otherwise it will look like this:
Click on Close and OK.
From the Toolbox in the section "Data Flow Destinations" select "Flat File Destination".
Right click on it and select "Edit...". In the "Flat File Destination Editor" select FileOut for "Flat File connection manager":
Click on "Columns" on the left side to see that it recognized the only column named COL_XML:
Click OK. Connect the "OLE DB Source" and "Flat File Destination" blocks with a green arrow:
If everything was fine the red error mark will disappear from the "Flat File Destination" block.
Now run your project. The end result will be the XML file as you specified earlier in the FileOut connection manager. Go find it and open it in your browser. It will look like this:
We are done. It looks like a lot of steps but it actually takes a short time to do this.
Points of Interest
XML is formed by FOR XML clause. AUTO modifier uses table's and column's names as XML tags.
To enclose the whole XML document in the root tag ROOT('root_tag_name') modifier is used like this:
FOR XML AUTO, ROOT('Company') To enclose several child XML nodes in a parent node without XML attributes, for instance to enclose several <Employee> nodes in one <Employees> node
I used this statement:
SELECT TOP 1 NULL as N, (SELECT...) FROM TableName
Of course it's not mandatory and could be omitted if your resulting XML does not need it.
To customize XML attributes' names I used an as clause, for example:
Employee.EmployeeId as Id, Employee.FirstName as Name
History
- 15/08/2013 - First version submitted.
- 18/08/2013 - Revised to explain why this approach is helpful and to compare it to others. SELECT statement is explained in details.


 General
  News
News  Suggestion
  Question
  Bug
Bug  Answer
  Joke
Joke  Praise
  Rant
Rant  Admin
Admin 


 Wonderful and straight forward example! I code all of my joins and other misc SQL tasks in a view, write the view to a table and then output the XML: