To start Universal App development in windows 10 you need to have windows 10 OS, and visual studio 2015. Windows 10 is free for upgrade from any of win 7, 8 or 8.1 licensed operating systems.
To upgrade follow below link.
https://www.microsoft.com/en-in/windows/windows-10-upgrade
Visual Studio is latest IDE for developing UWP Apps with lots of improvement over Visual Studio 2013. Visual Studio 2015 Community edition is freely available for individual developers, open source projects, academic research, education, and small professional teams.
Download it from
https://www.visualstudio.com/en-us/downloads/download-visual-studio-vs.aspx
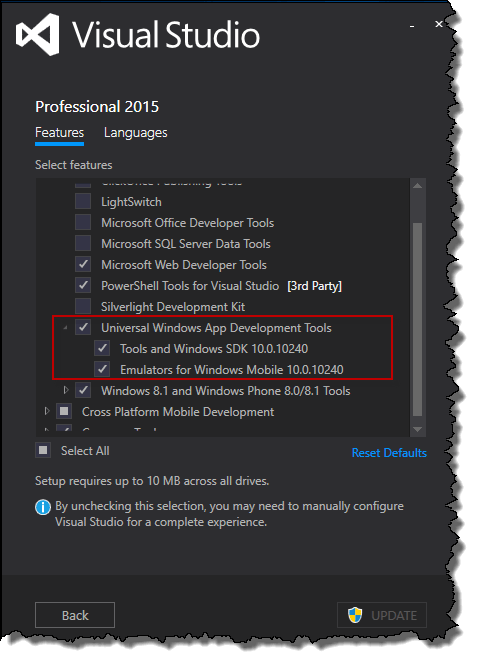
Once you are installing Visual Studio 2015 make sure you have selected custom installation type and choose "Universal Windows App Development Tools" from custom installer windows. As shown in below image.
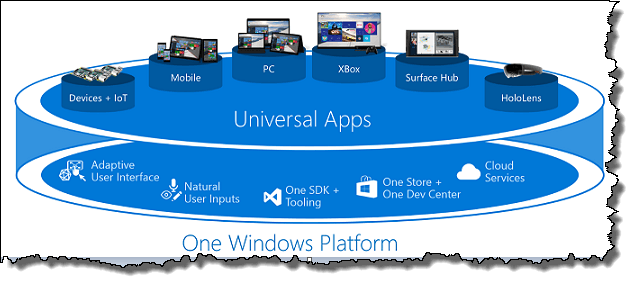
A Universal Windows Platform (UWP) app can run on any Windows-based device, ranging from an IoT, HoloLens, SurfaceHub, XBox to your phone, tablet or PC.
UWP is designed to create a user interface that suits with different display sizes. You can use the same code and design for all devices, and you can also tailor the user interface for specific screen sizes. For example, you can design an interface that works great for tablets and PCs and create a customized experience for mobile devices, while still reusing most of your code.
UWP will works on the principle of Adaptive UI, Natural user inputs, One SDK, One Store and Cloud optimized services.
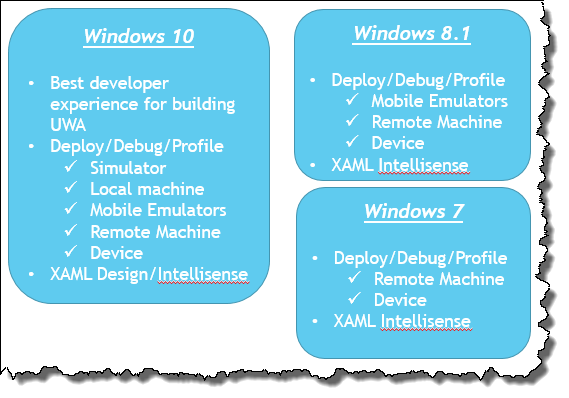
UWP will give best developer experience with Windows 10, but it can be developed on Windows 8, 8.1 and even with windows 7 with limited features. Supported features for individual OS's are as below
1. Adaptive UI: Each device has their own set of user inputs and screen resolution, DPI density and other device specific characteristics. To develop a UWP it’s mandatory that application will have similar UI experience in all the devices, for the same purpose Windows 10 provides new universal controls, layout panels, and tooling to help you adapt your UI to the devices your app may run on. For example, you can tailor the UI to take advantage of the difference in screen resolution when your app is running on a desktop computer versus on a mobile device.
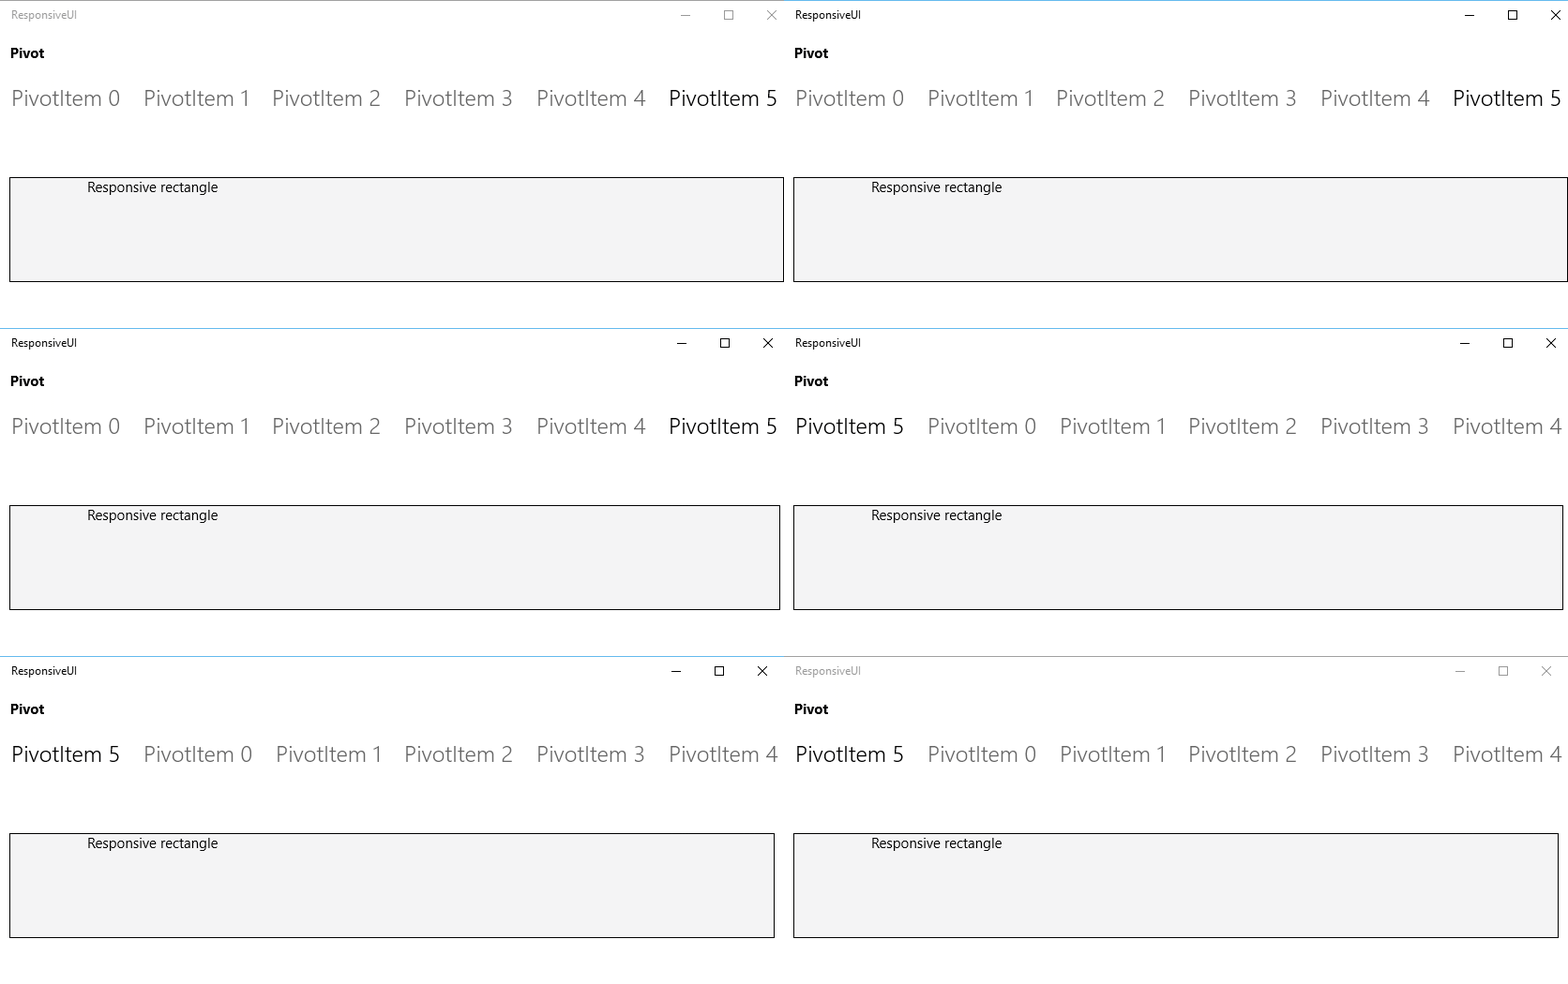
a) Responsive Design: in UWP most of the controls have basic responsiveness and able to change the behavior based on device resolution, for e.g. a Pivot control will have selected item in left most area in mobile device but it will be in their position in desktop.
b) Adaptive Design: A small layout adjustment has large impact in the visualization, Features like visual states and adaptive triggers are playing major role to create Adaptive design applications.
<Grid Background="{ThemeResource ApplicationPageBackgroundThemeBrush}">
<VisualStateManager.VisualStateGroups>
<VisualStateGroup x:Name="VisualStateGroup">
<VisualState x:Name="_720pxState">
<VisualState.StateTriggers>
<AdaptiveTrigger MinWindowWidth="100"/>
</VisualState.StateTriggers>
<VisualState.Setters>
<Setter Target="image.(UIElement.Opacity)" Value="1"/>
<Setter Target="image.(FrameworkElement.Width)" Value="NaN"/>
<Setter Target="image.(FrameworkElement.HorizontalAlignment)" Value="Stretch"/>
<Setter Target="image.(FrameworkElement.Margin)">
<Setter.Value>
<Thickness>10,10,10,0</Thickness>
</Setter.Value>
</Setter>
<Setter Target="image.(Image.Stretch)" Value="UniformToFill"/>
<Setter Target="textBlock.(UIElement.Opacity)" Value="1"/>
<Setter Target="textBlock.(TextBlock.FontSize)" Value="18.667"/>
<Setter Target="textBlock.(TextBlock.FontFamily)">
<Setter.Value>
<FontFamily>Arial Black</FontFamily>
</Setter.Value>
</Setter>
<Setter Target="textBlock.(TextBlock.FontWeight)">
<Setter.Value>
<FontWeight>Bold</FontWeight>
</Setter.Value>
</Setter>
<Setter Target="textBlock.(FrameworkElement.Margin)">
<Setter.Value>
<Thickness>10,0,10,222</Thickness>
</Setter.Value>
</Setter>
<Setter Target="textBlock1.(UIElement.Opacity)" Value="1"/>
<Setter Target="textBlock1.(FrameworkElement.Height)" Value="247"/>
<Setter Target="textBlock1.(FrameworkElement.Margin)">
<Setter.Value>
<Thickness>10,0,10,10</Thickness>
</Setter.Value>
</Setter>
<Setter Target="image.(FrameworkElement.Height)" Value="217"/>
<Setter Target="textBlock.(FrameworkElement.VerticalAlignment)" Value="Bottom"/>
<Setter Target="textBlock.(FrameworkElement.Height)" Value="60"/>
<Setter Target="textBlock1.(TextBlock.FontSize)" Value="13.333"/>
</VisualState.Setters>
</VisualState>
<VisualState x:Name="_1024pxState">
<VisualState.StateTriggers>
<AdaptiveTrigger MinWindowWidth="701"/>
</VisualState.StateTriggers>
<VisualState.Setters>
<Setter Target="image.(UIElement.Opacity)" Value="1"/>
<Setter Target="image.(FrameworkElement.Width)" Value="400"/>
<Setter Target="image.(FrameworkElement.HorizontalAlignment)" Value="Left"/>
<Setter Target="image.(FrameworkElement.Margin)">
<Setter.Value>
<Thickness>10,10,10,0</Thickness>
</Setter.Value>
</Setter>
<Setter Target="image.(Image.Stretch)" Value="UniformToFill"/>
<Setter Target="textBlock.(UIElement.Opacity)" Value="1"/>
<Setter Target="textBlock.(TextBlock.FontSize)" Value="32"/>
<Setter Target="textBlock.(TextBlock.FontFamily)">
<Setter.Value>
<FontFamily>Arial Black</FontFamily>
</Setter.Value>
</Setter>
<Setter Target="textBlock.(TextBlock.FontWeight)">
<Setter.Value>
<FontWeight>Bold</FontWeight>
</Setter.Value>
</Setter>
<Setter Target="textBlock.(FrameworkElement.Margin)">
<Setter.Value>
<Thickness>438,75,10,0</Thickness>
</Setter.Value>
</Setter>
<Setter Target="textBlock1.(UIElement.Opacity)" Value="1"/>
<Setter Target="textBlock1.(FrameworkElement.Height)" Value="NaN"/>
<Setter Target="textBlock1.(FrameworkElement.Margin)">
<Setter.Value>
<Thickness>436,181,0,57</Thickness>
</Setter.Value>
</Setter>
<Setter Target="image.(FrameworkElement.Height)" Value="400"/>
<Setter Target="textBlock.(FrameworkElement.VerticalAlignment)" Value="Top"/>
<Setter Target="textBlock.(FrameworkElement.Height)" Value="60"/>
<Setter Target="textBlock1.(TextBlock.FontSize)" Value="16"/>
<Setter Target="textBlock1.(Grid.Row)" Value="0"/>
<Setter Target="textBlock1.(Grid.RowSpan)" Value="1"/>
<Setter Target="textBlock1.(Grid.ColumnSpan)" Value="1"/>
<Setter Target="textBlock1.(Grid.Column)" Value="0"/>
<Setter Target="image.(Grid.RowSpan)" Value="1"/>
<Setter Target="image.(Grid.Row)" Value="0"/>
<Setter Target="image.(Grid.Column)" Value="0"/>
<Setter Target="textBlock1.(FrameworkElement.HorizontalAlignment)" Value="Left"/>
<Setter Target="textBlock1.(FrameworkElement.VerticalAlignment)" Value="Stretch"/>
<Setter Target="textBlock1.(FrameworkElement.Width)" Value="834"/>
<Setter Target="textBlock.(FrameworkElement.HorizontalAlignment)" Value="Stretch"/>
<Setter Target="textBlock.(FrameworkElement.Width)" Value="NaN"/>
</VisualState.Setters>
</VisualState>
</VisualStateGroup>
</VisualStateManager.VisualStateGroups>
<TextBlock x:Name="textBlock" Height="60" Margin="10,0,10,10" Opacity="0" TextWrapping="Wrap" Text="Holographic computing is here." VerticalAlignment="Bottom" d:LayoutOverrides="LeftPosition, RightPosition"/>
<Image x:Name="image" HorizontalAlignment="Center" Height="330" Margin="10,209,0,0" Opacity="0" VerticalAlignment="Top" Width="100" d:LayoutOverrides="VerticalAlignment, TopMargin, BottomMargin, LeftPosition, RightPosition" Source="Images/HoloLens.jpg"/>
<TextBlock x:Name="textBlock1" Height="187" Margin="10,0,10,10" Opacity="0" TextWrapping="Wrap" VerticalAlignment="Bottom" d:LayoutOverrides="LeftMargin, RightMargin, TopPosition, BottomPosition">
<Run Text="Microsoft HoloLens is the first fully untethered, see-through holographic computer. It enables highMicrosoft HoloLens is the first fully untethered, see-through holographic computer. It enables high-definition holograms to come to life in your world, seamlessly integrating with your physical places, spaces, and things. We call this experience mixed reality. Holograms mixed with your real world will unlock all-new ways to create, communicate, work, and play.-definition holograms to come to life in your world, seamlessly integrating with your physical places, spaces, and things. We call this experience mixed reality. Holograms mixed with your real world will unlock all-new ways to create, communicate, work, and play.Windows Holographic is a mixed reality[1] computing platform[2] by Microsoft, enabling applications in which the live presentation of physical real-world elements is incorporated with that of virtual elements (referred to as "holograms" by Microsoft[3][4][5][note 1]) such that they are perceived to exist together in a shared environment. A variant of Windows for augmented reality computers[1] (which augment a real-world physical environment with virtual elements[3]) Windows Holographic features an augmented-reality operating environment in which any Universal Windows App can run. In addition, with Holographic APIs, which are part of the Universal Windows Platform, and supported as standard in Windows 10 (including versions for mobile devices and Xbox One), mixed reality features can be readily implemented in any Universal Windows App, for a wide range of Windows 10-based devices.[6][note 2]"/>
<LineBreak/>
<Run/>
<LineBreak/>
<Run Text="Microsoft announced Windows Holographic at its "Windows 10: The Next Chapter" press event on January 21, 2015.[7] It is set to be introduced as part of the general rollout of Windows 10, and showcased in the smart glasses headset Microsoft HoloLens. The Windows 10 launch begins in summer 2015 with release of the PC version, with HoloLens to be released sometime after."/>
</TextBlock>
</Grid>
Output will be as below (Desktop & a mobile device)
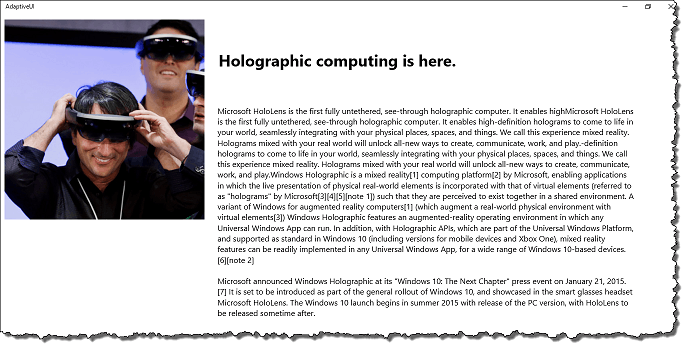
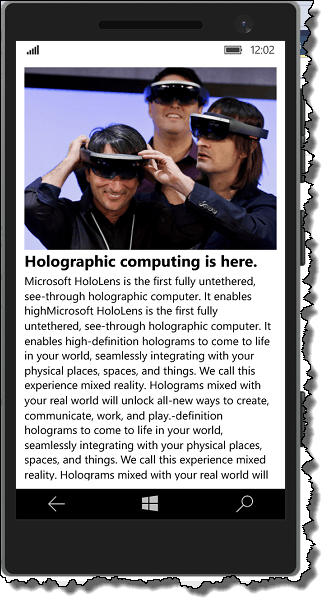
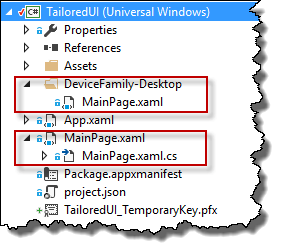
c) Tailored design: In the places where Adaptive Ui and responsive controls are not able to full fill the requirement then a tailored (specific UI page for specific device family) page is the best choice. For tailored sample I have created an other MainPage.xaml inside DeviceFamily-Desktop, Make sure xaml file name as well as folder name should be same else runtime will not able to identify the page to be loaded.
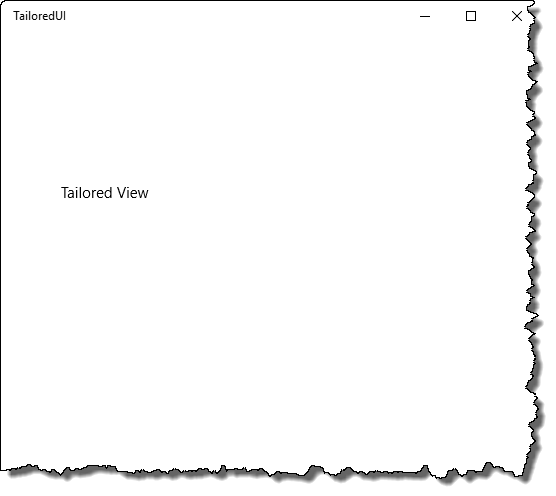
output will be as below (Desktop & mobile device)
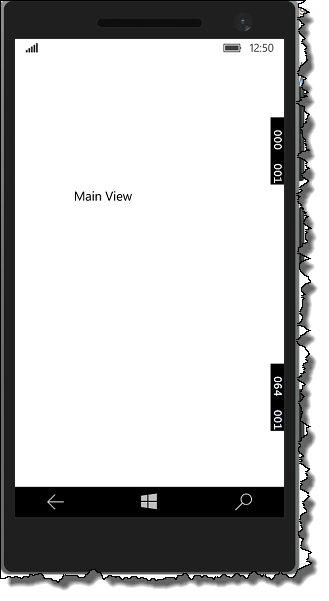
3. Adaptive Code: A windows UAP's are expected to run across all supported devices. However, in order to take advantage of specific device features they may want to target specific device families. If a developer wants to access features that are only available on one or more device families. The first step is to add a reference to the extension software development kit for the device families. Below image illustrates adding the Windows Mobile Extension SDK to support Hardware back button.
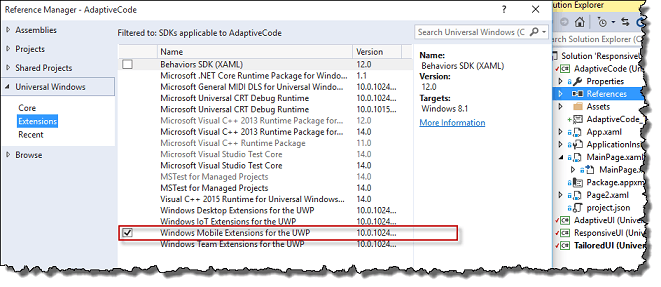
And in the second step developer has to add the code to check that a HardButtons (Mobile’s back button) class exists, before wiring up a handler to the back button pressed event which is specific to mobile application. As shown in below code.
public sealed partial class Page2 : Page
    {
        public Page2()
        {
            this.InitializeComponent();
            if (Windows.Foundation.Metadata.ApiInformation.IsTypePresent("Windows.Phone.UI.Input.HardwareButtons"))
            {
                Windows.Phone.UI.Input.HardwareButtons.BackPressed += HardwareButtons_BackPressed;
            }
        }

        private void HardwareButtons_BackPressed(object sender, Windows.Phone.UI.Input.BackPressedEventArgs e)
        {
            throw new NotImplementedException();
        }
    }
Happy coding !!!
Microsoft Certified Solutions Associate - Cloud Platform || MCSD - App Builder || MCSA - Web Applications || Microsoft Community Contributor (MCC)
A fond lover of Microsoft .NET Technologies including ASP.NET MVC, AZURE etc.
 General
  News
News  Suggestion
  Question
  Bug
Bug  Answer
  Joke
Joke  Praise
  Rant
Rant  Admin
Admin 


