Introduction
If you are into developing large Web applications, the following situations may sound familiar:
- Build the VS.NET solution. That will take a long time to build.
- You start debugging your application. You realize you made a small mistake.
You have to recompile the whole application again just to fix that small bug. It does get annoying sometimes. This article is an attempt to alleviate that problem by showing you how to use Edit and Continue in ASP.NET, without recompiling the whole application.
Background
VS.NET Code-Behind Model
When you create a new WebForm page in Visual Studio, it creates an .aspx page (e.g.: WebForm1.aspx) and a Code-Behind file (e.g.: WebForm1.aspx.vb or WebForm1.aspx.cs) which contains a class that is derived from System.Web.UI.Page as shown:
Public Class WebForm1
Inherits System.Web.UI.Page
public class WebForm1 : System.Web.UI.Page
The .aspx page file in turn inherits from the derived WebForm1 class.
<%@ Page Language="vb" AutoEventWireup="false" Codebehind="WebForm1.aspx.vb"
             Inherits="WebApplication1.WebForm1"%>
In Web Forms that use code-behind files, the @Page directive contains attributes that specify the relationship of the .aspx file with its code-behind file. These attributes are:
Codebehind - In Visual Studio, this attribute references the name of a file that contains the class for the page. This attribute tells the VS WebForm designer where to find the page class so that the designer can create an instance of it for you to work with. The attribute is not used at run time.
Inherits - Identifies the class from which the page derives. In Visual Studio, this points to a class in the project assembly (.dll).
It is important to note that all the Code-Behind class files get compiled to one project assembly. The problem with this approach is if you want to change a line of code in the Code-Behind file, you have to re-compile the whole application.
ASP.NET CodeBehind Model
<%@ Page Language="" AutoEventWireup="false"
        Src="EditAndContinueTest.aspx.vb" Inherits="EditAndContinueTest"%>
The ASP.NET Framework supports a slightly different code-behind model for Web Forms pages.
In the ASP.NET code-behind model, there is no Codebehind page attribute, since that attribute is unique to Visual Studio. To tie a .aspx file to its corresponding code, the @Page directive contains a Src attribute, which references the file containing the source code for the file.
In the ASP.NET code-behind model, the visual elements are in an .aspx file and the code is in a separate code-only file, as in Visual Studio. However, the code is not pre-compiled into one project assembly like in the VS.NET Code-Behind model. Instead, the Code-Behind class file is compiled at run time, when the page is first requested by a user. Here, each page is a separate assembly.
The advantage of this is you can edit the Code-Behind class and save it. There is no need to compile the whole project. ASP.NET will re-compile the .vb or .cs file, when the user requests the file again and if it detects a change in the file.
Using the code
I will walk you through creating a sample ASP.NET application which uses Edit and Continue.
- Create a new ASP.NET Web Application.
- Open the WebForm1.aspx page and rename the
Codebehind attribute to Src and remove the namespace in the Inherits attribute as shown below:
VB.NET
<%@ Page Language="vb" AutoEventWireup="false"
         Src="WebForm1.aspx.vb" Inherits="WebForm1""%>
C#
<%@ Page Language="C#" AutoEventWireup="false"
         Src="WebForm1.aspx.cs" Inherits="WebForm1""%>
- Add this code in the Code-Behind file:
Imports System.Web
Imports ASPNETEandCVB
Public Class WebForm1
Inherits System.Web.UI.Page
Private Sub Page_Load(ByVal sender As System.Object, _
ByVal e As System.EventArgs) Handles MyBase.Load
Response.Write("Before Editing")
End Sub
End Class
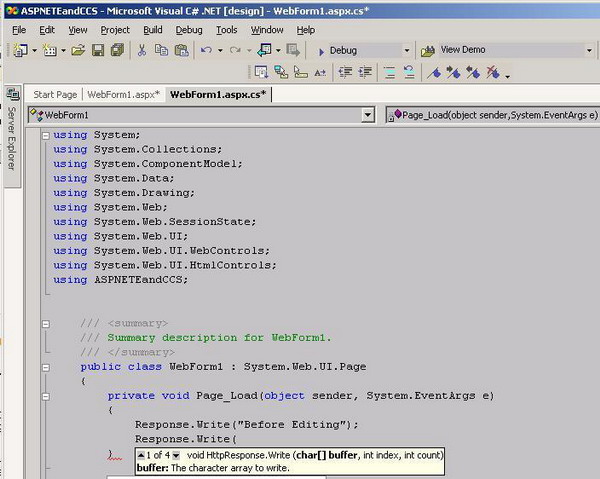
using ASPNETEandCCS;
public class WebForm1 : System.Web.UI.Page
{
private void Page_Load(object sender, System.EventArgs e)
{
Response.Write("Before Editing");
}
}
We use the Imports (VB)/ using (C#) statement because the Code-Behind class exists in its own separate assembly.
- Run the application.
- Add the following line of code in the
Page_Load event:
Response.Write("After Editing")
Response.Write("After Editing");
Just save the Code-Behind file and refresh the browser. And voila, the changes you made are reflected in the page without recompilation!
Errors
- The
Src attribute is not supported in Visual Studio. If you import a Web Forms page that contains the Src attribute into Visual Studio, the designer will raise an error. The quick fix for this is to remove the Src and Inherits attributes, save the page, go to Design mode and insert back the Src and Inherits attributes.
- While running the C# project, you may get the following error: 'WebForm1' is defined in multiple places. To fix the error, do the following:
- Click on the Show All Files button.
- Select WebForm1.aspx.cs and right click with the mouse and choose Properties.
- In the Properties window, change the Build Action property to None and rebuild the application. This ensures that this class is not included in the project build. So we do not have two classes with the same name '
WebForm1' and hence there is no conflict.
Note: By doing this, Intellisense may not work in the Code-Behind file. Whenever you need Intellisense, change this back to the Compile in Build Action property. Once you are done with making changes, remember to change back the Build Action to None.

Future enhancements
- In this part of the article, I only showed you the Edit and Continue for Code-Behind pages. For your custom .vb or .cs class files, you have to create an ASP.NET page called DynamicCodeCompiler.aspx and set the
Src attribute to your class file. You should access this aspx page atleast once so that ASP.NET dynamically compiles the class file. I will explain this in detail in the next part of the article.
History
Sriram works as Senior Technical Specialist at Infosys's Microsoft Technology Center.
He has been working on ASP.NET,VB.NET,C#,ASP and SQL Server for past 7 years. He loves to churn out innovative ideas.
During his freetime,you may find him hiking, humming a song in his karaoke or listening to inspiring music. You can reach him at srirambalaji_work@yahoo.com.


 General
  News
News  Suggestion
  Question
  Bug
Bug  Answer
  Joke
Joke  Praise
  Rant
Rant  Admin
Admin 


 ---
---