In this article, I will show you how to use the API in local mode to test the different responses your application can get during a purchase sequence.
Introduction
Part of BlackBerry's AppWorld services is the ability to have your users purchase goods inside your application. This service provides an API to use inside your AIR for PlayBook applications. Read on to check out the basics of using this new API, new as of Beta 3 or Tablet OS SDK for Adobe AIR 0.9.2.
To test the API for real, you will have to register your goods with BlackBerry as a vendor. I am not familiar with that process at the moment, I'll leave that for another blog post. Here is a link for more information on the Payment Services.
Although the current documentation, in the link above, does not explain how to use the Tablet OS SDK for AIR payment specific APIs, it is available. The rest of the post will walk you through an example application that can be found on github under PaymentService folder.
The PaymentService application looks like this:
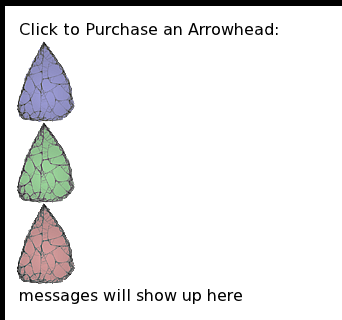
What the picture above shows is two labels and 3 arrowhead images. The user would click on a specific arrowhead to purchase the arrowhead of their choice.
Using the code from my QNX with MXML post, I laid out the application like this:
="1.0"="utf-8"
<r:QApplication
xmlns:fx="http://ns.adobe.com/mxml/2009"
xmlns:r="http://ns.renaun.com/mxml/2010"
margins="{Vector.<Number>([12,12,12,12])}"
flow="{ContainerFlow.VERTICAL}"
align="{ContainerAlign.NEAR}"
size="100" sizeUnit="{SizeUnit.PERCENT}"
xmlns:text="qnx.ui.text.*">
<fx:Script source="PaymentServiceSource.as" />
<text:Label text="Click to Purchase an Arrowhead:"
autoSize="{TextFieldAutoSize.LEFT}" />
<r:Image source="com/renaun/embed/blue_arrowhead.png"
click="purchaseObject(event)" />
<r:Image source="com/renaun/embed/green_arrowhead.png"
click="purchaseObject(event)" />
<r:Image source="com/renaun/embed/red_arrowhead.png"
click="purchaseObject(event)" />
<text:Label id="lblOutput" text="messages will show up here"
autoSize="{TextFieldAutoSize.LEFT}" />
</r:QApplication>
This declares a QNX container with vertical flow and adds the labels and images. The Image class (notice the r namespace) in the MXML is actually a class that extends the QNX Image class to allow for setting images by setting a source property. The real logic happens when you click on a button. Here is the code for the PaymentServiceSource.as file:
import net.rim.blackberry.events.PaymentErrorEvent;
import net.rim.blackberry.events.PaymentSuccessEvent;
import net.rim.blackberry.payment.PaymentSystem;
import qnx.ui.core.ContainerAlign;
import qnx.ui.core.ContainerFlow;
import qnx.ui.core.SizeUnit;
import qnx.ui.data.DataProvider;
private var paymentService:PaymentSystem;
private var goods:Array = [{sku:"1001", name: "Blue Arrowhead",
meta: "saleprice", app: "Arrow R US",
icon: "/com/renaun/embed/blue_arrowhead_small.png"},
{sku:"1002", name: "Green Arrowhead", meta: "saleprice", app: "Arrow R US",
icon: "/com/renaun/embed/green_arrowhead_small.png"},
{sku:"1003", name: "Red Arrowhead", meta: "saleprice", app: "Arrow R US",
icon: "/com/renaun/embed/red_arrowhead_small.png"}]
protected function purchaseObject(event:MouseEvent):void
{
if (!paymentService)
{
paymentService = new PaymentSystem();
paymentService.addEventListener(
PaymentErrorEvent.PAYMENT_SERVER_ERROR, paymentErrorHandler);
paymentService.addEventListener(PaymentErrorEvent.USER_CANCELLED,
paymentErrorHandler);
paymentService.addEventListener(PaymentErrorEvent.PAYMENT_ERROR, paymentErrorHandler);
paymentService.addEventListener(PaymentErrorEvent.DIGITAL_GOOD_NOT_FOUND,
paymentErrorHandler);
paymentService.addEventListener(PaymentSuccessEvent.PAYMENT_SUCCESS,
paymentSuccessHandler);
paymentService.setConnectionMode(PaymentSystem.CONNECTION_MODE_LOCAL);
}
var obj:Object = goods[getChildIndex(event.target as DisplayObject)-1];
paymentService.purchase(obj.sku, null, obj.name, obj.meta, obj.app,
"file://" + File.applicationDirectory.nativePath + obj.icon);
}
private function paymentSuccessHandler(event:PaymentSuccessEvent):void
{
lblOutput.text = "Success: " + event.purchase.date + " - " + event.purchase.licenseKey;
}
private function paymentErrorHandler(event:PaymentErrorEvent):void
{
lblOutput.text = "Error[" + event.type + "]: " + event.message;
}
The first thing to notice is the net.rim.blackberry.payment.PaymentSystem class. This is where the API for purchases happens. You create a new instance of the PaymentSystem and then call the purchase() method. Seems simple, well the complexity is in handling all the success and error cases. This examples adds listeners to all the different events and outputs the different messages to the bottom label.
NOTE: There is an error in 0.9.2 SDK that if you auto import net.rim.blackberry.payments.PaymentSuccessEvent instead of net.rim.blackberry.events.PaymentSuccessEvent. This is a metadata typo and will probably be fixed in the future, for now the workaround is to manually fix the typo in the import statements.
The PaymentService running in local mode allows the developer to test all the different scenarios before hooking it up to a real sku that you have registered as a vendor with BlackBerry. This is done through the paymentService.setConnectionMode(PaymentSystem.CONNECTION_MODE_LOCAL); line of code. If you comment this line of code (which is the default), you will be running in production mode against the live AppWorld servers. But on the BlackBerry Tablet OS PlayBook simulator, this is the message you get if you try and do that:

Production Mode Message on Simulator
Let's take a closer look at the paymentService.purchase() method call. Here is the current doc info available from the BlackBerry Tablet OS SDK for Adobe AIR asdocs.
digitalGoodID:String (default = null) — Digital Good ID
Only the ID or SKU of the digital goods to be purchased is required; it is not necessary to provide both. If both the ID and SKU are provided, then the ID takes precedence; the SKU is only used if the digital good cannot be located by the Payment Service based on the ID.
digitalGoodSKU:String (default = null) — Digital Good SKU
See description of digitalGoodID.
Optional Arguments
digitalGoodName:String (default = null) — Digital Good Name
A digital good name should be provided in the case where a single ID/SKU represents multiple digital goods on the Payment Service server, and a more specific digital good name should be displayed on the purchase screen. For example, if a game sells additional levels via the Payment Service at a single price point, then a generic "My game level" digital good can be used for all such levels. However, at purchase time, the game application should override "My game level" with the name of the level being purchased. In this way, the end user is aware of exactly what they are purchasing on the purchase confirmation screen.
metaData:String (default = null) — Metadata
Metadata offers the application developer a way to store information about each purchase on the Payment Service server, and to retrieve that data via net.rim.blackberry.api.payment.PaymentSystem.getExistingPurchases(boolean). For example, assume a book vendor offers many titles at a single price point, and represents them on the vendor portal as a single digital good. In this case, the ISBN of the book can be provided as metadata, which uniquely identifies the digital good that was purchased. The entire list of purchased books can then be retrieved at any time by obtaining previous purchases via the getExistingPurchases method, filtering on the book's digital good Content ID, and finally enumerating the ISBNs in the metadata of each purchase.
purchaseAppName:String (default = null) — Purchase Application Name
To further give context to the end user during an in-application purchase, a banner is displayed along the top of the purchase and BlackBerry ID login screens, showing the name and icon of the application the purchase is being made from (i.e., the purchasing application). To customize the name and icon that are displayed, simply provide them as arguments. If the name or icon are not provided as arguments, then they are retrieved from the purchasing application's descriptor. However, this may not work for applications that register with the home screen dynamically; in these cases, it is highly recommended that the purchasing application explicitly provide a name and icon as part of the purchase arguments.
purchaseAppIcon:String (default = null) — Purchase Application Icon
See description of purchaseAppName.
In the code example above, all the parameters worked as stated. Except I had no way to test the metadata parameter data. With the PaymentService set in the local connection mode, you can simulator a real purchase, cancel purchase, goods not found, and server error. Here is what it looks like after the purchase() is called.
PaymentService test mode purchase popup.
And here are the options available to test (also hitting the cancel button will send a message).
PaymentService test mode purchase popup with options.
I do not know if this is exactly how the in app purchase UI will look for users, especially as the text refers to a buy now button. But you should notice that I was able to define the app name, goods name and goods icon through the purchase method parameters. The price seems to be coming from the AppWorld side and is probably driving by the process of registering goods as a vendor and getting a sku.
Either way, this is the current info on how to get started using the new PaymentService API. More to come as we find out more information about this API.
History
- 14th April, 2011: Initial version
This member has not yet provided a Biography. Assume it's interesting and varied, and probably something to do with programming.


