Introduction
This article is intended to give a solution for placing a bitmap as the Dialog's background. Setting a bitmap as the background allows you to place controls over the bitmap and not have them obscured. Placing a bitmap into a dialog using the resource editor forces the bitmap to the foreground and hinders the placement of additional controls.
Background
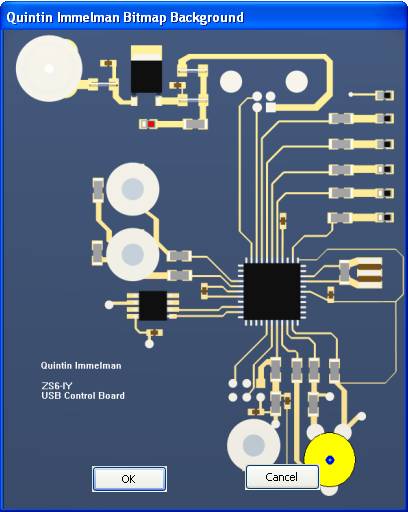
While I was busy with my final year Industrial Engineering project of designing and building a USB Control interface, the final step was to write an application to communicate with the board. I chose an easy-to-use graphic interface. After many hours of drawing the PCB on CAD, I took a screen dump and thought that was it finalised. When I inserted the screen dump into the application using the Resource Editor, I discovered that not a single GUI drawing command had been displayed. Upon removing the bitmap to ensure that the OnPaint instructions were being drawn, I realised that the bitmap was drawn as the foreground with no options in the Resource Editor to force the bitmap into the background. I searched the Internet for a solution. I found a few possible solutions, but they all involved downloading an API written by another author. I challenged myself as to whether it would be possible for me to derive my own solution to this problem. I succeeded and I herewith describe my solution.
Using the code
Step 1: Load the bitmap image into the resource editor under Bitmaps. Change the Depth from 16 Colours to 24Bit True Colour.
Step 2: Assign a Resource ID to the bitmap and resize the dialog to the size of the bitmap. This ensures that Windows does not fill the empty area with a screen dump. Disable the maximize box, failing which the OnSize message will have to be handled to adjust the size of the bitmap to fill the remaining areas. It's preferable to use SW_SHOWNORMAL instead of SW_MAXIMIZE in OnInitDialog();
Step 3: Add a Cbitmap class under Protected in the bitmaps header file, a CSize handle and a CBrush handle, as per the example set out below:
enum { IDD = IDD_BITMAPBACKGROUND_DIALOG };
protected:
virtual void DoDataExchange(CDataExchange* pDX); Cbitmap Background; CBrush BrushHol; CSize bitmapSize;
Step 4: Load the bitmap in OnInitDialog() and get bitmap dimensions as per the example set out below:
BOOL CbitmapBackgroundDlg::OnInitDialog()
{
CDialog::OnInitDialog();
SetIcon(m_hIcon, TRUE);
SetIcon(m_hIcon, FALSE);
ShowWindow(SW_SHOWNORMAL);
Background.LoadbitmapW(IDB_BACKGROUND); BITMAP bm; Background.Getbitmap(&bm); bitmapSize = CSize(bm.bmWidth, bm.bmHeight); Invalidate(1);
return TRUE; }
Step 5: Add a WM_ERASEBKGND Message (OnEraseBkgnd)
Step 6: Edit OnEraseBkgnd and add the following:
BOOL CbitmapBackgroundDlg::OnEraseBkgnd(CDC* pDC)
{
CDC dcMemory;
dcMemory.CreateCompatibleDC(pDC);
Cbitmap* pOldbitmap = dcMemory.SelectObject(&Background);
CRect rcClient;
GetClientRect(&rcClient);
const CSize& sbitmap = bitmapSize;
pDC->BitBlt(0,0,sbitmap.cx,sbitmap.cy,&dcMemory,0,0,SRCCOPY);
dcMemory.SelectObject(pOldbitmap);
return TRUE;
}
Step 7: Add OnDestroy() and free the resources created for the bitmap, as per the example set out below:
void CbitmapBackgroundDlg::OnDestroy()
{
CDialog::OnDestroy();
Background.DeleteObject(); BrushHol.DeleteObject();
}
Step 8: Handle background colour for controls like Static Text. This will ensure that the text is drawn with a background the same as the bitmap. Add the following to the Dialogs Create function:
CbitmapBackgroundDlg::CbitmapBackgroundDlg(CWnd* pParent )
: CDialog(CbitmapBackgroundDlg::IDD, pParent)
{
m_hIcon = AfxGetApp()->LoadIcon(IDR_MAINFRAME);
BrushHol.CreateStockObject(HOLLOW_BRUSH);
}
Step 9: Add OnCtlColor. This instructs Windows to make your background mode TRANSPARENT. This can later be used to change the colour of text and controls, as per the example set out below:
HBRUSH CbitmapBackgroundDlg::OnCtlColor(CDC* pDC, CWnd* pWnd, UINT nCtlColor)
{
pDC->SetBkMode(TRANSPARENT);
if( pWnd->GetDlgCtrlID() == IDC_STATIC)
{
pDC->SetTextColor(RGB(255, 0, 0));
}
return BrushHol;
}
Points of interest
I hope you found this experiment in Windows manipulation as interesting as I did. You may wish to eliminate the OnCtlColor by doing your text drawing in the OnPaint() function. This was the method I used.
History
- 28 May, 2007 - Original version posted
Engineer, Completed a PhD. Mechanical Engineering focusing on Machine Vision Control. Developed algorithms to allow an automated machine to automatically identify and qualify the product loaded. If the product has been correctly loaded then the machine will execute the correct program for that particular component.
Interested in hardware, PCI, USB, Serial and Parallel along with the software to accompany.


 General
  News
News  Suggestion
  Question
  Bug
Bug  Answer
  Joke
Joke  Praise
  Rant
Rant  Admin
Admin 


