Introduction
This article covers a selection of best practices related to the internals of the project “sandbox”. The sandbox is understood as a folder with a complete structure containing the source files of a specific product.
History
How is a new .NET product developed in terms of organizing source files and the build process?
You take a usual Visual Studio, create a new solution and a new project as well. Way to go! You write the code, submit it to Subversion from time to time and also get updated code from other developers on the team. You launch your application by pressing Ctrl+F5 to see the intermediate results and keep working.
At a certain moment, you understand that it would be pretty cool to use a third-party UI library. You download it, press setup.exe and – bingo! There are new controls on the Visual Studio toolbox. So you start using them right away. Everybody’s happy about the new pretty UI.
Unfortunately, there was no super-meta-combo-box in it that would’ve looked so great in your project, but that’s not a problem! Codeplex seems to have a project with the much wanted super-meta-combo-box. And it’s open source! Awesome! The only problem is that it can’t be multi-colored and that there are a dozen of critical bug reports from its users. “That’s fine,” you think, “the project is being actively developed, the bugs will be fixed soon.” Adding more colors is not a problem at all: this is an open-source project after all, so we can change things here and there. That’s exactly what we are going to do. We’ll download the source codes to C:\Temp\New Folder (12), change the code a bit, build the assembly and share the result with our workmates. It’s tip-top now – we have our own super-meta-combo-box!
Things are going well and you keep adding new fancy features to the product. All of a sudden, your boss calls up and tells you that there is an important exhibition starting tomorrow that he wants to use to demonstrate the prototype of your product to potential customers. “No problem”, you say and press Ctrl+Shift+B. A new setup.exe file magically appears on your hard drive. You copy it to a flash drive and hand it over to your boss, smiling. Life is great!
Then you keep working on the product for several more months and – voilà, the product is ready! You submit the ISO image to production and walk around counting your bonus fees with a smile across your face.
Does that sound like a familiar situation? Has it ever occurred to you? To me neither.
There are hardly any projects that can be completely built with Visual Studio into a complete “retail box” form without additional actions. Product development usually involves the work of designers, technical writers and other people, whose materials are not supported by Visual Studio, but are an integral part of the project.
Most products are developed on a number of workstations with various configurations: new developers are hired, some developers quit, hard drives fail and are replaced. The process of sandbox installation on a new system can be a real pain in the neck if this process hasn’t been polished to perfection.
I have partaken in a number of projects and have seen a lot of sandbox setup variants. I had a great opportunity to witness what impact hasty and incorrect decisions may have in the long run. Even minor blunders can ruin a project in the long-term perspective.
This experience made me adopt several simple practices for creating and extending project sandboxes. And I wanted to share them with you in this article.
There are ready sandbox templates, such as CI Factory and Tree Surgeon. I have absolutely nothing against them. However, they simply use the best methods without answering the question “why do you need it?” and “why this way and not the other?” The main purpose of this article is the description of the advantages of adhering to specific methodologies and practices and the possible negative consequences of ignoring them.
The rules outlined in the article are not meant to be absolute truth in any respect. This is merely something that works well for me and my company, but I hope that you and your product can benefit from some of them. I use SVN as a revision control system and NAnt as a build system. However, it does not limit the applicability of these recommendations to your sandbox: you can use any tools, such as Source Safe / Team Foundation and MS Build.
I also do not position this article as a comprehensive manual for NAnt, MSBuild or other tools. This information can be easily found through Google. Instead, I will focus on organizational aspects of the process.
General Structure: Wide Perspective
Imagine that you have an SVN repository with standard folders: trunk, tags and branches. I will not talk about their purpose here, as it’s a totally different subject. Let’s just assume that “trunk” is a root folder of our sandbox in the repository. It may have any name on the developer’s disk. Here is an example of the contents of this root folder for one of our products:
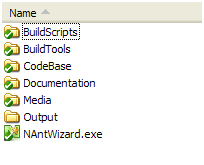
Folder names are not that important and may differ from product to product, but the essence is always the same and will be conveyed later in the article. Let’s take a look at these folders one by one.
Build Tools: Binaries of All Tools
Yes, that’s correct. All the tools used in the build process, such as NAnt, NUnit, FxCop and many others should be placed inside the project sandbox. Below is an example of the file structure of one of the projects:

Now I expect a question: ”Why would I need that? These are not my source files. In fact, these are not source files, these are binaries!” Initially, this approach also seemed weird to me, but later I discovered that it had more advantages than flaws.
The first advantage is that when a sandbox is installed on a new computer, you don’t need to manually install lots of additional tools, specify paths and environment variables in Visual Studio. All you need is to pull it from SVN.
The most important thing, however, is the guarantee of matching versions and tool configurations. I often faced a problem when a decision of one of the developers to use the latest version of a tool brought the work of the team to a complete halt for half a day. The best variant suggests that the developers will be rejected by the continuous integration server, if it exists at all and is configured to immediately react to changes. In a worse case scenario, it will take several hours before the developers understand that the project cannot be built, because the old generally accepted version does not support new commands added to the build scripts the day before. Finally, the worst case will mean that builds may contain hard-to-localize errors.
Now you may object that such changes in the product must be approved by the management, that every person involved in the project must be informed, must receive new versions and so forth. First of all, any of us can underestimate the consequences of the changes if they only consist of minor tool tuning and customization. Secondly, if there is an “agile” way to do it, I don’t see reasons to hack through an entanglement of red tape.
Keeping the tools inside the product probably has the only drawback – increased sandbox size. The toolset often weighs more than the source code, resources and documentation combined; however, it shouldn’t be a problem in the era of terabytes and gigabits per second. Stability and reliability are much more important.
It is useful to keep a certain Description.txt file in the root of the BuildTools folder with a list of all versions of tools, URLs they were downloaded from and their content. For instance, we have the following for NAnt:
NAnt:
    Version: 0.85
    Based on bin directory of nant-0.85-bin distributive from sf.net
    NAnt-contrib 0.85 is installed inside
This information will come handy when you want to update a tool. It often happens that the utility that is included into the product consists of multiple add-ons and tweaked configuration files, which makes it really hard to recreate all these actions afterwards.
The only tool located outside of BuildTools is a compact and free utility called NAnt Wizard, which is found in the root folder of the sandbox. Its location is defined by its purpose. This is a type of “control panel” for your sandbox, which allows you to make just a couple of mouse clicks to perform any action described in your NAnt scripts, while it will find the scripts itself.
Build Scripts: Input Files for Tools
This folder contains various project files, script and response files that serve as input data for tools used in the product. For instance, .build script files used by NAnt, project files for FxCop with a list of ignored rules and others.
Below is the file structure of one of our sandboxes:
Don’t bother to think about the purpose of these files – we’ll cover this below.
In fact, there is a very vague distinction between a file serving as an input script for a tool and other files. For instance, .cs files are used by csc.exe, but are stored separately, not in the BuildScripts folder. In order to understand, where the source file belongs to, use rational thinking: if the number of these files will not change with time (or these changes will be negligible), they should be put into the BuildScripts folder. Otherwise, you should think about creating a separate top-level folder.
If it’s hard to determine, let them stay in BuildScripts: you can always copy them to a more appropriate location. This happened, for instance, with our XSLT files used for documentation preprocessing. First they were stored in BuildScripts, as they are used by xsltproc, but then it became clear that they were “something bigger” and they moved to Documentation\Transformation.
Code Base: Sandbox in a Sandbox
CodeBase is one of the key development folders. It contains everything that is “native” for Visual Studio. Specifically, the root of this folder contains solution files and subfolders with source files; a subfolder with third-party libraries; MSBuild extensions; temporary keys for signatures of the libraries being built.
Below is the content of this folder for one of our projects:
I will cover folder contents and naming in Code Base a bit later in this article. For now, I will tell you that the main purpose of Code Base is isolation of the .NET source code in a separate location. This is a certain sandbox in a sandbox that will be of interest to developers only, but not designers, composers or technical writers.
Isolation has several reasons:
- You can easily exclude such a folder from your project and still keep it useful. You can use it to create a fully-functional product that will lack a number of components necessary for a retail product (documentation, version number, content). The separated folder can be used for sending source files by email, when sending the whole sandbox is not necessary or practical.
- The use of the version control system is simplified. If you need to track changes in the program algorithm, you can simply look at the logs of the CodeBase folder not worrying about filtering out records related to modifications of resources, documentation or anything else. If a lot of people are working on the project, it’s a good idea to distribute access rights on the folder level: CodeBase – for developers, Documentation – for copywriters, Media – for artists and designers. This will help avoid possible conflicts and situations when members of one department may damage the source materials of the other departments.
Documentation, Media, Resources and others
These folders are similar to Code Base in relation to the “sandbox in a sandbox” principle, they simply contain source files of other types. For instance, Documentation may contain XML files – sources for DocBook – or a set of Word documents that turn into CHM and online help documentation. If the product is a computer game, Media may contain raw 3D models in Collada or 3D Studio MAX formats and textures in the PSD format that will be transformed into models and textures native to the game engine during the build process.
On the whole, sets of folders vary from project to project, but the purpose is the same – keep all the source files intact. It have often faced situations when I needed to find a specific resource (such as an image) to make a minor change, but couldn’t find it quickly. I only needed to swap layers, but the original PSD source file was lost or hidden deeply in a stack of backup DVDs. In such situations, astounding amounts of time are spent uselessly to fulfill a primitive task, while you could have avoided this situation altogether if the approach were right.
In reality, these directories may not be included into SVN at all, but be controlled by other systems, such as Perforce or Alien Brain, which are better tailored for storing textures and 3D models. In this case, however, retrieving absolutely up-to-date sandbox version stops being a matter of a trivial SVN update, and you must keep it in mind. Creation of a bat file or a NAnt target for updating the build files is a logical decision in this situation.
Output
You may have already guessed that this folder contains the artifacts that eventually form the final product. Mind that absolutely all artifacts end up being here. Not a single file can appear in any other folder of the sandbox. The Output folder is not controlled by the version control system, as the “ignore” box is checked for it in Subversion.
Again, there are several reasons for that:
- If you delete the Output folder, you can be sure that the result of a new build will not depend on those of previous ones in any respect. Knowing that is very important for working with Continuous Integration servers, such as CruiseControl.NET. It also makes the creation of a clean build on a local machine much easier.
- There is no recursive dependence of the following type: the most recent build is composed of the most up-to-date sources; the source files stop being the most recent ones during the build process. This dependence causes constant unexpected SVN conflicts when attempting to get the latest version. Eventually, the very notion of the latest build vanishes, and so does the confidence in its correctness.
Regular publishing of the latest build is the task of the build server. The build frequency depends on the product. In some cases, builds are created every night, in other cases with intervals of several hours. In our project, builds are created by the server after each change in the SVN repository, which is handled by CruiseControl.NET. In comparison with other variants, this is the best one and you should definitely strive for it. The main advantage of this approach is the capability of the QA team to quickly react to changes in the product and further iterative work with them.
General Structure: Wide Perspective Again
Let’s draw the bottom line. The main principles of the structural organization of the sandbox are:
- All tools with their settings are stored with the source files in the system control version. This allows you to install and build a sandbox on any unprepared system. All you need to install is the .NET Framework and, sometimes, a DBMS or web server (depends on the product).
- The sandbox contains all the source files of your product. And I mean the original source files, which is more relevant for documentation, art and other resources than to the code.
- Folders in a sandbox preserve their value and importance even when used separately. Folders are divided by the roles of the people working on the product. Developers have their own folder, artists have theirs and so forth. However, one person can play several roles in a project.
- The build-system allows you to build all the sources into artifacts that are saved only to the Output folder, where they eventually form the product.
I should also comment on character case in file and folder names. I recommend choosing a single case and use it universally. This will help you avoid rare, but annoying problems when two files or directories with names that Windows considers the same in the SVN.
I advise you to use PascalCase, as .NET folders have a correlation with namespaces and files – with type names that should be written in PascalCase, according to Microsoft guidelines.
To be continued: Part II.
Programming has been my hobby for over 10 years. I started from Delphi, then migrated to C++ that became the tool I began my professional career with. Since 2003, I have been working in the game development industry. In the beginning of 2007, I got interested in the ideas of eXtreme Programming, Agile Development and the .NET platform. At the moment, these ideas have evolved into professional activities: I am an eXtreme Programming Manager in a company that develops mobile gaming content on the .NET platform.


 General
  News
News  Suggestion
  Question
  Bug
Bug  Answer
  Joke
Joke  Praise
  Rant
Rant  Admin
Admin 


