Introduction
That a small pop up window displaying some information appears at the right lower corner of the screen just like what Live Messenger does is more friendly to the user, isn't it? In .NET 2.0, we can use Form.Opacity property to create a fade in & fade out window with serveral rows of codes, but it is much difficult to create a irregular window. Now we have WPF in .NET 3.5 and with it you can create a irregular window by only changing some window's properties and we can also have more smooth fade in & fade out animation experience.
Background
This is my first WPF program, just for fun. I wish all of you will be interested in it.
How to create a fade in & fade out window using XAML
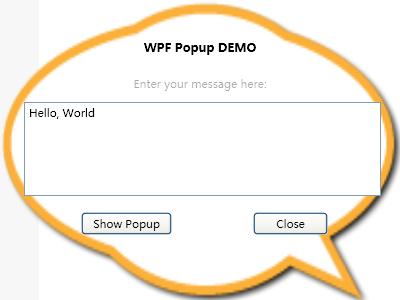
First, we need to create a window :) , and add what you want on it, text boxes, combo boxes and etc. Then we need to create a Storyboard which is a container timeline and a DoubleAnimation, which animates the value of a Double property between two target values using linear interpolation over a specified Duration, for this window like this:
<BeginStoryboard>
    <Storyboard Name="FormFade">
        <DoubleAnimation  Name="FormFadeAnimation"
            Storyboard.TargetName="winMain"
            Storyboard.TargetProperty="(Window.Opacity)"
            From="0.0" To="1.0" Duration="0:0:2"
            AutoReverse="False" RepeatBehavior="1x"
        />
     </Storyboard>
</BeginStoryboard>
Here comes some explainations about the above XAML, you can get more detailed information about each key word by searching MSDN.
TargetName: Sets the name of the object to animate. Here my window's name is "winMain", so give it to this property.TargetProperty: Sets the property that should be animated. We want to create a fade in & fade out window, so just keep changing its opacity property.From, To: The animation's starting & ending value. Here it means the Opacity will be changed from 0.0 to 1.0.Duration: Sets the length of time for which this timeline plays, not counting repetitions. In another word, this animation will be played 2 seconds for each time.AutoReverse: Sets a value that indicates whether the timeline plays in reverse after it completes a forward iteration. If False, it only do the fade in, since the animation XAML only tell it to do so. And if it is set to True, after fade in, it will do a reverse animation, yes, it will fade out.RepeatBehavior: Sets the repeating behavior of this timeline. Here we want it is played only once. You can change it to Forever, which specifies that the timeline should repeat indefinitely.Finally we need to attach this animation to the window.Loaded event, we need to add an event trigger, so the final XAML likes this:
<Window.Triggers>
    <EventTrigger RoutedEvent="Window.Loaded">
        <BeginStoryboard>
            <Storyboard Name="FormFade">
                <DoubleAnimation  Name="FormFadeAnimation"
                                        Storyboard.TargetName="winMain"
                                        Storyboard.TargetProperty="(Window.Opacity)"
                                        From="0.0" To="1.0" Duration="0:0:2"
                                        AutoReverse="False" RepeatBehavior="1x"
                                     />
            </Storyboard>
        </BeginStoryboard>
    </EventTrigger>
</Window.Triggers>
Now we have a main window with fade in animation by only writing XAML, no C# codes at all.
How to create a fade in & fade out irregular window using codes
For the above fade in & fade out window (above window only have fade in animation, you can change AutoReverse to True in order to get the fade out animation), we can also use C# codes to implement it. This is our major point in this section.
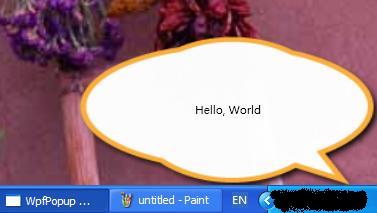
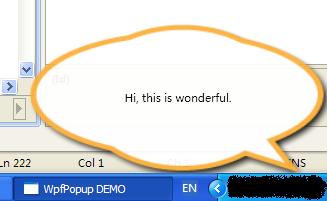
We want to create a window fade in in 1.5 seconds, display some text on it and then fade out in another 1.5 secondes. Of course, this window is irregular and displayed on the right lower corner of the screen.
First, we need to create a instance of Window object.
Window popUp = new Window();
popUp.Name = "PopUp";
popUp.AllowsTransparency = true;
popUp.Background = Brushes.Transparent;
popUp.WindowStyle = WindowStyle.None;
popUp.ShowInTaskbar = false;
popUp.Topmost = true;
popUp.Height = winHeight;
popUp.Width = winWidth;
popUp.Left = Screen.PrimaryScreen.Bounds.Width - winWidth;
popUp.Top = Screen.PrimaryScreen.Bounds.Height - winHeight - 30;
In order to create a irregular window, we need to set three properties:
AllowsTransparency: Sets to TrueWindowStyle: Sets to WindowStyle.NoneBackground: Sets to Brushes.TransparentThen we create a Grid as a container, a Image to show a irregular backgroud image as the border of the window and a TextBlock for message displaying:
Grid g = new Grid();
Image img = new Image();
img.Stretch = Stretch.Fill;
img.Source = bgImg;
img.BitmapEffect = new System.Windows.Media.Effects.DropShadowBitmapEffect();
g.Children.Add(img);
TextBlock msg = new TextBlock();
msg.Padding = msgPadding;
msg.VerticalAlignment = VerticalAlignment.Center;
msg.HorizontalAlignment = System.Windows.HorizontalAlignment.Center;
msg.TextWrapping = TextWrapping.Wrap;
msg.Text = msgText;
g.Children.Add(msg);
popUp.Content = g;
Now we have our window, the next step is to add the fade in & fade out animation to this window.
For the animation, we have to create a NameScope before creating the Storyboard which is a container timeline mentioned above. We creates a DoubleAnimation just like the above XAML. One point to mention is that, in order to close the window when it fades out, a delegate function is attached to the DoubleAnimation.Complete event to call Window.Close() method.
Then we add this animation to the Storyboard and add another delegate function to the Window.Loaded event to start playing this animation when the Window is loaded. Finally, we call Window.Show() method to display the form and we can see the animation starts playing automatically.
NameScope.SetNameScope(popUp, new NameScope());
popUp.RegisterName(popUp.Name, popUp);
DoubleAnimation winFadeAni = new DoubleAnimation();
winFadeAni.From = 0;
winFadeAni.To = 1;
winFadeAni.Duration = new Duration(TimeSpan.FromSeconds(1.5));
winFadeAni.AutoReverse = true;
winFadeAni.Completed += delegate(object sender, EventArgs e)
{
popUp.Close();
};
Storyboard.SetTargetName(winFadeAni, popUp.Name);
Storyboard.SetTargetProperty(winFadeAni, new PropertyPath(Window.OpacityProperty));
Storyboard winFadeStoryBoard = new Storyboard();
winFadeStoryBoard.Children.Add(winFadeAni);
popUp.Loaded += delegate(object sender, RoutedEventArgs e)
{
winFadeStoryBoard.Begin(popUp);
};
popUp.Show();
This is final pop up window, have fun.
Points of Interest
With WPF, we can create a beautiful UI with less codes, we can play animation in our window and we can have our animation more smooth. WPF brings many new features and a greate UI experience, these are the real ppoints of interest. Have any new idea in using WPF?
History
2008.6.17, Version 1.0.0
This member has not yet provided a Biography. Assume it's interesting and varied, and probably something to do with programming.


 General
  News
News  Suggestion
  Question
  Bug
Bug  Answer
  Joke
Joke  Praise
  Rant
Rant  Admin
Admin 


