Introduction
This is a WPF implementation of the famous marching ants selection paradigm which you see almost in every selection-enabled software, like the one in Adobe Photoshop Marquee Selection Tool. I created the interface and animations in Expression Blend 2.0, and used Visual Studio 2008 to code the behavior. Through this simple example, you'll learn some basic concepts about how WPF works and how you manipulate objects created with Blend in code-behind.
Background
Recently, while working with WPF for a software project, I had to implement some kind of selection tool, and no wonder, the first thing came to my mind was to use the famous marching ants, the rectangle with animated dashed strokes. I had done this before with GDI+, but this time, using Blend and VS, I created the same cool effect. Note that using WPF has many advantages over traditional methods, and you get a much richer user interface. For the sake of simplicity, I removed many selection styles like rounded rectangles, blinking ones, color fading ones, and ... originally used in my application, so it's much easier to follow the sample code. But once you get the idea, you can do whatever you want with it.
Using the code
The code consists of some XAML markup and a few lines of C# code that you can use according to your needs. Note that the logic for actually selecting the objects are not implemented as it must be defined in the context of the application you are developing. Probably, the most common way of detecting which objects are selected is the HitTest concept, which in WPF you can find in VisualTreeHelper.HitTest. I'll talk about it later in detail, but for now, my main purpose in this article is to show you how to draw a perfectly animated selection rectangle without any complexity, and note that in real world projects, you should consider turning this code to something much more reusable, like a custom component or something.
XAML
<Window
xmlns="http://schemas.microsoft.com/winfx/2006/xaml/presentation"
xmlns:x="http://schemas.microsoft.com/winfx/2006/xaml"
x:Class="MarchingAntsSelection.Window1"
x:Name="Window"
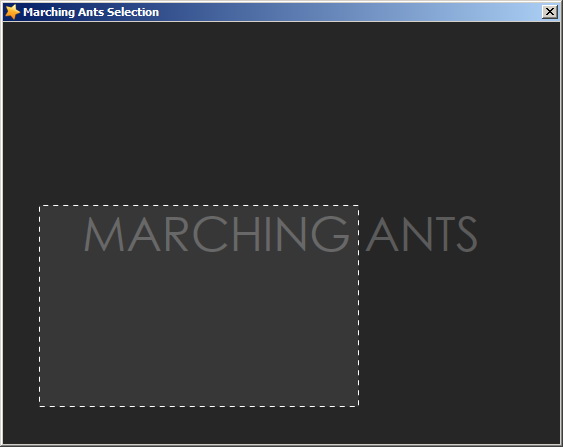
Title="Marching Ants Selection"
Width="563" Height="447"
Background="#FF353535" ResizeMode="NoResize">
<Window.Resources>
<Storyboard x:Key="MarchingAnts">
<DoubleAnimationUsingKeyFrames BeginTime="00:00:00"
Storyboard.TargetName="rectangle"
Storyboard.TargetProperty="(Shape.StrokeDashOffset)"
RepeatBehavior="Forever">
<SplineDoubleKeyFrame KeyTime="00:00:00" Value="0"/>
<SplineDoubleKeyFrame KeyTime="00:00:00.5000000"
Value="10"/>
</DoubleAnimationUsingKeyFrames>
</Storyboard>
</Window.Resources>
<Window.Triggers>
<EventTrigger RoutedEvent="FrameworkElement.Loaded">
<BeginStoryboard Storyboard="{StaticResource MarchingAnts}"/>
</EventTrigger>
</Window.Triggers>
<Grid x:Name="LayoutRoot">
<Canvas x:Name="canvas" Background="#FF262626">
<Rectangle Fill="#14FFFFFF" StrokeDashArray="5"
Stroke="#FFFFFFFF" Visibility="Hidden"
x:Name="rectangle" Width="50" Height="50"
StrokeDashOffset="0" StrokeThickness="1"
RadiusX="0" RadiusY="0"
Canvas.Left="0" Canvas.Top="0"/>
<TextBlock Width="Auto" Height="Auto"
FontFamily="Century Gothic"
FontSize="48" Foreground="#FF5B5B5B"
Text="MARCHING ANTS" TextWrapping="Wrap"
Canvas.Top="182" Canvas.Left="79"/>
</Canvas>
</Grid>
</Window>
As you can see in the markup above, I have a Canvas object which includes a Rectangle. This is the actual selection rectangle. Note that I've set the StrokeDashArray property to 5, which converts the solid stroke to dashed. You can use any thickness, color, corner radius, or background color for different look and feel of the selection rectangle. Then, I created a Storyborad which animates the StrokeDashOffset property of the rectangle. The first keyframe is at 00:00:00, and the second at 00:00:00.5000000. If you want faster ants, then reduce the second KeyTime. The key trick for a smooth animation without jumpy ants is to set the second SplineDoubleKeyFrame value equal to 2*StrokeDashArray, which in our case would be 2*5=10. Any multiple of 2 instead of the 2 itself should work fine, but they will make the animation faster. Initially, I set the Rectangle position to (0,0) through the Canvas.Left and Canvas.Top properties, which is also important because I'm using the RenderTransform property in my C# code to translate the rectangle to the proper place. You can use Canvase.SetLeft and Canvas.SetTop instead. Initially, I set the Visibility of the selection rectangle to Hidden too. Later, through our code, when the user actually drags the mouse on the surface, we make it Visible.
C#
using System;
using System.IO;
using System.Net;
using System.Windows;
using System.Windows.Controls;
using System.Windows.Data;
using System.Windows.Media;
using System.Windows.Media.Animation;
using System.Windows.Navigation;
using System.Windows.Input;
namespace MarchingAntsSelection
{
public partial class Window1
{
private Point startDrag;
public Window1()
{
this.InitializeComponent();
canvas.MouseDown += new MouseButtonEventHandler(canvas_MouseDown);
canvas.MouseUp += new MouseButtonEventHandler(canvas_MouseUp);
canvas.MouseMove += new MouseEventHandler(canvas_MouseMove);
}
private void canvas_MouseDown(object sender, MouseButtonEventArgs e)
{
startDrag = e.GetPosition(canvas);
Canvas.SetZIndex(rectangle, canvas.Children.Count);
if (!canvas.IsMouseCaptured)
canvas.CaptureMouse();
canvas.Cursor = Cursors.Cross;
}
private void canvas_MouseUp(object sender, MouseButtonEventArgs e)
{
if (canvas.IsMouseCaptured)
canvas.ReleaseMouseCapture();
canvas.Cursor = Cursors.Arrow;
}
private void canvas_MouseMove(object sender, MouseEventArgs e)
{
if (canvas.IsMouseCaptured)
{
Point currentPoint = e.GetPosition(canvas);
double x = startDrag.X < currentPoint.X ? startDrag.X : currentPoint.X;
double y = startDrag.Y < currentPoint.Y ? startDrag.Y : currentPoint.Y;
if (rectangle.Visibility == Visibility.Hidden)
rectangle.Visibility = Visibility.Visible;
rectangle.RenderTransform = new TranslateTransform(x, y);
rectangle.Width = Math.Abs(e.GetPosition(canvas).X - startDrag.X);
rectangle.Height = Math.Abs(e.GetPosition(canvas).Y - startDrag.Y);
}
}
}
}
This is the whole C# code which is absolutely simple and self explanatory. Whenever the user clicks the mouse on canvas, we set the start point, capture the mouse within the canvas, and we make sure that the selection rectangle is the topmost object in canvas using the Canvas.SetZIndex method. As my friend Josh suggested, you can use an adorner layer too. The only thing which remains is, OnMouseMove you calculate the rectangle again and set its position and size accordingly.
Footnote
If you used this code as is or as a base for more advanced selection styles in your application, I'd be grateful if you mention this article with a link; otherwise, it's absolutely free for any kind of commercial or personal use.
This member has not yet provided a Biography. Assume it's interesting and varied, and probably something to do with programming.


 General
  News
News  Suggestion
  Question
  Bug
Bug  Answer
  Joke
Joke  Praise
  Rant
Rant  Admin
Admin 


 and that stupid idea of WPF not exposing the mouse coords via EventArgs, I think I read it somewhere else and I was lazy enough not to search more on the topic. Internet is not always telling the truth, is it?
