Introduction
One thing that I have been proud of is that I always yearn to learn something new. Dave Kreskowiak once told me not to use wizards for my database work. I really understand why. I think they can be used for prototype purposes. Well, let me tell you what I came across in ASP.NET. I came across “paging”, and I looked for examples on the net about the subject. All the examples were using the SqldataSource control (wizard). I have nothing against the control. I must admit that Microsoft has done a very good job on it. It’s just that I am against using wizards. I am the type of programmer who is interested in writing what the wizard will do for me. Others might ask questions like “Why reinvent a wheel when it is there, why can't you just implement it?”. My answer is, it makes me a better programmer who understands the code better. Now, in this article, we are going to write our small paging application, still following the N-Tier design style, without using any wizard.
Background
The first thing we need to do is create a database and name it. We are going to to do that in SQL. We are going to use ASP.NET 2.0 in our article, and we are going to use C# as our language.
Start (SQL)
Create Database Vuyiswa
After you are done creating the databse, use the database and create a table like this:
create table memyself
(
    ID int identity(100,01)Primary key not null,
    Fname varchar(20) null,
    Lname varchar(20) null,
    Tel int null,
    Adress varchar(35) null,
    Car_model varchar(20) null,
    Car_Type varchar(20) null
)
Now, let us fill the table with data. Remember, we want to demonstrate the "paging" functionality, which means we can execute our Insert statement 80 times just to fill our table with sufficient data for demonstration purposes. Write an Insert statement like I did below:
insert into memyself
values('Dave','Mucky',054545774,'44 Drake Avenue, Pretoriawest 001','2009','HAMMER H3')
When you are done, check how many records you have in your table:
SELECT * FROM memyself
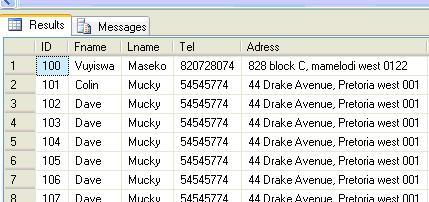
I have 80 records, and that will be enough for the test:
The last step on the SQL side is to create a Stored Procedure that we are going to use in our application, like this:
CREATE PROC PRCALLDATA
AS
SELECT * FROM DBO.memyself
When you are done, let's create our application. I am using VS2005. Open your Visual Studio, and create a new website or web application. I am using C#, you can use VB.NET, if you want to. As I said before, all my examples, no matter how small they are, I demonstrate them in an N-Tier style.
Creating N-Tier
Now, your application will only contain a website that has a “Default.aspx” like this:

Now, we have to add other layers: the DAL and the BLL. Right click on the Solution Explorer and add a class project and name it “DAL”. Add another and name it “BLL”. After that, add a connection string to your Web.Config file, like this:
<appSettings>
<add key ="F" value="User id =sa;Password=wow;
                      Server=VUYISWA\SQLEXPRESS;Database=VUYISWA"/>;
</appSettings>
After that is done, your Solution explorer will look like this:
Now it seems like everything is ready to be coded. Wait, we forget that we have to start from the presentation layer first. As you can see, I have renamed my default.aspx to shop.aspx, because I love shopping. Open your default.aspx in Design mode and add a GridView. In the wizard world (Harry Potter), you would have added the SqldataSource control, but we are not going to do that. Last thing, add a button because we don’t want to show our data on page load. At the bottom of your page, you will see something like this:
Click on Source. We need to enable paging, and you will see something like this:
<asp:GridView ID="GridView1" runat="server">
</asp:GridView>
Now, change it to look like something like this:
<asp:GridView ID="GridView1"
runat="server"
Height="293px"
Width="674px"
AllowPaging="True"
OnPageIndexChanging="GridView1_PageIndexChanging">
</asp:GridView>
The bolded part AllowPaging is the one that will allow you to have paging functionality, and the next one OnPageIndexChanging, will allow you to go to another page and see different data. In this event, you will rebind the page. Name your button “btnshowdata” and change its text to “Show Data”. This is not a must, you can name it anything. Now, your page should look like this:
At the bottom are numbers that represents the pages. Now, we want it to work like this: when you click the button, it should show us the data from the database.
DAL
Go to your DAL and make sure you write code like this:
using System;
using System.Collections.Generic;
using System.Text;
using System.Data.SqlClient;
using System.Data;
using System.Configuration;
namespace DAL
{
public class DAL
{
String strcon = ConfigurationManager.AppSettings.Get("F");
SqlConnection con;
SqlCommand cmdselect;
SqlDataAdapter da;
public DataSet GetData()
{
con = new SqlConnection(strcon);
cmdselect = new SqlCommand();
cmdselect.CommandText = "dbo.PRCALLDATA";
cmdselect.CommandTimeout = 0;
cmdselect.CommandType = CommandType.StoredProcedure;
cmdselect.Connection = con;
da = new SqlDataAdapter();
da.SelectCommand = cmdselect;
DataSet Curriculat = new DataSet();
try
{
con.Open();
da.Fill(Curriculat);
}
catch (SqlException)
{
throw;
}
finally
{
con.Close();
}
return Curriculat;
}
}
}
Go back to the Design view and click the GridView, and a property window will appear. Click on the Sign that looks like a lightning.
And double click the GridView1_PageIndexChanging event, and make sure it looks like this:
protected void GridView1_PageIndexChanging(object sender, GridViewPageEventArgs e)
{
    GridView1.PageIndex = e.NewPageIndex;
    GetData();
}
BLL
In the BLL, we call the function we created in DAL and wait for the PL (Presentation Layer) to call it. Go to your BLL project and do the following. Add a reference to the project DAL and go to your Presentation Layer (website) and add a reference to BLL. Remember, the PL should not access the DAL directly; it should go via the BLL.
Now, make sure that your BLL looks like this:
using System;
using System.Collections.Generic;
using System.Text;
using System.Data;
using System.Data.SqlClient;

namespace BLL
{
    public class BLL
    {

        public DataSet GetData()
        {
            DAL.DAL obj = new DAL.DAL();

            DataSet Curriculat = new DataSet();

            try
            {
            Curriculat =  obj.GetData();

            }
            catch(SqlException)
            {
                throw;
            }
            return Curriculat;
        }
    }
}
Back to PL again
Go to your PL (Presentation Layer), your ASPX page, and double click. Make this your code-behind code:
private void GetData()
{
    DataSet Curriculat = new DataSet();
    BLL.BLL obj = new BLL.BLL();
    Curriculat = obj.GetData();

    GridView1.DataSource = Curriculat;
    GridView1.DataBind();
}
Now, this will bind your DataSet to the DataGrid. You just call the function now. On your button Click event, call the function to bind the GridView like this:
protected void btnShowData_Click(object sender, EventArgs e)
{
    GetData();
}
When you are done, build and press “F5” to admire your work. And, you should see something like this:
Click on the numbers at the bottom to navigate to another page. I don’t say I am good, I just explained how it was done without a wizard so that I can continue without using a wizard.
Conclusion
On my next article, we will Update, Delete, and Insert into the GridView. On my previous articles, we did it in a Windows application, and now we are going to do it via Web. This article is dedicated to (www.ITS.co.za) and Kamogelo Mokgoro from PostOffice (www.SAPO.co.za), because this is the first article I have written since I joined them on 10 December 2008. Thank you.
Vuyiswa Junius Maseko is a Founder of Vimalsoft (Pty) Ltd (http://www.vimalsoft.com/) and a forum moderator at www.DotnetFunda. Vuyiswa has been developing for 16 years now. his major strength are C# 1.1,2.0,3.0,3.5,4.0,4.5 and vb.net and sql and his interest were in asp.net, c#, Silverlight,wpf,wcf, wwf and now his interests are in Kinect for Windows,Unity 3D. He has been using .net since the beta version of it. Vuyiswa believes that Kinect and Hololen is the next generation of computing.Thanks to people like Chris Maunder (codeproject), Colin Angus Mackay (codeproject), Dave Kreskowiak (Codeproject), Sheo Narayan (.Netfunda),Rajesh Kumar(Microsoft) They have made vuyiswa what he is today.


 General
  News
News  Suggestion
  Question
  Bug
Bug  Answer
  Joke
Joke  Praise
  Rant
Rant  Admin
Admin 


