I’ve tried to find a jQuery editor plug in which works out of the box without configuration. The WMD editor used by stackoverflow.com looked nice but I couldn’t find a version that I got running. My main issue with most editors was that I didn’t figure out how to configure custom image and link dialogs. I’ve therefore done my own.
Highlights:
- Markdown (currently the only format supported)
- Preview pane (see generated HTML live)
- Syntax highlighting (live)
- Expanding textarea (which also goes back to original size on blur)
- jQueryUI dialogs for links/images
- Access keys (default browser modifier or CTRL if activated)
- Plug & Play (just include additional scripts to activate features)
The basic setup looks like this:
<!DOCTYPE HTML PUBLIC "-//W3C//DTD XHTML 1.0 Strict//EN"
"http://www.w3.org/TR/xhtml1/DTD/xhtml1-strict.dtd">
<head>
<title>Editor demo</title>
<script type="text/javascript"
src="scripts/jquery-1.6.2.min.js"></script>
<script type="text/javascript"
src="scripts/jquery.markdown-0.2.js"></script>
<script type="text/javascript"
src="../Source/textselector.js"></script>
<script type="text/javascript"
src="../Source/jquery.griffin.editor.js"></script>
<script type="text/javascript"
src="../Source/jquery.griffin.editor.markdown.js"></script>
<style type="text/css">
.editor .area { width: 600px; height: 200px; }
.editor .toolbar { padding: 0px; }
</style>
</head>
<body>
<div class="editor">
<div class="toolbar">
<span class="button-h1"
accesskey="1" title="Heading 1">
<img src="../Source/images/h1.png" /></span>
<span class="button-h2"
accesskey="2" title="Heading 2">
<img src="../Source/images/h2.png" /></span>
<span class="button-h3" accesskey="3"
title="Heading 3">
<img src="../Source/images/h3.png" /></span>
<span class="button-bold" accesskey="b"
title="Bold text">
<img src="../Source/images/bold.png" /></span>
<span class="button-italic" accesskey="i"
title="Italic text">
<img src="../Source/images/italic.png" /></span>
<span class="divider"> </span>
<span class="button-bullets" accesskey="l"
title="Bullet List">
<img src="../Source/images/bullets.png" /></span>
<span class="button-numbers" accesskey="n"
title="Ordered list">
<img src="../Source/images/numbers.png" /></span>
<span class="divider"> </span>
<span class="button-sourcecode" accesskey="k"
title="Source code">
<img src="../Source/images/source_code.png" /></span>
<span class="button-quote" accesskey="q"
title="Qoutation">
<img src="../Source/images/document_quote.png" /></span>
<span class="divider"> </span>
<span class="button-link" accesskey="l"
title="Insert link">
<img src="../Source/images/link.png" /></span>
<span class="button-image" accesskey="p"
title="Insert picture/image">
<img src="../Source/images/picture.png" /></span>
</div>
<textarea class="area">Hello world</textarea>
</div>
<script type="text/javascript">
$(function(){
$('.editor').griffinEditor();
});
</script>
</body>
</html>
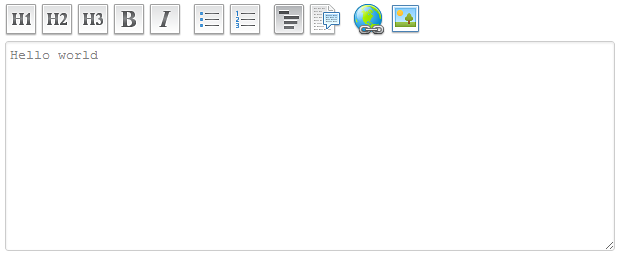
All of that is required. (Just a simple copy/paste). The idea is that you should easily be able to customize its layout. The script generates the following layout:
Dialogs
The basic setup uses browser dialog boxes:

Not so sexy. Include jQueryUI and the integration script:
<link rel="stylesheet"
href="Styles/jquery-ui-1.8.16.custom.css">
<script type="text/javascript"
src="scripts/jquery-ui-1.8.16.custom.min.js"></script>
<script type="text/javascript"
src="../Source/jquery.griffin.editor.dialogs.jqueryui.js"></script>
... to automatically reconfigure the plug in to use jQueryUI:
You can use your own dialogs by implementing the following function:
$.griffinEditorExtension.imageDialog = function(options)
{
options.success({ title: 'Some title', url: 'Some url';}) when you are done
}
Same goes for the link dialog.
Preview Pane
The preview pane is automatically configured when you add a div with a special id:
<div class="editor" id="myeditor">
//all the editor code
</div>
<div id="myeditor-preview">
</div>
This allows you to place the preview pane wherever you like. The included demo scripts place the preview to the right:
You can also add support for syntax highlighting by including additional script & stylesheet:
<script src="http://yandex.st/highlightjs/6.1/highlight.min.js"></script>
<link rel="stylesheet"
href="http://yandex.st/highlightjs/6.1/styles/idea.min.css">
The script inclusion will activate those features, no additional configuration is required.
Access Keys
The default access key implementation uses the browser specific implementation. For instance, Win+Chrome uses ALT+Key to activate it. Hence no additional information in the tooltip:
That can be changed by adding a hotkeys script:
<script type="text/javascript"
src="scripts/jquery.hotkeys.js"></script>
Which reconfigures the tooltips and allows you to use CTRL+key to access the toolbar features. The key is still controlled by the accesskey attribute on the toolbar icons.
Summary
The code and all examples are available at github.


 General
  News
News  Suggestion
  Question
  Bug
Bug  Answer
  Joke
Joke  Praise
  Rant
Rant  Admin
Admin 


