Introduction
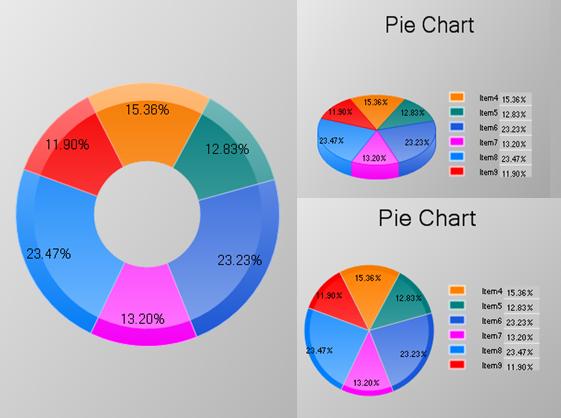
This article is written to describe the simple pie chart control implemented for MFC applications. There are so many chart controls and libraries available online but some of them are lacking with regard to graphics or rich in graphics, and are a bit heavily used on small projects. This pie chart is written for the MFC platform using the graphics library GDI+ and simple in terms of classes used (single class) and the basic functionalities it provides. It has three styles of pie charts. They are:
- Doughnut style.
- Two dimensional style.
- Three dimensional style.
It consists of functionalities like setting colors to each pie chart elements, background and text areas. Setting up fonts for the texts, setting up rotations and setting inclination for 3-D style are also present.
Background
The implementation uses the basic drawing functionalities in GDI+. But there are three properties which provide the visual qualities for the control. They are:
- Gradient calculation for the colors.
- Flicker-free drawing.
- Calculation for 3-D pie.
Calculating Gradient for Different Colors
It uses a simple linear calculation to find the gradient colors. Calculating the gradient for a given color was done as follows:
- Take RGB values separately for the given color.
- To calculate the dark gradient, they are divided by a common factor, later multiplied by a factor set by the user which will be equal or less than the division factor.
Ex. for R value, R gradient = (R / division factor)* factor (linear equation)
- Then this value is subtracted from original R, calculating the R new value which creates a dark gradient value for the corresponding color.
For the division factor the value used is 255. The reason to choose 255 is that for any RGB value, the maximum it can get is 255.
To calculate the light gradient, each RGB values are subtracted from 255 and then divided by 255 to find the gradient.
This value is multiplied by a factor and added to original RGB values.
Color CPieChartWnd::CalculateGradientLight(Color crBase, float fGradVal)
{

	BYTE r = crBase.GetR();
	BYTE g = crBase.GetG();
	BYTE b = crBase.GetB();

	float fact = 255.0f;
	float rGrad = (255 - r) / fact;
	float gGrad = (255 - g) / fact;
	float bGrad = (255 - b) / fact;

	r =  BYTE(min(r + rGrad * fGradVal, 255));
	b =  BYTE(min(b + bGrad * fGradVal, 255));
	g =  BYTE(min(g + gGrad * fGradVal, 255));

	return Color(r, g, b);
}

Color CPieChartWnd::CalculateGradientDark(Color crBase, float fGradVal)
{

	BYTE r = crBase.GetR();
	BYTE g = crBase.GetG();
	BYTE b = crBase.GetB();

	float fact = 255.0f;
	float rGrad = r / fact;
	float gGrad = g / fact;
	float bGrad = b / fact;

	r = BYTE(max(r - rGrad * fGradVal, 0));
	b = BYTE(max(b - bGrad * fGradVal, 0));
	g = BYTE(max(g - gGrad * fGradVal, 0));

	return Color(r, g, b);
}

Flicker-free Drawing
The double buffering in GDI+ is done using the Bitmap and CachedBitmap objects. The way I used this is by creating a Graphics object using Graphics::FromImage. The Bitmap passed is created in the size of Cwnd area. Then all the drawing operations were done on the Graphics object. Finally this Graphics object is freed and the Bitmap is used in creating a CachedBitmap which will build from the graphics member created on device context. One technique is to save the Bitmap object and set it dirty on resizing or when the drawing changes. At other times the saved bitmap will be used directly on the CachedBitmap. But in this I only create and destroy the Bitmap when onPaint calls.
Bitmap* mBtmap = new Bitmap(rect.Width(), rect.Height());
graphics = Graphics::FromImage(mBtmap);
delete graphics;
graphics = NULL;
Graphics gr(pDc->m_hDC);
gr.SetSmoothingMode(SmoothingModeHighQuality);
CachedBitmap* btmp = new CachedBitmap(mBtmap, &gr);
if (mBtmap){
delete mBtmap;
mBtmap = NULL;
}
gr.DrawCachedBitmap(btmp, rect.left, rect.top);
if (btmp){
delete btmp;
btmp = NULL;
}
Calculation for 3-D Object
In the case of a 3-D pie chart, it has some transformation to do on its drawing parameters based on the inclination angle. So when the inclination angle is set, the circle pie shape goes to an elliptic shape resulting in visual changes in the element pie areas. These areas are transformed purely according to the changes in the pie angle per each element. This angle is calculated as follows:
So the calculation is:
New Point y' = y + x * sin (α). Using the new location of the point and the center point of the ellipse, the new angle α is calculated.
void CPieChartWnd::UpdatePiechartPoints(void)
{
CRect rectBnd;
GetBoundRect(rectBnd);
CalcuatePieElemetPoints();
float flStart = fl_startAngle;
float flStartIncline = 0;
PointF ptStart;
CRect rectBtm, rectTop;
Get3DBounds(rectTop, rectBtm);
long rectClip = long(fl_InclineAngle * rectBnd.Height() / 180);
rectTop.top += long(rectClip * f_depth / 2);
rectTop.bottom += long(rectClip * f_depth / 2);
REAL xPoint = REAL(rectBnd.CenterPoint().x +
(rectBnd.Width() / 2) * cos(PI * (flStart)/ 180));
REAL yPoint = REAL(rectBnd.CenterPoint().y +
(rectBnd.Height() / 2) * sin(PI * (flStart)/ 180));
ptStart.X = xPoint;
ptStart.Y = yPoint - REAL(rectClip * sin((flStart) * PI / 180));
flStartIncline = CacluateInclineAngle(ptStart, rectTop);
fl_startAngleIncline = flStartIncline;
map<int, pie_chart_element*>::reverse_iterator iter = map_pChart.rbegin();
for (; iter != map_pChart.rend(); iter++){
pie_chart_element* ele = iter->second;
ele->pie_3d_props.pt_InPie.Y -= REAL(
rectClip * sin((flStart + ele->f_angle) * PI / 180));
float inClineAngle = CacluateInclineAngle(ele->pie_3d_props.pt_InPie,
rectTop);
if(inClineAngle == flStartIncline && ele->f_angle == 360)
inClineAngle = 360;
else if (inClineAngle >= flStartIncline)
inClineAngle -= flStartIncline;
else
inClineAngle += (360 - flStartIncline);
ele->pie_3d_props.f_InclineAngle = inClineAngle;
flStartIncline += inClineAngle;
flStart += ele->f_angle;
}
}
Using the Control
This control can be easily used by Creating a CPieChartwnd member on the Client Frame.
BOOL CPieChartWnd::Create(LPCTSTR lpCaption, const RECT& rect, CWnd* pParentWnd,
    UINT nID)
There are various functions provided to set visual qualities like colors, pie style, fonts and color gradients. By setting up start angle in timers can create rotating effects and setting up incline angle can create inclination effects on 3-D style chart. Also it has some functionality to sort the elements and to reverse back to the added order.
Pie chart element structure
struct pie_3d_properties{
float f_InclineAngle; PointF pt_InPie; GraphicsPath path; };
struct pie_chart_element{
double d_value;
float f_percentage;
float f_angle;
float f_ColorGradL;
float f_ColorGradD;
Color cr_GradientL;
Color cr_GradientD;
Color cr_Base;
CString s_label;
CString s_element;
pie_3d_properties pie_3d_props;
int i_ID;
BOOL b_select;
};
The pie chart element has two unique keys. One is a string key which users can define when an element is added. Another one is an integer identifier. This is added by the control it self. The string key has to be unique and not an empty string.
Add element:
The method InsertItem is defined to add elements to the chart. If the insertion was succeeded, it will return a pointer to the element which is the defined data type for the pie_chart_element. The return pointer is in type PIECHARTITEM
Removal of elements can be done using the two keys or using a PIECHARTITEM pointer
PIECHARTITEM InsertItem(CString sElement, CString sLabel, double dValue, Color crColor);
BOOL RemoveItem(CString sElement);
BOOL RemoveItem(int iElementID);
BOOL RemoveItem(PIECHARTITEM pItem);
Points of Interest
This control provides only basic functionalities which a pie chart control should hold but it will be useful for small MFC applications. Also this might help as a learning material for GDI+ graphics too.
Prasad Perera is a software developer who's interested in parallel and distributed computing and graphics programming!
Currently he is following his masters in Concordia University, Montreal.


 General
  News
News  Suggestion
  Question
  Bug
Bug  Answer
  Joke
Joke  Praise
  Rant
Rant  Admin
Admin 


![Rose | [Rose]](https://codeproject.global.ssl.fastly.net/script/Forums/Images/rose.gif)
 nx Prasad but i solved it Now
 .
. .
.
 .
.