Introduction
This article shows you how to use C# to display pictures on a rotary tray. With this bit of code, you'll be able to quickly throw a bunch of pictures on the screen and allow the user to rotate the tray to view the ones selected, or even click on an image and have it pop up on a separate form. Imagine an invisible rotating tray you can place anywhere on the screen, rotate at any velocity, or resize however you like. Then, imagine pinning images onto this tray and having them shrink behind other images as they move to the back, or stretch out and appear closer as they move to the front. Can't imagine it? Well, now you don't have to, because this code will do it for you.
We're not going to solve any economic crisis or save any baby seals here. All we have is an easy to use Windows object which will lend your projects a keener edge and a bit of zip.
Here's a Screenshot...
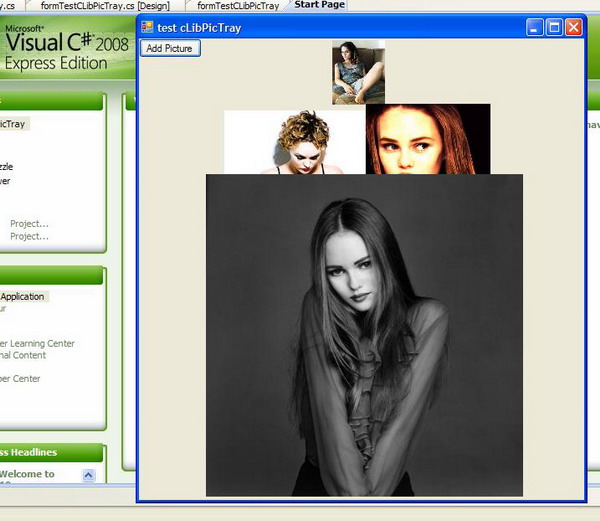
Pretty, eh?
Using the Code
You'll need to download and compile both the cLibPicTray and the cLibPicBoxViewer (which I described in a previous article), then include their DLLs in your own project. Listed below is a sample code of how to use this program. It assumes you have a C# Windows form and have already added a button called 'btnAddPicture'.
namespace formTestCLibPicTray
{
public partial class formTestCLibPicTray : Form
{
cLibPicTray.cLibPicTray picTray = new cLibPicTray.cLibPicTray();
public formTestCLibPicTray()
{
InitializeComponent();
Controls.Add(picTray.picBackground);
picTray.picBackground.Dock = DockStyle.Fill;
btnAddPicture.Click += new EventHandler(btnAddPicture_Click);
}
void btnAddPicture_Click(object sender, EventArgs e)
{
OpenFileDialog ofd = new OpenFileDialog();
if (ofd.ShowDialog() == DialogResult.OK)
{
PictureBox thisPicBox = new PictureBox();
thisPicBox.Load(ofd.FileName);
picTray.addPicBox(ref thisPicBox);
}
}
}
}
If we look at the button's event handler for the 'click' event, you'll notice that we first created an OpenFileDialog called ofd, then we only use the results if, after 'showing' this object to the user, the user has pressed the 'OK' button with the mouse, which means that a file has been selected. Next, we create a PictureBox and load it with the image the user selected, and finally, we tell the picture tray to add this picture to itself by calling its .addPicBox() method and sending our newly created PictureBox along using the 'ref' (by reference parameter) keyword.
And, that's it.
If you want to use the formTestCLibPicTray.zip file, you'll find that all the code is wrapped up into that one file which you can download and execute with no preamble. But, if you want to use the DLL files, you'll need to go through it one step at a time. That is,
- Download all zip files.
- Open and compile the
PicBoxViewer into a DLL. - Open the PicTray solution in your C# integrated development environment, and include the DLL file from your PicBoxViewer directory (which you compiled in step #2 above) into this project, and only then will you be able to compile the
PicTray into a DLL of its own. - Now that you have these two DLLs, you can make use of the whole she-bang into any project you want!
The PicViewer DLL can run by itself but the PicTray requires PicViewer, so when you're running the PicTray, you'll have to include both of the dynamic link libraries.
There are a few options available to you, the easiest ones are:
picTray.bolPopUpClickedPic = true;
picTray.bolMouseMoveOverAutoSelect = true;
picTray.setBackGroundImage(ofd.FileName);
If you want to have a copy of a picture appear in a separate popup form when the user clicks it, then you set your picTray's bolPopUpClickedPic to true. To have the image which the user's mouse scans over be the selected image without having to click it, then you set the bolMouseMoveOverAutoSelect to true, and to have an image appear behind the others on the background picturebox, you send an image, filename, or URL to the setBackGroundImage method.
There are other variables you can play with. You can move the tray around on the background, set max/min size of the pictures as they move from front to back, and vice-versa, as well as set options to resize the tray's radius. If you feel like fiddling around with it, just write the name of your picTray object and let the intellisense give you the options. Then, if you want to reset everything back to standard parameters, there's a function that'll do that too.
Points of Interest
Are you interested in knowing how it works?
public struct udtTrayLoc
{
    public double angle;
    public double x;
    public double y;
}

public struct udtPicBoxTrayElement
{
    public PictureBox picBox;
    public udtTrayLoc trayLoc;
    public double dblXOverYRatio;
}

public udtPicBoxTrayElement[] udrPicBoxTrayElements;
The array udrPicBoxTrayElement of the user-defined type udtPicBoxTrayElement is your friend. Here it is in a nutshell:
- Each element in this array holds the information for each picture in the tray, the
picBox, and the picture it contains:
- Information about where on the tray that picture is located.
- The aspect-ratio of the image (width over height).
- The pictures are evenly distributed around an invisible circular tray.
- When the tray is rotated and repositioned, all the images are ranked and placed on the screen from back to front, resizing them from the smallest in the back to the biggest in the front.
Let's look at the Add Picture function:
public void addPicBox(ref PictureBox PicThisBox)
{
    if (udrPicBoxTrayElements == null)
        udrPicBoxTrayElements = new udtPicBoxTrayElement[1];
    else
        Array.Resize<udtpicboxtrayelement>(ref udrPicBoxTrayElements,
                udrPicBoxTrayElements.Length + 1);

    udrPicBoxTrayElements[udrPicBoxTrayElements.Length - 1].picBox = PicThisBox;
    picBackground.Controls.Add(
       udrPicBoxTrayElements[udrPicBoxTrayElements.Length - 1].picBox
                             );

    PicThisBox.SizeMode = PictureBoxSizeMode.AutoSize;
    udrPicBoxTrayElements[udrPicBoxTrayElements.Length - 1].dblXOverYRatio
               = (double)udrPicBoxTrayElements[
                                   udrPicBoxTrayElements.Length - 1
                                              ].picBox.Width
               / (double)udrPicBoxTrayElements[
                                   udrPicBoxTrayElements.Length - 1
                                              ].picBox.Height;

    PicThisBox.SizeMode = PictureBoxSizeMode.StretchImage;
    handle_SizeChange();
    intSelected = udrPicBoxTrayElements.Length - 1;
    repositionTray();
    handle_newSelection();
}
First we create a new entry in our tray elements array by resizing it (or initializing it if it is empty). Then, we store the newly added picture box we received in the function's parameters into this new array element's field called '.picBox' and add it to the picBackground using the Controls.Add function.
Once that's done, we need to do a bit of math and get a workout figuring what the image's aspect ratio is. To do this, we set the PictureBox's mode to 'AutoSize'; this will cause the picture box to stretch itself out to its natural proportions. Then, we force the conversion of the picture's width and height values to doubles, divide them to get their ratio, and store this value in the dblXOverYRatio field of our array element. The line of code looks a bit complicated because it stretches over a few lines, but if you look at it closely, it is really just the width divided by the height of the same picture box.
Once we have this value figured out, we reset the SizeMode to StretchImage so that we can now decide for ourselves just what size we want it to be. Remember that the image will now stretch to whatever size the PictureBox is. This means that if you neglect to retain the image's aspect ratio, the image will appear distorted.
Ladies and Gentlemen, the one and only repositionTray() function:
So, here's where the brunt of the work is done. Whenever we add a picture, delete a picture, resize the background image, or rotate the tray, repositionTray() is there.
We have a variable of type 'double' called 'dblCurrentAngle'. This is the angle at which the tray is rotated at. Remember that each picture has a 'location on the tray' that I mentioned above? Well, when we add/remove a picture, the pictures on the tray all make room, shove elbows sort of speak, and reposition themselves around 2 pi radians of our circle so that they're all evenly distributed around it. Then, given their location on the tray and the tray's rotation, the function repositionTray() calculates where they appear on the rotated tray, and then they are each reassigned new Cartesian coordinates (x, y). Those with negative x values are to the left, and the rest are on the right; those with negative y values are at the bottom of our unit circle and the others are on top.
Once all the pictures have been placed on this imaginary circle, they are ranked using a bubble-sort in the getRankingIndices() function which returns an array of integers. These integers correspond to the indices of the array elements (pictures) ranked from back to front.
Here's a look at the part of this famous function which actually repositions the pictures on the screen after we've already gotten the ranked indices.
for (int intPicCounter = 0;
intPicCounter <
intRankingIndices.Length;
intPicCounter++)
{
double dblSizeAttenuationFactor; double dblDistanceToFront = 1
+ udrPicBoxTrayElements[
intRankingIndices[intPicCounter]
].trayLoc.y;
double dblFactorRange = 1 - dblMinSizeFraction;
dblSizeAttenuationFactor = 1
- dblFactorRange * (dblDistanceToFront / 2);
resizePic(ref udrPicBoxTrayElements[
intRankingIndices[intPicCounter]
],
attenuateUdtCartesian(udrMaxSize, dblSizeAttenuationFactor));
udrCirclePt.x = udrCenter.x
+ dblCircleRadius * Math.Cos(udrPicBoxTrayElements[
intRankingIndices[intPicCounter]
]
.trayLoc.angle + dblCurrentAngle - Math.PI / 2);
udrCirclePt.y = udrCenter.y
- dblCircleRadius * Math.Sin(udrPicBoxTrayElements[
intRankingIndices[intPicCounter]
]
.trayLoc.angle + dblCurrentAngle - Math.PI / 2);
udrPicBoxTrayElements[intRankingIndices[intPicCounter]].picBox.Left
= (int)(udrCirclePt.x - udrPicBoxTrayElements[
intRankingIndices[intPicCounter]
].picBox.Width / 2);
udrPicBoxTrayElements[intRankingIndices[intPicCounter]].picBox.Top
= (int)(udrCirclePt.y);
udrPicBoxTrayElements[intRankingIndices[intPicCounter]].picBox.BringToFront();
}
We already know in what order to put the images onto the screen so that the ones in the back appear behind the ones in the front. And, we already know where they are on the unit circle, so finding the corresponding location on the screen isn't too difficult. What we need to worry about is the size of the image, and this is a function of how close to the front it is and what the max/min picture sizes are.
On our unit circle, the images at the bottom of the circle are at or close to y= -1, so we can use this knowledge when we calculate dblDistanceToFront and add 1 to the y value. This gives us that picture's distance from the front, which is anything between 0 and 2, such that those at 0 are closest to the front and the pictures 2 'units' from the front are furthest in the back. The dblMinSizeFraction variable is used to determine the size of the picture at the back (smaller) relative to the maximum size of the picture at the front. We use the distance from the front and the factorRange to 'attenuate' the image to the appropriate size. Since each image is not necessarily the same shape or size as the others and the tray needs to accommodate all shapes and sizes, this program uses the maximum values in which the image can be allowed to fit. Given these confinements, the function resizePic() uses the image's aspect ratio which we recorded earlier, and fits the image inside the allowed space without distorting its shape.
Next, we need to place the images on the screen. To do this, imagine that you're sticking a thumbtack through the middle of the top edge of your picture into some spot on your rotating tray. You'll need to dig up your trigonometry a bit and remember that Cos(theta) is the x value on the unit circle at the angle theta, and Sin(theta) is the y value at the angle theta on that same unit circle. You calculate these values remembering that your angle theta in this case is the sum of the picture's location on the tray plus the tray's angle of rotation and an extra Pi/2 for good luck (actually, that extra pi/2 places the angle zero at the bottom of the screen for appearance's sake). Then, multiply these values by the output circle's radius and add them to that circle's center.
Confused? Don't be. You've got a central location. You have a tray that rotates, and you have points on that tray; the rest is more math than programming, and if you need to, just pull out a sheet of paper and doodle for some time to get a better look at it.
What is a bit of an issue, however, is that the unit circle your high-school math teacher taught you is the same one your calculator uses, and it is also the same as the one your computer's CPU knows. But, your computer's screen has a different teacher and is a bit confused. So, you'll need to remember that your screen's y-axis is upside down. It is unfortunate, but we all have to live with it. You have to take this into consideration when throwing those pictures on the screen and calculating where up and down are when entering the fun world of computer graphics.
We're looping through all the images from back to front, so when we've placed an image on the screen, we have to make sure that it appears in front of the others which were placed before it by calling the PictureBox's method BrintToFront(). It is like you are dropping pictures on the table. The ones you dropped first wind up being covered by the ones that followed until they're all on the table. This gives you the illusion of depth. The smaller pictures are at the back, and the bigger ones are in front.
Tada, already better than pre-renaissance and you haven't gotten your fingers full of paint.
History
- Update: 2009 08 13
- I didn't know, at the time, how to have
mouseMove/mouseClick events for a bunch of dynamically generated pictureBoxes and now that I know how to do this no longer need to use a problematic expedient like a troublesome 'transparentLabel' to interact with. So, I deleted the references to this now useless label in the HTML and have attached the edited article along with the two compressed files which appear in the article so that it can be updated
- Update: 2009 11 15
- Updated source code and demo
Christ Kennedy grew up in the suburbs of Montreal and is a bilingual Quebecois with a bachelor’s degree in computer engineering from McGill University. He is unemployable and currently living in Moncton, N.B. writing his next novel.


 General
  News
News  Suggestion
  Question
  Bug
Bug  Answer
  Joke
Joke  Praise
  Rant
Rant  Admin
Admin 


 Note that I can reliably repeat this whether bolMouseMoveOverAutoSelect is set to 'true or 'false. And, by the way, I don't know what bolMouseMoveOverAutoSelect is really supposed to do : it doesn't seem to have any effect when I set it to true that I can observe.