Introduction
If there is something every developer ought to do often, it is Source Code Versioning, it is not something new and not rocket science. Be it a large scale software development or just in house development, versioning your code can be interesting and can save you a lot of headaches.
Before I got immersed into source code versioning, what I was normally doing was to do a backup of the current project I was working on, at the end of each working day, while this is good, it's not really efficient. What plunged me into source code versioning was that, there was a day I had not backed up the project I was working on and I mistakenly deleted a code class, that I had worked on for more that four hours, I whined throughout that day, because it was just four hours of development time wasted.
Source code versioning can be achieved using a version control system(VCS). VCS is a system that keeps track of changes made to a file or set of files over time so that the files can be recalled later if need be. It is a very wise thing to use a VCS when building softwares because it allows files or even an entire project to be reverted back to a previous state, files can be compared to see what changes have been made over time, who last modified a file, when it was modified, and a lot more. Using a VCS also generally means that if you screw things up or lose some files, you can easily recover them back.
There are various VCS available such as Mercurial, Bazaar, Perforce, Subversion, Git and so on. Git is a robust VCS, and I prefer it to other VCS because it makes use of local files and resources on your system for all its operations. Everything in Git is check-summed before it is stored and is then referred to by that checksum. This means that Git will know and keep track of any change made to the file or folder it is monitoring, and files cannot get corrupted without Git detecting.
Now, let's get started by downloading and installing the windows version of Git from http://code.google.com/p/msysgit. After the installation is completed, try and right click any folder in your system, you will see that two new menu entries have been added to the windows context menu - Git GUI Here and Git Bash Here, Thus, you have access to a CLI and a GUI for controlling Git.
To work effectively with Git, some basic Git shell commands must be understood, and I will try to explain them below.
Since the installation is completed successfully, the Git on your system needs to be setup and configured. You need to set your username and email address and this should be done after Git installation. So open your Git Bash, that can be done by right clicking any folder on your system and select Git Bash Here and then type the command below.
$ git config --global user.name "Ayobami Adewole"
$ git config --global user.email myemail@myemail.com
You should substitute your name and your email address appropriately.
To start version controlling and tracking an existing project on your system with Git, just locate the folder that contains the project solution, files and other items, right click the folder and select Git Bash Here. Then type the following command:
$ git init
This command will create a new folder named .git and all necessary files that Git needs to track your project effectively in the project folder. But at this point no file is being tracked yet, you have to explicitly tell Git to start tracking your files, that can be achieved with:
$ git add *.cs
$ git add info.txt
These commands tell Git to start tracking all our C# files in the folder and a text file named info.
Not all files and folder needs to be tracked, for example we might need to tell Git not to track the bin sub folder in a visual studio project. To achieved this, the command below is entered in Git Bash in order to generate a .gitignore file.
$ touch .gitignore
After this file has been created, open this file with Notepad and type in all the sub folders and files that you do not want Git to track and then save it, for example:
*.suo
/obj
/bin
If you type the command:
$ git status
You can see all the files that have been modified lately and have not yet been committed and probably new files that you just created and are not yet being tracked by Git.
To commit all the changes you have made, you need to run the command:
$ git commit -a -m 'I just added two new code classes'
This command will commit the changes, -a option is to skip the Git staging area and -m option is the commit message.
There are times when you might mistakenly screw things up and need to revert files or even an entire project back to its earlier form. Suppose I have an AccountRepository.cs file that I want to unmodify, I can simply just type the command:
$ git checkout -- AccountRepository.cs
This command will revert back the content of the AccountRepository.cs file to what it was before the last commit was made. The beauty of Git is that any change that have been committed can be recovered back.
Now, to some folks like me who are not really keen working with command line interface, there is an extension Git Source Control Provider which when installed into Visual Studio can make working with Git interesting, because everything operation will be performed within the comfort of your Visual Studio, be it Visual Studio 2008, Visual Studio 2010 and even Visual Studio 11 beta. Just download the extension from gitscc.codeplex.com, and install it into your version of Visual Studio.
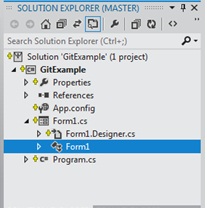
I will be using Visual Studio 11 beta, but nothing to worry about, because it's the same approach to all the supported versions of Visual Studio. Create a new project, in this case, I created a new Windows Form application and I named it GitExample.
When the project has successfully loaded, right click the solution and select New Repository, this will create a new Git Repository for the project and those files required by Git, even a .gitignore file would be automatically created for you with some entries, which you can edit later. You should see a yellow plus symbol, which indicates that there are new files that have not yet been added to the repository.
In your Visual Studio, you should see a tabbed document with the title GIT PENDING CHANGES-MASTER, with this tab, you can commit changes, amend last commit, stage files and even invoke the Git Bash directly.

In the Git tab, you will see files that have been changed, new files that need to be staged and committed. To commit changes, in the Git tab, under Changed Files, right click those files and select stage to stage the files, then type your comments in the comment textbox and then click Commit to commit the changes.
After a successful commit, the icons in front of all the files that Git is tracking will change to a blue padlock, the moment you make changes to any of the file, the icon will change to an orange pass mark icon indicating that the file has been modified.
I hope you find this article helpful.


 General
  News
News  Suggestion
  Question
  Bug
Bug  Answer
  Joke
Joke  Praise
  Rant
Rant  Admin
Admin 


