Table of Contents
This is a pretty simple tutorial dedicated to LINQ newbies who want to learn how to do CRUD operations using LINQ entities. I am sure many experienced LINQ players would criticize me for such a mild article. One of the biggest catches which I found is the in-memory update service by LINQ, which I think for any LINQ newbie is a must to understand.
So we will start with an understanding of the differences between in-memory updates and physical commits and then we will go deep into the code for each database operation. Again this article is one of those small sprints which I need to run so that I can complete the huge LINQ FAQ project.
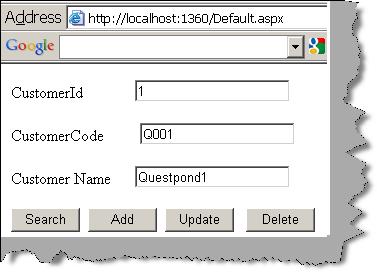
Screen shot of what we are going to talk about
- Are you a complete newbie? Read this.
- Do you want to define 1-* and *-1 using LINQ? Read this.
- Issues of multiple trips handled in this article? Read this.
- Do not know how to call stored procedures using LINQ? Read this.
Entity objects form the base of LINQ technologies. So when any data is submitted to database, it goes through the LINQ objects. Database operations are done through ‘DataContext’ class. As said previously, entities form the base of LINQ, so all the data is sent to these entities first and then it's routed to the actual physical database. Due to this nature of working database commits is a two step process. The first step is in-memory and final step is physical commits.
In order to do in-memory operation ‘DataContext’ has provided ‘DeleteOnSubmit’ and ‘InsertOnSubmit’ methods. When we call these methods from the ‘DataContext’ class, they add and update data in the entity objects memory. Please note these methods do not change / add new data in the actual database.
Once we are done with the in-memory operations and we want to send all the updates to the database, we need to call ‘SubmitChanges()’ method. This method finally commits data into the physical database.

So let’s consider a customer table (customerid, customercode and customername) and see how we can do the in-memory and physical commit operations.
So as a first step, we create the entity of customer class as shown in the below code snippet.
[Table(Name = "Customer")]
public class clsCustomerEntity
{
private int _CustomerId;
private string _CustomerCode;
private string _CustomerName;

[Column(DbType = "nvarchar(50)")]
public string CustomerCode
{
set
{
_CustomerCode = value;
}
get
{
return _CustomerCode;
}
}
[Column(DbType = "nvarchar(50)")]
public string CustomerName
{
set
{
_CustomerName = value;
}
get
{
return _CustomerName;
}
}
[Column(DbType = "int", IsPrimaryKey = true,IsDbGenerated=true)]
public int CustomerId
{
set
{
_CustomerId = value;
}
get
{
return _CustomerId;
}
}
}
So the first thing is to create a ‘datacontext’ object using the connection string.
DataContext objContext = new DataContext(strConnectionString);
Once you create the connection using the ‘DataContext’ object, the next step is to create the customer entity object and set the data to the object properties.
clsCustomerEntity objCustomerData = new clsCustomerEntity();
objCustomerData.CustomerCode = txtCustomerCode.Text;
objCustomerData.CustomerName = txtCustomerName.Text;
We then do an in-memory update in entity objects itself using ‘InsertOnSubmit’ method.
objContext.GetTable<clsCustomerEntity>().InsertOnSubmit(objCustomerData);
Finally we do a physical commit to the actual database. Please note until we call ‘SubmitChanges()’, data is not finally committed to the database.
objContext.SubmitChanges();
Below is the final LINQ code put together:
DataContext objContext = new DataContext(strConnectionString);
clsCustomerEntity objCustomerData = new clsCustomerEntity();
objCustomerData.CustomerCode = txtCustomerCode.Text;
objCustomerData.CustomerName = txtCustomerName.Text;
objContext.GetTable<clsCustomerEntity>().InsertOnSubmit(objCustomerData);
objContext.SubmitChanges();
So let’s take the next database operation, i.e. update.
As usual we first need to create a ‘datacontext’ object using the connection string as discussed in the create step:
DataContext objContext = new DataContext(strConnectionString);
Get the LINQ object using LINQ query which we want to update:
var MyQuery = from objCustomer in objContext.GetTable<clsCustomerEntity>()
where objCustomer.CustomerId == Convert.ToInt16(txtCustomerId.Text)
select objCustomer;
Do the updates and call ‘SubmitChanges()’ to do the final update.
clsCustomerEntity objCustomerData =
	(clsCustomerEntity)MyQuery.First<clsCustomerEntity>();
objCustomerData.CustomerCode = txtCustomerCode.Text;
objCustomerData.CustomerName = txtCustomerName.Text;
objContext.SubmitChanges();
Below is what the final LINQ update query looks like.
DataContext objContext = new DataContext(strConnectionString);
var MyQuery = from objCustomer in objContext.GetTable<clsCustomerEntity>()
where objCustomer.CustomerId == Convert.ToInt16(txtCustomerId.Text)
select objCustomer;
clsCustomerEntity objCustomerData =
	(clsCustomerEntity)MyQuery.First<clsCustomerEntity>();
objCustomerData.CustomerCode = txtCustomerCode.Text;
objCustomerData.CustomerName = txtCustomerName.Text;
objContext.SubmitChanges();
Let’s take the next database operation delete.
We will not be going through the previous steps like creating data context and selecting LINQ object. Both of them are explained in the previous section. To delete the object from in-memory, we need to call ‘DeleteOnSubmit()’ and to delete from final database, we need use ‘SubmitChanges()’.
objContext.GetTable<clsCustomerEntity>().DeleteOnSubmit(objCustomerData);
objContext.SubmitChanges();
Now in the final step, selecting and reading the LINQ object by criteria. Below is the code snippet which shows how to fire the LINQ query and set the object value to the ASP.NET UI.
DataContext objContext = new DataContext(strConnectionString);

var MyQuery = from objCustomer in objContext.GetTable<clsCustomerEntity>()
where objCustomer.CustomerId == Convert.ToInt16(txtCustomerId.Text)
select objCustomer;

clsCustomerEntity objCustomerData =
	(clsCustomerEntity)MyQuery.First<clsCustomerEntity>();
txtCustomerCode.Text = objCustomerData.CustomerCode;
txtCustomerName.Text = objCustomerData.CustomerName;
You can download the complete CRUD source code from here.
For further reading do watch the below interview preparation videos and step by step video series.


 General
  News
News  Suggestion
  Question
  Bug
Bug  Answer
  Joke
Joke  Praise
  Rant
Rant  Admin
Admin 


