Introduction
In this article, I will discuss how to do visual concealment calculations as they relate to two-dimensional top-down games. By visual concealment, I mean the act of hiding things that are either outside of the field of view or behind an obstacle.
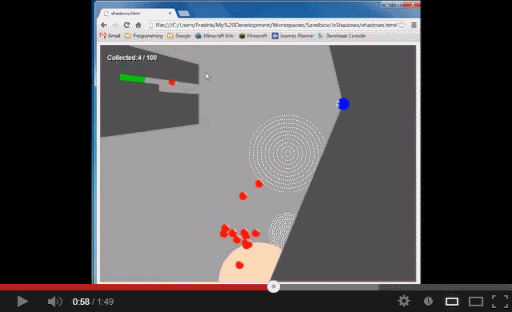
There is a JsFiddle available if you want to play around with the implementation.
Background
After playing around a bit with a very cool game, I realized that I wanted to try to do something similar for an Android game. Having just watched Jonathan Blow's talk on prototyping (which is a really good talk, by the way), I decided to knock up a simple prototype first and I felt that it would be more efficient to do that not on the Android platform as I then wouldn't have to wait for emulators or debuggers to start on physical devices. I went for a JavaScript approach instead and, while the result is very different from what I hope the finished Android game will be, it proved a very convenient way of making sure I could implement all the mechanics required.
Using the Code
There are two downloads for this article; visualconcealment.zip which contains the basic code for testing this stuff and prototype.zip that contains a (kind-of) playable alpha version of a game.
The code is all HTML and JavaScript organised in two Eclipse, one to show the basic math and one that is a very simple game. There is no need to have Eclipse installed to run the code, just open either example.html or game.html in your browser of choice that supports HTML5 Canvases.
I've tried to go for an Object-Oriented approach and also tried to organize my classes and files as I would have, had this been a C# or Java project. That means the project contains a lot of .js files, more than you see in most web projects of this size, and while this leads to a solution not as well suited for redistribution (as a library, for example), it does help I feel to have such a structure.
In addition to the parts I'm going to cover in this article, there is quite a lot of stuff relating to collision detection and moving around in a physics based (kind of) fashion. These might make the code a bit messier to read but I've left them in there as it makes it easier to play around and check out the effects of the concealment logic.
There is a limited number of unit tests included for the math-heavy classes that are using the QUnitJs framework.
Prerequisites
The prototype will be a two-dimensional, top-down view game (like Pac-Man, for example) and obstacles will be represented by lines defined by two points.
The concealment logic must cater for hiding what is outside the field of view (essentially what is behind the player) as well as hiding things that are behind obstacles. Hiding of areas not visible to the player must be rendered as a solid colour, obscuring any walls or other entities (such as computer controlled enemies), but must show a partial view of the entities if they are not completely obscured.
To achieve this, I've gone for an implementation approach that is quite different to the one used in the game mentioned above, a filled polygon will be rendered over any areas found to be obscured. This means it is harder to do dynamic lighting like where the viewable area gets darker, the further away it is from the observer, but for the game I am aiming for that will work just fine I think.
The Approach
There are essentially two different scenarios where a polygon has to be calculated:
- Outside of field of view
- Behind an obstacle
While both of them are fairly similar, there are some differences between them so I'll go through each one separately. This section is math-heavy and it will help if you have a bit of Vector-math experience because I won't go into details on how to add, subtract or scale vectors for example, and pretty much all of this logic boils down to a few vector operations.
I'm going to try to explain the math used using diagrams rather than equations, and leave the actual formulas in the code. What I want to describe is more about how to find the relevant points and areas rather than how to calculate them (if that makes sense).
Outside Field of View
Given an observer (blue triangle) in a "room" without any obstacles except the room's walls, and given the look-direction (green arrow) what falls outside of the field of view?

The obscured area would be the one shown in grey:
To find the vertices of that polygon, the following steps are taken:
- Extend a line along the left boundary of the field-of-view and see which wall it intersects and where, call this point A.
- Extend a line along the right boundary of the field-of-view and see which wall it intersects and where, call this point B.
- Extend a line from the player to each "corner" on the outside walls and take the ones where the line falls outside the field of view, call these P1-Pn.
In the diagram below, the red arrows find points A and B, while the yellow arrows find points P1 to P3. The dashed yellow line shows the result of step 3 but where the line falls within the field of view so it is ignored.
Intersections
To find the intersection between two lines, I'm relying on two classes; Vector2D and Segment.
The Vector2D class is (obviously) a representation of a two-dimensional vector holding an x and a y value. It supplies standard vector operations such as add and length.
The Segment class represents a line or a "segment", i.e., a distance running from point A to point B. It is built using two Vector2D s. The Segment class has a method for finding intersections aptly named findIntersection, this method implements a standard line-line intersection equation (which can be found along with a very good explanation over here).
Segment.findIntersection = function(a, b) {
	var x1 = a.a.x;
	var y1 = a.a.y;
	var x2 = a.b.x;
	var y2 = a.b.y;

	var x3 = b.a.x;
	var y3 = b.a.y;
	var x4 = b.b.x;
	var y4 = b.b.y;

	var denominator = (x1 - x2)*(y3 - y4) - (y1 - y2)*(x3 - x4);
	if (denominator == 0)
		return new SegmentIntersection(a, b, false, null, false, false);

	var xNominator = (x1*y2 - y1*x2)*(x3 - x4) - (x1 - x2)*(x3*y4 - y3*x4);
	var yNominator = (x1*y2 - y1*x2)*(y3 - y4) - (y1 - y2)*(x3*y4 - y3*x4);

	var px = xNominator / denominator;
	var py = yNominator / denominator;

	var point = new Vector2D(px, py);
	return new SegmentIntersection(a, b, true, point, a.contains(point), b.contains(point));
};
The reason the method findIntersection returns a SegmentIntersection object rather than just the intersection point is because line-line intersection can get a bit complicated.
By complicated, I mean that whilst the equation will give the intersection point (or nothing if the lines are parallel) with bounded lines starting at A and ending at B, the intersection calculated might not be within the bounds of the line but on some point on the extension of that line.
The SegmentIntersection class is used to record this information so that along with the actual intersection point, it also provides information on whether it intersects line a or line b or indeed both.
Being able to detect if a line-line intersection has occurred is convenient as it makes it easy to calculate things like if an enemy sees the player or not. This is done by creating a Segment from the enemy's position to the player's position and then iterate over all obstacles to see if there are any intersections, if there are; the player is obscured.
As a side note, I think it's worth mentioning that clever people would have just gone and used an already implemented math library (of which there are many), but since I like this stuff, I've gone and hand-rolled all of it.
Building a Polygon
Having identified all the vertices of the polygon, there is still one more thing we must do to get the polygon to render correctly. Since the vertices of a polygon have to appear "in order" for the polygon to render as a single surface, it is important that the found points are sorted. This can be either clockwise or counter-clockwise, it doesn't matter which one. If the vertices are not sorted in this way, the polygon might render incorrectly:
In this image, the points (as numbered) are not sorted in a clockwise or counter-clockwise direction so the polygon intersects itself, yielding an incorrect area covered.
Sorting the vertices is a matter of sorting them by how many degrees they are off the direction the player looks in (shown by the green arrow). Since JavaScript arrays support a convenient sort method, this can be done like this:
var direction = Vector2D.normalize(entity.lookDirection);
var origin = entity.position;
polygonPoints.sort(function(lhs, rhs) {

    if (lhs.equals(origin))
        return 1;

    if (rhs.equals(origin))
        return -1;

    if (lhs.equals(rPoint))
        return -1;

    if (rhs.equals(rPoint))
        return 1;

    if (lhs.equals(lPoint))
        return 1;

    if (rhs.equals(lPoint))
        return -1;

    var vl = Vector2D.normalize(Vector2D.sub(lhs, origin));
    var vr = Vector2D.normalize(Vector2D.sub(rhs, origin));

    var al = Vector2D.wrappedAngleBetween(vl, direction);
    var ar = Vector2D.wrappedAngleBetween(vr, direction);

    if (al < ar)
        return 1;
    else
        return -1;
});
Where wrappedAngleBetween gives a signed angle that wraps to all positive angles:
Vector2D.signedAngleBetween = function(lhs, rhs) {
	var na = Vector2D.normalize(lhs);
	var nb = Vector2D.normalize(rhs);

	return Math.atan2(nb.y, nb.x) - Math.atan2(na.y, na.x);
};

Vector2D.wrappedAngleBetween = function(lhs, rhs) {
	var angle = Vector2D.signedAngleBetween(lhs, rhs);
	if (angle < 0)
		angle += TWO_PI;

	return angle;
};
Walls and outer boundaries are owned by a Level class, so that class is best suited to do this calculation on a per entity (an entity being a player or a monster or whatever):
Level.prototype.calculateOutOfViewArea = function(entity) {

  var polygonPoints = [];

  polygonPoints.push(entity.position);

  var rDir = Vector2D.rotate(entity.lookDirection, entity.fieldOfView / 2);
  var lDir = Vector2D.rotate(entity.lookDirection, -entity.fieldOfView / 2);

  var rSegment = new Segment(entity.position, Vector2D.add(entity.position, rDir));
  var lSegment = new Segment(entity.position, Vector2D.add(entity.position, lDir));

  var lPoint = null;
  var rPoint = null;

  for(var i = 0; i < bounds.length; ++i) {
    var bound = bounds[i];
    var rBoundIntersection = Segment.findIntersection(bound, rSegment);
    if (rBoundIntersection.isIntersection && rBoundIntersection.pointIsOnA &&
        !fltEquals(0, Vector2D.angleBetween(rDir, Vector2D.sub(entity.position,
        rBoundIntersection.point)))) {
      rPoint = rBoundIntersection.point;
      polygonPoints.push(rBoundIntersection.point);
    }

    var lBoundIntersection = Segment.findIntersection(bound, lSegment);
    if (lBoundIntersection.isIntersection && lBoundIntersection.pointIsOnA &&
        !fltEquals(0, Vector2D.angleBetween(lDir, Vector2D.sub(entity.position,
        lBoundIntersection.point)))) {
      lPoint = lBoundIntersection.point;
      polygonPoints.push(lBoundIntersection.point);
    }

    var toCorner = Vector2D.sub(bound.a, entity.position);
    var angle = Vector2D.angleBetween(toCorner, entity.lookDirection);
    if (Math.abs(angle) > entity.fieldOfView / 2) {
      polygonPoints.push(bound.a);
    }
  }

  var direction = Vector2D.normalize(entity.lookDirection);
  var origin = entity.position;
  polygonPoints.sort(function(lhs, rhs) {

    if (lhs.equals(origin))
      return 1;

    if (rhs.equals(origin))
      return -1;

    if (lhs.equals(rPoint))
      return -1;

    if (rhs.equals(rPoint))
      return 1;

    if (lhs.equals(lPoint))
      return 1;

    if (rhs.equals(lPoint))
      return -1;

    var vl = Vector2D.normalize(Vector2D.sub(lhs, origin));
    var vr = Vector2D.normalize(Vector2D.sub(rhs, origin));

    var al = Vector2D.wrappedAngleBetween(vl, direction);
    var ar = Vector2D.wrappedAngleBetween(vr, direction);

    if (al < ar)
      return 1;
    else
      return -1;
  });

  return polygonPoints;
};
In the above code snippet, variables rDir and lDir represent the outer bounds of the field-of-view. These are calculated by taking the look-direction and then rotating that vector by half the field-of-view radians, and that rotation has to be done twice. Once negative to find the left boundary and once positive to find the right boundary:
var rDir = Vector2D.rotate(entity.lookDirection, entity.fieldOfView / 2);
var lDir = Vector2D.rotate(entity.lookDirection, -entity.fieldOfView / 2);
These vectors then form what is illustrated as the two red vectors in the diagram above.
Calculating the vertices and sorting them using the above method yields a polygon like this:
Behind an Obstacle
Calculating the obscured area behind an obstacle in the field-of-view is basically calculating the shadow cast by the obstacle, had the observer been a light source. This is very similar to calculating the polygon that covers everything outside the field-of-view but differs in that it starts with the obstacle, rather than the observers field of view.
- Extend a line from the observer through point a on the obstacle (
Segment) and see where it hits a boundary wall, call this point A. - Extend a line from the observer through point b on the obstacle (
Segment) and see where it hits a boundary wall, call this point B. - Extend a line from the player to each "corner" on the outside walls and take the ones where the line falls between the obstacle's a and b, call these P1-Pn.
In the diagram below, the red arrows finds point A and B, while the yellow arrows finds the corners, note that in this example, there is only one yellow arrow meeting the criteria of falling between A and B.
The shadow polygon that needs to be drawn is then the one that is made of the points on the obstacle and where the red arrows intersects the outer walls and the yellow (not dashed) arrow intersect the outer boundary corner.
Code-wise, this is very similar to the code finding the area outside the field of view with the main difference being that it's obstacle based, it's called once per obstacle. Again, the same sort of ordering of the vertices is required as the polygon has to be rendered in order.
Level.prototype.calculateShadowArea = function(entity, wall) {
  var polygonPoints = [];
  var endpoints = wall.getEndPoints();

  for(var i = 0; i < endpoints.length; ++i) {
    var wallPoint = endpoints[i];
    var observerToWallEndPoint = new Segment(entity.position, wallPoint);

    polygonPoints.push(wallPoint);
    for(var j = 0; j < this.bounds.length; ++j) {
      var bound = this.bounds[j];

      var wallIntersection = Segment.findIntersection(observerToWallEndPoint, bound);
      if (wallIntersection.isIntersection && wallIntersection.pointIsOnB &&
          fltEquals(0, Vector2D.angleBetween(observerToWallEndPoint.getAtoB(),
          Vector2D.sub(wallIntersection.point, entity.position)))) {
          polygonPoints.push(wallIntersection.point);
      }
    }
  }

    for(var i = 0; i < this.bounds.length; ++i) {
        var bound = this.bounds[i];

        var observerToBoundryCornerA = new Segment(entity.position, bound.a);
        var cornerIntersection = Segment.findIntersection(wall, observerToBoundryCornerA);
        if (cornerIntersection.isIntersection && cornerIntersection.pointIsOnA &&
            !fltEquals(0, Vector2D.angleBetween(observerToBoundryCornerA.getAtoB(),
            Vector2D.sub(entity.position, cornerIntersection.point)))) {
            polygonPoints.push(observerToBoundryCornerA.b);
        }
    }

  var source = new Segment(entity.position, wall.a);
  polygonPoints.sort(function(lhs, rhs) {
    if (lhs.equals(wall.a))
      return 1;

    if (rhs.equals(wall.a))
      return -1;

    if (lhs.equals(wall.b))
      return -1;

    if (rhs.equals(wall.b))
      return 1;

    var p2lhs = Vector2D.sub(lhs, source.a);
    var p2rhs = Vector2D.sub(rhs, source.a);

    var lhsAngle = Vector2D.angleBetween(p2lhs, source.getAtoB());
    var rhsAngle = Vector2D.angleBetween(p2rhs, source.getAtoB());

    if (lhsAngle < rhsAngle) {
      return 1;
    }
    else {
      if (lhsAngle > rhsAngle) {
        return -1;
      }
    }

    return 0;
  });

  return polygonPoints;
As a convenience the Segment class exposes its two endpoints (Vector2Ds a and b) as an array as well through method getEndPoints, this tidies up code that needs to process across all endpoints as they can be expressed as loops.
The Segment class also has a method called getAtoB which returns a vector v such that v = segment.b - segment.a, which of course represents the line from a to b. Or in code:
Segment.prototype.getAtoB = function() {
    return Vector2D.sub(this.b, this.a);
};
Again, this is there mainly so that code that uses Segment becomes a little neater, and an appropriate optimization would probably have been to cache this value.
Summary
The observant reader might point out that this approach isn't very efficient, if an obstacle is completely behind another obstacle, the shadow for it will still be calculated and rendered! This is a correct observation and I've deliberately left that optimisation out as I am going to redo all of this anyway for my Android version. The solution would be to check if both end-points of an obstacle are inside an already calculated shadow-area.
Rendering
Because the non-visible areas of the map are calculated as a polygon to be filled with a solid color, the level should be rendered in this order:
- Level background
- Enemies and any other entities
- Field-of-view exclusion and obstacle shadow areas
- Walls/obstacles
- Player
This rendering order allow for enemies to be partially visible as they come out of an obscured area.
The below images show an example rendering with no occlusion, obstacle occlusion and finally both obstacle and field-of-view (red lines are obstacles);
No obscured areas rendered, map is fully visible.
Areas hidden by obstacles are dark-gray.
Areas hidden by obstacles and outside field-of-view are dark-gray.
Points of Interest
I was using JavaScript for prototyping, but the experience of writing simple games in JavaScript was quite pleasant, and I might consider simply turning this little prototype into an actual game.
I was impressed by QUnitJs, the unit-test framework I used for testing the math-heavy parts. I haven't really used any other test framework for JavaScript so I haven't got anything to compare to but it worked really well and it was easy creating test cases using it.
If you're not already unit testing your code, you should check it out at qunitjs.com.
The game prototype in the prototype.zip archive is far from finished, it is possible to play around with it but you can't beat it.
Use WASD to control the blue guy, avoid the red guys, eat green flashing food and drop of in the pink-ish area. Shoot red guys with SPACE but that drains your energy.
History
- 2013-02-13: First version


 General
  News
News  Suggestion
  Question
  Bug
Bug  Answer
  Joke
Joke  Praise
  Rant
Rant  Admin
Admin 


