Introduction
The original Night Stalker game for Mattel's Intellivsion console was awesome! I played that until the paddles broke, and this is the second time I've recreated the game, first in Visual Basic 6.1 using picture boxes to animate the characters, and now in C# using the Sprite Editor described in one of my previous articles. This time, I've taken some liberty in creating the sprites for the game, and have modified the map just for the hell of it, but it's still essentially the same game.
With respect to coding, programmers might find interesting the way-points scheme which tells the AI-characters how to get from one end of the map to another using a table rather than calculate the path every time, in order to boost performance. There's also a miniaturized map used exclusively for collision detection.
So, if all you want to do is reminisce about an old favourite, have a look at this, but if you think way-points and a mini CD-map can help your code, then you have an excuse to do both.
The Original
Intellivision's Night Stalker had a bit of a following, partly due to the dark nature of the game and the eerie heartbeat sound-effect which affected everyone within hearing distance, but also for the simple reason that it was a great game. Designed and programmed by Steve Montero who "is an expert on robotics, it was natural for him to program Night Stalker because the game's main antagonists are all robots. The basics are this: you're stuck in a maze, and robots keep appearing out of a robot nest. The more you kill, the more there are, and the better they get at hunting you. Meanwhile, you have nothing but a six-shooter, but you have to hunt the maze in order to reload, and the pace never lets up. There are bats and a spider to complement the array of attackers at your heels, and though they do nothing but put you to sleep, it's best if you stay awake just a little while longer.
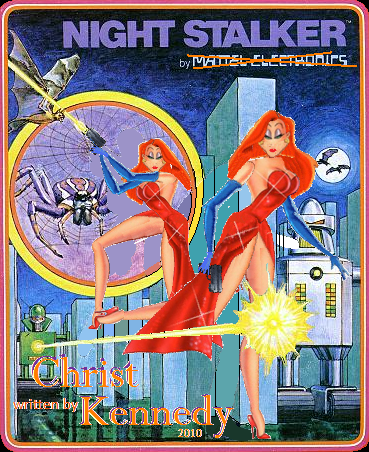
Introducing... Jessica Rabbit
Instead of using the old graphics, which I thought were amazing at the time, I decided to create a new set of characters using the Sprite-Editor mentioned above. The player's character is none-other than your favourite, and always sexy, Jessica Rabbit. We could make up a story about how Roger Rabbit's been framed, and this is somehow the only way for Jessica to bust him out, but my local library didn't have a copy of Who Framed Roger Rabbit?, so I didn't get any sound-bytes, and though I could have tried YouTube, we'll just call that an excuse to leave Roger at home and take Jessica out instead. He was always a third wheel anyway.
Aside from the new characters and the fact that the player and the badder baddies can shoot diagonally, it's pretty much exactly the way I remember it. So go ahead, and try not to have fun playing it.
The Code
What's a Way-Point?: The Basics
The idea of way-points is one that I've described in passing in an article called Battlefield Simulator, but did not include any source code along with the cursory mention made there. A way-point, according to Wikipedia, is "any mapped reference point on a route that can be easily identified". We'll go with that because it means just about the same thing here. Since this game is played out entirely on a single unchanging map, these way-points can be created by the programmer at design time. For this particular game, perhaps the use of way-points is a bit of an overkill since the map is relatively small. However, when you're dealing with huge maps and you need to get your characters along a correct path in real-time, way-points are one means by which this can be achieved.
What's a Way-Point?: The Core
Night Stalker uses three different maps that all reflect the same maze. The first one is the one the player sees on the screen, and that one is used exclusively for graphics output, while the second one is the way-points map which is used for the express purpose of creating the way-points database. Looking at the way-points map, MapsWP.png, included in the source-code's resource directory, you'll see that it looks like a black and white version of the game map, with some yellow lines and a few red dots. Then, if you zoom in on the image, you might notice that the top left-most pixel is the same color as the red dots, and the pixel next to it is the same color as the walls. That's because these two colors are used to identify the red-colored way-points and the black-colored impasse points that make up the walls.
The way-points exist, at this point, solely on an image, and must be transferred into memory by first scanning the entire bitmap until we've found all the red dots and have a complete array of all the way-points in the game. Next, the 'rebuild way-points' algorithm, which is run during the development stage, searches for each way-point's neighboring way-points, and creates a list of all neighbors which are within a given pre-determined range, keeping these in a separate array of a structure type defined below, and called, appropriately enough, 'neaghbours':
public struct udtShortestPathToWayPoint
{
    public classWayPoint wp;
    public int index;
    public string strPath;
}
With this information, the AI-characters can find themselves at a way-point, and know the path to any of the neighboring way-points. And, since all travel plans made by the AI-characters are with reference to a way-point, all they really need to know is which neighbor to visit next when what they want to do is get somewhere on the other side of the map. The problem here is that though they know how to get from, say Detroit to Ann Arbor, they don't necessarily know how to get to Jackson, even though they only have to keep driving. So, instead of going anywhere, they sit in their car trying to decide whether they should go to Windsor, Ann Arbor, or Pontiac, because they don't know which way to Jackson from Detroit.
Now, if all you had were local maps that told you how to get from one town to the neighboring towns, and you wanted to cross the country, then you'd need a table in which you could cross reference the name of the town you're in along the top edge of the table with the name of the town you want to go to along the side edge of the table, and read the name of the town you need to get to next. It would be like those tables you find on maps now that tell you the distance between two cities, but instead of the number of miles to travel from A to B, it would tell you where to go from wherever you are now.
The integer values contained in the nextWPTable[,] array in Night Stalker refer to the indices of the current way-point's neighbor list. Consider the code taken from classRobot() of the Night Stalker game where the robot needs to find the path to the correct way-point along his route to his final destination.
if (udrMove.WPnext != udrMove.WPtarget)
{
    udrMove.strPath += udrMove.WPnext
        .neaghbours[
           cLibWPs.nextWPTable[udrMove.WPnext.index,
                               udrMove.WPtarget.index]
                   ].strPath;

    classWayPoint WPNext
        = udrMove.WPnext.neaghbours[
                     cLibWPs.nextWPTable[udrMove.WPnext.index,
                                         udrMove.WPtarget.index]
                                   ].wp;
    udrMove.WPfrom = udrMove.WPnext;
    udrMove.WPnext = WPNext;
}
This sample code demonstrates two references to the table. The first sets the path described in the "N", "E", "S", "W" directions, listed in a string field called strPath. The WPnext field of the udrMove structure is of type classWayPoint and this way-point's neighbors list is being referenced using an index gotten from nextWPTable[,] using WPnext.index (the WPs[] array index of the way-point we're looking at) as the column component of the 2-dimensional array, and WPtarget.index (the destination way-point's index in the WPs[] array) as the row component for the same 2-dimensional nextWPTable. This string tells the robot what path to travel, pixel-by-pixel, to get to the next way-point along its way to the ultimate target destination.
The second reference sets a temporary WPNext to the same intermediate way-point along the route which will now be the way-point, subsequent passes along this bit of code for this robot will use.
To help clarify the concept, have a look at the image below which shows the entries needed for the two paths 1-4-5 and 2-3-6 in the 6x6 example table. Note that though the entries in Night Stalker are integer values corresponding to the index (of the next way-point through which the character needs to travel on its way to some final destination) in the current way-point's neighbors list, this example uses the 'name' of the way-points to further simplify the example.

The blue example starts at WP #1, and wants to go to WP #5, so the AI looks at the table entry (1,5) and reads '4', which means that it will first have to travel through WP #4 on its way to #5. Then, when on WP#4, the AI cross references current (4) with target (5), and looks at table entry (4,5) to read that '5' is the next and final way-point. Similarly, for the orange example which starts at 2 and wants to get to 6, the AI looks at (2,6) and reads '3', then looks at (3,6) and reads '6'.
Mini Collision Detection Map
As briefly described above, the Night Stalker collision detection scheme runs entirely on a miniaturization of the game map. The original map has been miniaturized using an algorithm which averages the colors of the pixels in a 5x5 region of the main map and then sets a single pixel to the most important color in that original map. This was done with a black and white map of the walls before the output graphics map was created, so the mini map consists mostly of black and white pixels. I say mostly because there are other collision colors that are used to heighten the game, but the simplest way to look at it is black and white, and I'll explain the other colors in more detail a little further on.
The concept of a miniaturized collision detection map takes advantage of the smaller scale's diminished number of pixels in doing pixel-by-pixel testing for collisions, thus accelerating the collision tests considerably. The result is an approximation up to five pixels off, which was deemed acceptable for this game. Since all the AI characters march along rails between way-points, the only wall collisions that need detection are bullets objects and the player character. To do this, a structure containing a description of the object is created that the collision detection algorithm can understand.
public struct udtCDInfo
{
    public Size sz;
    public Point ptRelPos;
}
The size field (sz) describes, in pixels, how large the object is to be represented in the miniaturized collision detection map, and the point field (ptRelPos) describes the position of the object's center relative to the top left corner of this rectangle (sz). Here's is a typical example:
udrCDInfo.ptRelPos = new Point(4, 4);
udrCDInfo.sz = new Size(7, 14);
which places Jessica's center at (4,4) on a rectangle of size (7,14). The options to view these while running the debugger are in the formNightStalker's:
public formNightStalker()
function, and are included here below:
cLibCD.bolDrawCDInfo =
System.IO.Directory.GetCurrentDirectory().ToUpper().Contains("DEBUG");
if (false && cLibCD.bolDrawCDInfo)
cLibCD.drawCDOnMap(ref bmpMap);
where cLibCD.bolDrawCDInfo draws yellow rectangles around all bullets, robots, and Jessica, while the call to cLibCD.drawCDOnMap(ref Map) draws small yellow 5x5 pixel squares where collision squares appear on the mini bmpCD map.
Snares and Bunker Busters
The other colors which the CDmap includes are for 'snares' which only cause collisions during a brief period after Jessica has woken up from having been put to sleep by the bats or spider and is 'groggy' for a time. These are painted 'green' by the drawCDOnMap() function.
Here's a zoomed partial view of the CD map.
The only real difficulty in creating and using this collision detection scheme was in writing the 'bunker-buster' bullets, the higher up and more deadly of which fiends fire at Jessica. I wasn't sure how I was going to do this, but then decided on using separate colors to describe the bunker's collision pixels. They can be seen in the bmpCD file contained in the game's resources directory. At the start of a new game, the game-time CD map is written over with a fresh copy of this bitmap. Looking at the mini-map, you'll see that the bunker's left, bottom, and right walls are all a dark shade of grey, with the inside of the bunker a lighter shade of grey. The light colored interior blocks all bullets from travelling through, but do not block Jessica from moving around. While the dark shade of grey prevents Jessica from escaping through a side door, forces her to exit through the 'roof' at the top of the bunker.
Then, when the badder meanies come around with bunker-buster bullets to knock Jessica out of her hole, the bunker must be destroyed. To do this, the collision detection first detects a collision between a bunker-buster and the bunker, then it calls the function damageBunker().
DamageBunker() is where it all happens. The resources directory has a mini bunker wall image, a game-sized bunker image, and at run-time, we have a bmpCD copy of the mini CD map. At the start of damageBunker(), the location of the damage is known, so the only thing left to do is to actually damage the bunker. This is quite easy: fill a white ellipse of some preset size on the spot the collision occurred, and move on.
But if you do that, it won't demonstrate to the player how much danger Jessica is in if she remains in her bunker after all the damage it has incurred. So, the real problem is in showing the player that the bunker is being destroyed. To do this, we first cut out the bmpCD map's bunker onto a temporary bitmap, 2 pixels too wide and 2 pixels too tall. Then, because we need to create a mask out of what is left of the damaged bunker (damaged from a previous hit), we have to make the walls and the interior a solid uniform color. But, if the walls (dark grey) have been damaged, then a flood-fill at one point does not guarantee that the flood will fill the entirety of what remains of the damaged bunker's walls. Therefore, to guarantee this flood fill operation catches the disconnected fragments of the walls, a one-pixel wide border of the same wall-color as the walls (dark grey) is drawn around the whole temp copy we just cut out from the mini bmpCD game map. Then, we do a flood-fill to color in the dark-grey walls to the lighter grey color of the interior, and recopy this to a smaller bitmap 2-pixels narrower and 2-pixels shorter, with nothing but the mini bunker, damaged, but now of uniform color.
Now, knowing where the collision has occurred, we do the current bullet's damage on this copied and uniform colored map, by filling a white ellipse at that location, coloring the damage 'white'.
This bunker now needs to be used for two reasons:
- As the source to create a larger mask which will put a white 'hole' where the damaged bunker is.
- As a mask over the miniCD bunker walls, which we'll need to redraw the collision walls that bar Jessica inside the bunker, before pasting this mini-bunker image back onto the mini CDmap we're using for all our wall-collisions.
Let's look at the first problem: letting the player see the damage. We have a miniaturized, uniform-colored image of the damaged bunker. To first resize it to game-size, it is scanned pixel-by-pixel, and for each light-grey pixel that describes un-damaged bunker, the mask bitmap of a game-sized bunker gets a new fillRectangle drawn onto it. This fill rectangle can be of any color as long as the entire mask bitmap uses the same color, which I'll call 'clrBunkerInterior' here. Then, when this bitmap is complete, it calls MakeTransparent() with the same clrBunkerInterior color to replace the default 'white', making this light-grey color transparent so that when it is subsequently painted over top of a copy of the complete undamaged game-sized bunker image, only the white gets drawn, and we have a game-sized image of the damaged bunker.
This game-sized damaged bunker image is made transparent with white as the transparent color, during every game-cycle's animation call, so that we only see whatever is left, and the white 'hole' allows Jessica to escape through any holes in the walls. You can see this in the code excerpt below:
Bitmap bmpRealMask = new Bitmap(cLibHelper.bmpBunker.Width,
cLibHelper.bmpBunker.Height);
SolidBrush brsClrDoor = new SolidBrush(clrBunkerDoor);
SolidBrush brsWhite = new SolidBrush(Color.White);
using (Graphics g = Graphics.FromImage(bmpRealMask))
{
g.FillRectangle(brsWhite,
new Rectangle(0,
0,
bmpRealMask.Width,
bmpRealMask.Height));
for (int intX = 0; intX < bmpCDBunker.Width ; intX++)
for (int intY = 0; intY < bmpCDBunker.Height ; intY++)
if (bmpCDBunker.GetPixel(intX, intY) == clrBunkerDoor
|| bmpCDBunker.GetPixel (intX, intY) == clrBunkerWalls)
g.FillRectangle(brsClrDoor,
new Rectangle((intX) * 5,
(intY ) * 5,
5,
5));
else
g.FillRectangle(brsWhite,
new Rectangle((intX ) * 5,
(intY ) * 5,
5,
5));
}
bmpRealMask.MakeTransparent(clrBunkerDoor);
using (Graphics g = Graphics.FromImage(cLibHelper.bmpBunker))
g.DrawImage(bmpRealMask, new Point(0, 0));
Drawing the damaged walls onto the mini map requires that the miniature walls be masked with a transparent version of the miniature damaged bunker of uniformed color and copying this over top of the undamaged mini-walls image to draw only the white (damaged part) of the bunker over the walls. Then, the damaged walls image is copied over top of the damaged bunker before being pasted onto the mini bmpCD map.
Loader Lock? Not a Problem
I'm not sure how to deal with the 'LoaderLock' issue which the debugger insists on warning me about every time I run a project that uses DirectX audio, but pressing F5 a second time after launching the project clears that up, and the executable makes no issue of it. Apparently, there's a way to tell your C# project to just ignore this loader-lock warning, but I haven't found it yet.
Jessica bad? And she said she was just drawn that way!
Christ Kennedy grew up in the suburbs of Montreal and is a bilingual Quebecois with a bachelor’s degree in computer engineering from McGill University. He is unemployable and currently living in Moncton, N.B. writing his next novel.


 General
  News
News  Suggestion
  Question
  Bug
Bug  Answer
  Joke
Joke  Praise
  Rant
Rant  Admin
Admin 


