Objective
The purpose of this article is to demonstrate how to create a pair of test harnesses from the very beginning, so that both conduct identical tests on a common WindowsForms application using data from an XML input. In the article I will present
- Examples in C# and Visual C++/CLI.
- Automated testing of a multi assembly application.
- A comprehensive approach to creating and running tests in Test Explorer.
- Fetching Test Data from XML using the TestMethod name to form an XPath query.
- Selection from ComboBoxes where the contents of one are dependent on the value chosen in its predecessor.
- Textbox population.
- Command button clicks.
- MenuStrip actions.
- Navigation between forms.
Example Origin
The example is driven by a system I am working on, where I need to create in excess of 400 purchase and consumption transactions across four different instances on a daily basis. Working alone, this would consume all the time I have available towards further development of the concluding features and reports so User Interface Automation is the only show in town for this requirement.
Because I am using Express products, I do not have the benefit of being able to record tests. Like so many others, a trawl of the web revealed a tangle of theory and examples that offered little in the way of clear instruction on how to get started.
In addition to not showing how to set up a test project using the Test Explorer, they were all confined to testing single form examples where the form presented was tied to the process invoked. In my example the form associated with the process I will invoke appears in third place!
My offering here has its origins largely in these excellent sources of material, fundamental to getting me started.
- [TATAR] - "WPF UI Automation" by Calin Tatar, right here on CodeProject
- [KAILA] - "Automate your UI using the Microsoft Automation Framework" by Ashish Kaila, also here on CodeProject
- [JOSHI] - Beginning XML with C# 2008 From Novice to Professional" By Bipin Joshi
- [FRASER] - "Pro Visual C++/CLI and the .NET 3.5 Platform" By Stephen R G Fraser
- [SANSANWAL] - "Logging method name in .NET" by S Sansanwal, again here on Codeproject
- [MCCAFFREY] - "Test Automation with the New menuStrip Control" by Dr. James D. McCaffrey
[TATAR] got me off the ground, and due to how I will evolve my solution using XML is likely to most closely resemble how my final production version will look. But initially I learned very little from it, aside from plugging a hardcoded value into an already running application.
[KAILA] on the other hand, launches the application under test from within the test itself, and makes use of the Visual Studio Test Explorer, which I was interesting in trialing from the outset. Both offer good theoretical explanations of the Microsoft UI Automation Framework, so I will not revisit that here. I learned to use the Automation tree form [KAILA], but he used Spy++ to identify the form attributes. This worked well with the windows calculator where the element ID's did not change, but I quickly found that I could not rely on those values as my application under test was assigned different ID's on each run. By that stage I had learned enough form [TATAR] to use the element name of the different form attributes.
The text that follows presents my experience the building of an automated test harness as it happened. The example I build is presented in both C# and Visual C++/CLI.
Introducing the sample application - and its heritage
I have created an sample test application using three assemblies from my ticketing system, the main menu, the logon control form and the form to select the bus service being operated. Although the process is kicked off using the EXE produced by the compilation of the main menu, it is the last of the three forms to be presented, adding an extra twist to the tale.
| The Source Code included |
I have attached four versions of the application under test (in the demo app folder). The first two illustrate sample bugs found while testing, V3 is used to demonstrate the full test harness. V1 to V3 are all written in Visual C++/CLI but V4 has its main form written in C# just to illustrate that there is no difference in behaviour where the application under test uses a different .NET language so long as the functionality remains constant.
You will also find two versions of the test harness, UnitTestProject1 contains the C# example - while VTRunServiceSln contains the Visual C++/CLI variation.
Before any of the code can run, search it for references to C:\\SBSB\\Logs\\ and C:\\SBSB\\Training - C#\\ArticleUIAutomation\\DemoApp, or create folders to satisfy these paths.
VTRunServiceSln may not run straight off. I found that when I moved it to a new folder, I was unable to rediscover the tests. The C# implementation had no such issues. If proves to be the case, follow my steps for setting up the Visual C++/CLI example then paste in the final code contained in the download.
The Demo app will need to be compiled in order to run the examples - it was too big to upload. |
Getting Started
C#
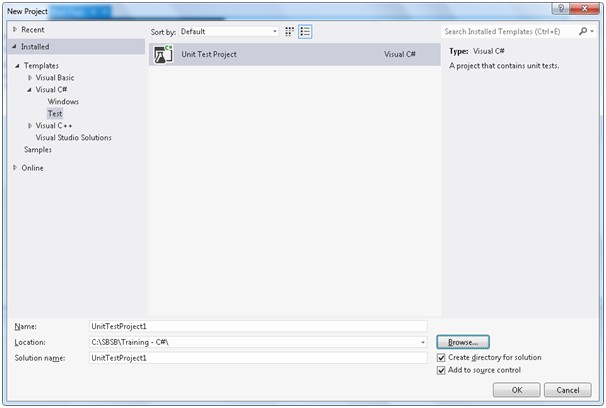
Open a new C# project, choosing Test and Unit Test Project as illustrated
If the system asks you to connect to a Team Foundation Server, cancel the dialog unless you wish to go down that route.

I named my project UnitTest1 and this was the default created for me by Visual studio:
Visual C++/CLI
Open a new Visual C++/CLI project, choosing Test and Managed Test Project as illustrated
I named my project VTRunServiceSln (not the illustrated CPPUnitTest) and this was the default created for me by Visual studio:
I had significantly more autogerated code in C++/CLI.
Connecting to the Automation Framework
The first item on the agenda for my harness projects is to connect them to the User Interface Automation framework. In the references include: UITestAutomationClient and UITestAutomationTypes. The example used System.Core, System.XML and System.XML.Linq so these are included too. Add using clauses for the Automation and Reflection namespaces
C#
Take the autogenerated code:
using System;
using Microsoft.VisualStudio.TestTools.UnitTesting;

namespace UnitTestProject1
{
    [TestClass]
    public class UnitTest1
    {
        [TestMethod]
        public void TestMethod1()
        {
        }
    }
}
And add:
using System.Windows.Automation;
using System.Reflection;
Visual C++/CLI
Take the autogenerated code:
#include "stdafx.h"
using namespace System;
using namespace System::Text;
using namespace System::Collections::Generic;
using namespace Microsoft::VisualStudio::TestTools::UnitTesting;
namespace CPPUnitTest
{
[TestClass]
public ref class UnitTest
{
private:
TestContext^ testContextInstance;
public:
property Microsoft::VisualStudio::TestTools::UnitTesting::TestContext^ TestContext
{
Microsoft::VisualStudio::TestTools::UnitTesting::TestContext^ get()
{
return testContextInstance;
}
System::Void set(Microsoft::VisualStudio::TestTools::UnitTesting::TestContext^ value)
{
testContextInstance = value;
}
};
#pragma region Additional test attributes
#pragma endregion
[TestMethod]
void TestMethod1()
{
};
};
}
And add:
using namespace System::Windows::Automation;
using namespace System::Reflection;
Connecting to the Application Under Test
I like the way [KAILA] connected to the application under test using a dedicated class. This proved cleaner in C# than in Visual C++/CLI.
C#
Right click on the project and choose Add Class to see the dialog shown here:
Use VTService.cs as the name – to reflect the application that this class will load up for testing:
using System;
using System.Collections.Generic;
using System.Linq;
using System.Text;
using System.Threading.Tasks;

namespace UnitTestProject1
{
    class VTService
    {
    }
}
Retain System and replace the others with:
using System.Diagnostics;
using System.Threading;
using System.Windows.Automation;
Add: IDisposable to the class definition bringing it to:
using System;
using System.Diagnostics;
using System.Threading;
using System.Windows.Automation;

namespace UnitTestProject1
{
    class VTService : IDisposable
    {
    }
}
Add a private variable to hold the VTSerivce process:
private Process _VTServiceProcess;
And a basic constructor:
public VTService()
{
}
Add a statement to the constructor that will start a process for the application being tested.
_VTServiceProcess = Process::Start("C:\\SBSB\\Systems\\Debug\\VT_Service.exe");
Add a "Dispose" method:
public void Dispose()
{
    _VTServiceProcess.CloseMainWindow();
    _VTServiceProcess.Dispose();
}
Add a statement to TestMethod1 (in UnitTest1.cs) that will launch the VTService application:
using (VTService vtServ = new VTService())
{
}
Visual C++/CLI
Right click on the project and choose Add Class to see the dialog shown here:
It will be named VTService.cpp as the name – to reflect the application that this class will load up for testing (class library is not available as a template – may be a restriction of using Express).
This generates a blank .cpp in which we will define a class to access the VTService application.
Add this code:
#include "stdafx.h"
using namespace System;
using namespace System::Diagnostics;
using namespace System::Threading;
using namespace System::Windows::Automation;

namespace VTRunServiceTests
{
	private ref class VTService
	{
	};
}
Note that IDisposable is not necessary here – one of the benefits of cpp.
Add a private variable to hold the VTService process:
      private:
Process ^_VTServiceProcess;
And a basic Constructor
public:
    VTService()
    {
    }
Add a statement to the constructor that will start a process for the application being tested.
_VTServiceProcess = Process::Start("C:\\SBSB\\Systems\\Debug\\VT_Service.exe");
Add an instruction to TestMethod1 of UnitTest.cpp that will launch the application:
VTService ^vtServ = gcnew VTService();
    try
    {
        ;
    }
finally
{
    delete vtServ;
}
It is not recognizing VTService as a valid class!
For the moment I am resolving this with
#include "VTService.cpp"
in UnitTest.cpp – again I am putting it down as an express limitation.
The First Trial Run
Open your Test Explorer window (if its not already open). Compile up everything and choose Run All in the test explorer panel or right click on TestMethod1 and choose Run Selected. You should see something like this appear:
We have successfully automated the opening of our application – not very spectacular as an end in itself but a very key starting step on the road to automated UI testing.
Now we need to start doing things
The default TestMethod1 will populate the username and password text boxes with "suser" and "spass", then click the log on button to test a successful log on. But in advance of that we have more ground work to do.
First add a private AutomationElement attribute:
In C#:
private AutomationElement _ VTServiceAutomationElement;
In Visual C++/CLI:
AutomationElement ^_ VTServiceAutomationElement;
Next we add some code to the constructor to discover the various automation elements
| NOTE |
| Initially it was my understanding was that the ct variable will restrict the tree produced to 50 elements. This is not so. The test harness makes 50 attempts to find the first form in the application being tested. The value in the name property is the caption of the first form presented. In my sample application this comes from the login assembly: "Enter your Logon Details". |
A sleep is included to force processing to wait for the automation elements to become available.
In C#:
int ct = 0;
do
{
    _VTServiceAutomationElement = AutomationElement.RootElement.FindFirst(TreeScope.Children, new PropertyCondition(AutomationElement.NameProperty, "Enter your Logon Details));
    ++ct;
    Thread.Sleep(100);
}
while (_VTServiceAutomationElement == null && ct < 50);
In Visual C++/CLI:
int ct = 0;
do
{
	_VTServiceAutomationElement = AutomationElement::RootElement::FindFirst(TreeScope::Children, gcnew PropertyCondition(AutomationElement::NameProperty, "Enter your Logon Details"));
	++ct;
	Thread::Sleep(100);
}
while (_VTServiceAutomationElement == nullptr && ct < 50);
It’s also a good idea to report an error if no elements were discovered:
In C#:
if (_VTServiceAutomationElement == null)
{
    throw new InvalidOperationException("VT_Service must be running");
}
In Visual C++/CLI:
if (_VTServiceAutomationElement == nullptr)
{
	throw gcnew InvalidOperationException("VT_Service must be running");
}
Everything on the screen is part of the windows desktop tree but my interest is confined to the subtree for my sample application. At this point in the exercise, all I have done is launch the sample application and find its root in the UI tree where I want to commence testing. As the test method stands, there is no further test code, but already I am seeing two different behaviours applying the same method to the same application differing only in the .NET flavour used.
C# - flashes through the login form to the "Set your Route and Service" and reports a successful conclusion.
C++/CLI – Opens the login form and waits as expected but reports failure!
This brings us to one of the conundrums of automated testing. Where does the fault lie? Is it in the test harness or the application being tested? In the past I have known test managers reluctant to embrace automation because of this concern.In this instance the finger of suspicion points at both. I am going to rework the sample application to include an audit log written to a text file, and use the IDE debugger on the test harness.If you’ve been building your test harness following the steps above, the you can replicate this misbehaviour using V1 of the demo application.
So carrying on, V2 of the demo application logs its activity to C:\SBSB\Logs. On this occasion the bug was in the demo application – the Logon assembly needed a form closing event. The different behaviour in the test harnesses was down to the presence of the Dispose() method in VTService.cs. This is one of the areas where C# and C++/CLI differ
The first test - logging on
Now its time to start thinking about a test. Typically my first test(s) on any application is(are) a basic one(s) to prove that the functionality works to an extent that allows meaningful testing to take place.For the application under test here, that will be post valid values to the username and password text boxes, click the login ok button and proceed to the next form. After all if I can’t log in there’s little point attempting much more.
First up I declare a private member variable for it of type AutomationElement in the VTService class.
In C#:
private AutomationElement _usernameTextBoxAutomationElement;
In Visual C++/CLI:
private AutomationElement^ _usernameTextBoxAutomationElement;
Then tell the constructor to go look for it in the element tree:
In C#:
_usernameTextBoxAutomationElement = _VTServiceAutomationElement.FindFirst(TreeScope.Descendants, new PropertyCondition(AutomationElement.NameProperty, "Username"));

if (_usernameTextBoxAutomationElement == null)
{
    throw new InvalidOperationException("Could not find username box");
}
In Visual C++/CLI:
_usernameTextBoxAutomationElement = _VTServiceAutomationElement->FindFirst(TreeScope::Descendants, gcnew PropertyCondition(AutomationElement::AutomationIdProperty, "Username"));

if (_usernameTextBoxAutomationElement == nullptr)
{
	throw gcnew InvalidOperationException("Could not find password box");
}
The last piece of this part of the puzzle is a public object to interface with the member variable:
In C#:
public object Username
{
    get
    {
        return _usernameTextBoxAutomationElement.GetCurrentPropertyValue(AutomationElement.NameProperty);
    }
     set
    {
        if (_usernameTextBoxAutomationElement != null)
        {
            LogEntry("Setting Username value...");
            try
            {
                ValuePattern valuePatternU = _usernameTextBoxAutomationElement.GetCurrentPattern(ValuePattern.Pattern) as ValuePattern;
                valuePatternU.SetValue(value.ToString());
                LogEntry("Username value set");
            }
            catch (Exception e1)
            {
                 LogEntry("Error " + e1.Message + " setting Username Value in " + _usernameTextBoxAutomationElement.Current.AutomationId.ToString());
            }
        }
     }
}
In Visual C++/CLI:
property Object ^Username
 {
     Object ^get()
     {
         return _usernameTextBoxAutomationElement->GetCurrentPropertyValue(AutomationElement::NameProperty);
     }
     void set(Object ^value)
     {
         if (_usernameTextBoxAutomationElement != nullptr)
         {
             LogEntry("Setting Username value...");
             try
             {
                 ValuePattern ^valuePatternU = dynamic_cast<ValuePattern^>(_usernameTextBoxAutomationElement->GetCurrentPattern(ValuePattern::Pattern));
                 valuePatternU->SetValue(value->ToString());
                 LogEntry("Username value set to " + value->ToString());
             }
             catch (Exception ^e1)
             {

                 LogEntry("Error " + e1->Message + " setting Username Value in " + _usernameTextBoxAutomationElement->Current.AutomationId->ToString());
             }
         }
     }
 }
Add a line to the test method to populate the username:
In C#:
vtServ.Username = "suser";
In Visual C++/CLI:
vtServ->Username = "suser";
When I run the test now I am expecting to see "suser" appear in the username box. However the username box is blank! This time I can be reasonably certain that the issue is with the test harness and a quick look in the log file confirms this – I have attempted to populate lblUsername, the label that identifies my username box on the form. This has happened because I have chosen to identify the Username box by name, but the name as a technical entity belongs to the label on the form that labels the username box.
There is no caption on the field so finding it by name is not going to work. I could work around this by including some default text in the username textbox that would uniquely identify it but I am choosing not to. The calculator example discusses using Spy++ to determine the element ID for components of calc.exe, however successive runs of my applications have different element ID’s for the username textbox on each run. I need an identifier that is both consistent and does not require a modification to the application under test.
Change
In C#:
_usernameTextBoxAutomationElement = _VTServiceAutomationElement.FindFirst(TreeScope.Descendants, new PropertyCondition(AutomationElement.NameProperty, "Username"));
In Visual C++/CLI:
_usernameTextBoxAutomationElement = _VTServiceAutomationElement->FindFirst(TreeScope::Descendants, gcnew PropertyCondition(AutomationElement::NameProperty, "Username"));
To
In C#:
_usernameTextBoxAutomationElement = _VTServiceAutomationElement.FindFirst(TreeScope.Descendants, new PropertyCondition(AutomationElement. AutomationIdProperty, "Username"));
In Visual C++/CLI:
_usernameTextBoxAutomationElement = _VTServiceAutomationElement->FindFirst(TreeScope::Descendants, gcnew PropertyCondition(AutomationElement::AutomationIdProperty, "Username"));
Run the test again and "suser" appears in the username box. Why did I not have to change "Username" to "txtUsername"? The answer is simple – poor naming convention in my login form. Labels are prefixed with "lbl" but I did not follow through and prefix my textboxes with "txt", and as a result I have a scenario where the a particular word ("Username" in this instance) is the name of one attribute and the identifier of the other.
The password is populated in similar fashion.
Adding XML to the mix
When I run the test again I have the username and password boxes populated. While this is good, it’s value is diminished by having to edit the test or duplicate it in order to verify another user. So before I proceed to look at how I might click the logon button I will examine reading in the username and password from XML. (Excel could also be used – but that enforces a requirement to have it present and installed).
The Calculator example is testing expressions so it is able to harness the ExpressionTree library for its purposes.
Right click on the solution name (UnitTestProject1) in the Solution Explorer and choose Add -> New Folder (New Filter in the C++/CLI variant).
Right Click on Test Data then choose Add -> New Item. Scroll all the way to the bottom where you will find XML File near the end. Choose it and click "Add". This adds a file called XMLFile1 to the TestData folder. The IDE will open it where the content currently is just
="1.0"="utf-8"
In C++/CLI its Add->New Item->Web to include a new XML file.
Rename it in the Solution Explorer to "RawTestData" (making sure to retain the .xml extension). You are free to structure this file as best suits your approach to your tests, I have chosen nodes for each test name and within each nodes per test run and then run number with the elements that are to be entered as the final leaf nodes.
If you are following this article through the text here you will immediately notice that the first test in the XML document is PositiveLogonTest, but so far the test harness only has a TestMethod1. This will be addressed after we have dealt with the XML file.
First I will complete my positive logon test data. This is a list of the users I expect to log on successfully. I can introduce negative tests for bad password, bad username, username only etc later – but they will not form part of this article.
For now this is how RawTestData.XML looks:
="1.0"="utf-8"
<VTServiceTests>
<PositiveLogonTest>
<TestRun1>
<Username>suser</Username>
<Password>spass</Password>
</TestRun1>
<TestRun2>
<Username>auser</Username>
<Password>apass</Password>
</TestRun2>
</PositiveLogonTest>
</VTServiceTests>
Right Click on RawTestData.xml in the solution explorer, and choose Properties. I have chosen "Copy if Newer". Note that I also had to have the file open and ‘on top’ in the IDE for the properties to become editable.
Return to UnitTest1.cs(and UnitTest1.cpp), and now is as good a time as any to address the name of the first test. Change the definition public void TestMethod1() to public void PositiveLogonTest(). A quick F7 will confirm the name change to the test in the TestExplorer.
In order to pursue this method of reading in my test data, I need to add a references to the XML libraries to the top of UnitTest1.cs(and UnitTest1.cpp).
In C#:
using System.Xml;
using System.Xml.XPath;
In Visual C++/CLI:
using namespace System::Xml; using namespace System::Xml::XPath;
And because I want to harvest the name of the test method for communication with the test data in the XML document I need to add :
In C#:
using System.Diagnostics;
In Visual C++/CLI:
using namespace System::Diagnostics;
This feature to harvest the method name also requires Reflection – but I have already included it.
Since XML has only crept in here as a vehicle to manage test data, I will keep my description of what I am doing with it as brief as possible.
Firstly the UnitTest1 class needs some additional member variables:
In C#:
private String m_strNow;
private StreamWriter m_sw;
private String m_Filename;
private XmlDocument m_XMLDoc;
private XmlNode m_Node;
private XPathNavigator m_Navigator;
private StackFrame m_StackFrame;
private MethodBase m_MethodBase;
In Visual C++/CLI:
private:
    String^ m_strNow;
    StreamWriter^ m_sw;
    String^ m_Filename;
    XmlDocument^ m_XMLDoc;
    XmlNode^ m_Node;
    XPathNavigator^ m_Navigator;
    StackFrame^ m_StackFrame;
    MethodBase^ m_MethodBase;
I have added a new method to UnitTest1 for access to the test data document:
In C#:
private void SetUpTestDataDocument()
{
m_Filename = "TestData\\RawTestData.xml";
m_XMLDoc = new XmlDocument();
XmlReader reader;
reader = XmlReader.Create(m_Filename);
m_XMLDoc.Load(reader);
reader.Close();
m_Node = m_XMLDoc.FirstChild;
}
In Visual C++/CLI:
void SetUpTestDataDocument()
{
m_sw->WriteLine("\n[{0}] - Looking for XML Document ...", m_strNow);
m_sw->Flush();
m_Filename = "..\\VTRunServiceTests\\RawTestData.xml";
m_sw->WriteLine("\n[{0}] - XML Document: {1}", m_strNow, m_Filename);
m_sw->Flush();
m_XMLDoc = gcnew XmlDocument();
XmlReader ^reader;
m_sw->WriteLine("\n[{0}] - Document and reader defined", m_strNow);
m_sw->Flush();
reader = XmlReader::Create(m_Filename);
m_sw->WriteLine("\n[{0}] - reader created", m_strNow);
m_sw->Flush();
m_XMLDoc->Load(reader);
reader->Close();
m_Node = m_XMLDoc->FirstChild;
m_sw->WriteLine("\n[{0}] - XML Document opened!", m_strNow);
m_sw->Flush();
}
This is taken from [FRASER]. The Test method, PositiveLogonTest(), calls this new SetUpTestDataDocument () method and sets up a Method Base for extraction of the its name.
In C#:
m_StackFrame = new StackFrame();
m_MethodBase = m_StackFrame.GetMethod();
In Visual C++/CLI:
m_StackFrame = gcnew StackFrame();
m_MethodBase = m_StackFrame->GetMethod();
Then I replace the hard coded Username/Password population in the PositiveLogonTest () method with nested loops harnessing XPath based on examples by [JOSHI]
In C#:
String XPathNodeStr = "//" + m_MethodBase.Name;
XmlNode tmpNode = m_XMLDoc.SelectSingleNode(XPathNodeStr);
if (tmpNode.HasChildNodes)
{
m_Navigator = tmpNode.CreateNavigator();
m_Navigator.MoveToFirstChild();
}
if (m_Navigator.HasChildren)
{
do
{
m_Navigator.MoveToFirstChild();
vtServ.Clear();
do
{
if (m_Navigator.Name == "Username")
{
m_Navigator.MoveToFirstChild();
vtServ.Username = m_Navigator.Value;
}
else
if (m_Navigator.Name == "Password")
{
m_Navigator.MoveToFirstChild();
vtServ.Password = m_Navigator.Value;
}
else
{
m_sw.WriteLine("\n[{0}] - Unknown node", m_strNow);
m_sw.Flush();
}
m_Navigator.MoveToParent();
} while (m_Navigator.MoveToNext());
m_Navigator.MoveToParent();
} while (m_Navigator.MoveToNext());
}
In Visual C++/CLI:
try
{
String ^XPathNodeStr = "//" + m_MethodBase->Name;
XmlNode ^tmpNode = m_XMLDoc->SelectSingleNode(XPathNodeStr);
if (tmpNode->HasChildNodes)
{
m_Navigator = tmpNode->CreateNavigator();
m_Navigator->MoveToFirstChild(); m_sw->WriteLine("\n[{0}] - Navigator created successfully!", m_strNow);
m_sw->Flush();
}
if (m_Navigator->HasChildren)
{
do
{
m_Navigator->MoveToFirstChild();
vtServ->Clear();
do
{
if (m_Navigator->Name == "Username")
{
m_Navigator->MoveToFirstChild();
vtServ->Username = m_Navigator->Value;
}
else
if (m_Navigator->Name == "Password")
{
m_Navigator->MoveToFirstChild();
vtServ->Password = m_Navigator->Value;
}
else
{
m_sw->WriteLine("\n[{0}] - Unknown node", m_strNow);
m_sw->Flush();
}
m_Navigator->MoveToParent();
} while (m_Navigator->MoveToNext());
m_Navigator->MoveToParent();
} while (m_Navigator->MoveToNext());
}
}
finally
{
delete vtServ;
}
Note [FRASER] offers a neat recursive equivalent, but this one better suits what I want to achieve here.
First up I create an XPath string using "//" and the name of the testmethod. This is then plugged into the XML document to see if there is a corresponding node. Where this node has children, I build an Xpath navigator for the subtree for which this node is the root. I have instructed the navigator to go to the first child of the node containing the test data (NodeTestRun1 on the XML).
This node is now tested for children and another First Child move is instructed by which I reach the username node, but I am not ready to harvest the value yet. This is because the .NET representation of an XML document holds the value of an node in a further child called "Text". So I drop down another level to pick up the username sample test value. Likewise for Password. The traversal of the tree is controlled by moving back up to the parent of whatever the current node is and doing a move next until the tree is traversed in its entirety.
Now it’s time to start clicking some buttons. Looking at the calculator example, and how it has a generic function that can be employed to click any of the numbers, it occurs to me that the XML document could be expanded to supply details of the application elements such as form names, text boxes and button actions in addition to the data content for a truly generic test harness – but that is for another day.
In order to start clicking buttons I need to add two functions to the VTService class that controls the application I am testing. I have called these GetLogOnFrmButton and GetInvokePattern.
GetLogOnFrmButton will only process the ‘Log On’ and ‘Exit’ buttons. When it is passed a command to process one of these, it extracts and a button element attribute from the automation tree for VTService and returns that element to the method that invoked it.
In C#:
public AutomationElement GetLogOnFrmButton(String argBtnName)
{
if ((argBtnName != "LogOn") && (argBtnName != "Exit"))
{
LogEntry("Only valid buttons are LogOn and Exit");
throw new InvalidOperationException("Only valid buttons are LogOn and Exit");
}
AutomationElement buttonElement = _VTServiceAutomationElement.FindFirst(TreeScope.Descendants, new PropertyCondition(AutomationElement.AutomationIdProperty, argBtnName));
if (buttonElement == null)
{
LogEntry("Could not find button corresponding to " + argBtnName);
throw new InvalidOperationException("Could not find button corresponding to " + argBtnName);
}
return buttonElement;
}
In Visual C++/CLI:
AutomationElement ^GetLogOnFrmButton(String ^argBtnName)
{
if ((argBtnName != "LogOn") && (argBtnName != "Exit"))
{
LogEntry("Only valid buttons are LogOn and Exit");
throw gcnew InvalidOperationException("Only valid buttons are LogOn and Exit");
}
AutomationElement ^buttonElement = _VTServiceAutomationElement->FindFirst(TreeScope::Descendants, gcnew PropertyCondition(AutomationElement::AutomationIdProperty, argBtnName));
if (buttonElement == nullptr)
{
LogEntry("Could not find button corresponding to " + argBtnName);
throw gcnew InvalidOperationException("Could not find button corresponding to " + argBtnName);
}
return buttonElement;
}
The GetInvokePattern handles the instruction to act on the element passed into it.
In C#:
public InvokePattern GetInvokePattern(AutomationElement element)
{
    return element.GetCurrentPattern(InvokePattern.Pattern) as InvokePattern;
}
In Visual C++/CLI:
InvokePattern ^GetInvokePattern(AutomationElement ^element)
{
	return dynamic_cast<InvokePattern^>(element->GetCurrentPattern(InvokePattern::Pattern));
}
| Errors Link1255 and Link2022 |
If you compile the Visual C++/CLI version after adding functions like GetInvokePattern or VTSetServiceLaunched you may be presented with either of Link errors Link1255 and Link2022. A quick search on Google suggests that they can be difficult to pin down, for example one offering is to ensure that all assemblies are compiled with correct versions - we have only one here. Another talks of changing the compile switch in the Debug Configuration from /MDto /MDd. I did nothing. I carried on coding and added a call to the offending function both here and when it arose again, in the first instance to complete a section and in the second to confirm what happened to the error after my first encounter with it. In each instance the error resolved itself after I coded in a call to the function. |
So now I have the tools to click a button. I have placed the instruction to do so in the while loop that traverses the XML document immediately after I have populated the password field.
In C#:
vtServ.GetInvokePattern(vtServ.GetLogOnFrmButton("LogOn")).Invoke();
In Visual C++/CLI:
vtServ->GetInvokePattern(vtServ->GetLogOnFrmButton("LogOn"))->Invoke();
It’s code that won’t win prizes for style, structure or readability but it is doing the job.
If you are building the code as you read, comment out the next Username/Password pair in the XML document and run the test again.
<!--<TestRun2>
  <Username>auser</Username>
  <Password>apass</Password>
</TestRun2>-->
This is necessary because the test run will now take us off the login form, so until I include logic to get us back there, I will confine the example to a single Username/Password pair. The next run gives us our first look at the Set Service form.
After Logging on.
Because this is just a "Log On" test, I intend to continue by cancelling this form, but I can’t simply invoke the cancel button because this form is not in the snapshot of the tree that I took earlier.
| ASIDE |
| It was in putting the code to deal with this phase together that I realised just how reuseable the different methods were. So if I am prepared to compromise and have a single test method, or standard one calling the test libraries as per [TATAR], then I open up the possibility of a set of standard methods driven by an XML Document. |
So first I am going to include code that will determine that the SetService has been launched via VTSetServiceLaunched in the VTService class:
In C# :
private AutomationElement _VTSetServiceAutomationElement;
and
public void VTSetServiceLaunched()
{
    int ct = 0;
    do
    {
        _VTSetServiceAutomationElement = AutomationElement.RootElement.FindFirst(TreeScope.Children, new PropertyCondition(AutomationElement.NameProperty, "Set Your Route and Service"));
        ++ct;
        Thread.Sleep(100);
    }
    while (_VTSetServiceAutomationElement == null && ct < 50);

    if (_VTSetServiceAutomationElement == null)
    {
        LogEntry("VTSetService failed to launch");
        throw new InvalidOperationException("VTSetService failed to launch");
    }
}
In Visual C++/CLI:
AutomationElement ^_VTSetServiceAutomationElement;
and
void VTSetServiceLaunched()
{
	int ct = 0;
	do
	{
		_VTSetServiceAutomationElement = AutomationElement::RootElement->FindFirst(TreeScope::Children, gcnew PropertyCondition(AutomationElement::NameProperty, "Set Your Route and Service"));
		++ct;
		Thread::Sleep(100);
	}
	while (_VTSetServiceAutomationElement == nullptr && ct < 50);

	if (_VTSetServiceAutomationElement == nullptr)
	{
		LogEntry("VTSetService failed to launch");
		throw gcnew InvalidOperationException("VTSetService failed to launch");
	}
}
The VTService class also needs a handler for the buttons on the SetService form:
In C#:
public AutomationElement GetSetServiceFrmButton(String argBtnName)
{
if ((argBtnName != "btnOK") && (argBtnName != "btnCancel"))
{
LogEntry("Only valid buttons are OK and Cancel");
throw new InvalidOperationException("Only valid buttons are OK and Cancel");
}
AutomationElement buttonElement = _VTSetServiceAutomationElement.FindFirst(TreeScope.Descendants, new PropertyCondition(AutomationElement.AutomationIdProperty, argBtnName));
if (buttonElement == null)
{
LogEntry("Could not find button corresponding to " + argBtnName);
throw new InvalidOperationException("Could not find button corresponding to " + argBtnName);
}
return buttonElement;
}
In Visual C++/CLI:
AutomationElement ^GetSetServiceFrmButton(String ^argBtnName)
{
if ((argBtnName != "btnOK") && (argBtnName != "btnCancel"))
{
LogEntry("Only valid buttons are OK and Cancel");
throw gcnew InvalidOperationException("Only valid buttons are OK and Cancel");
}
AutomationElement ^buttonElement = _VTSetServiceAutomationElement->FindFirst(TreeScope::Descendants, gcnew PropertyCondition(AutomationElement::AutomationIdProperty, argBtnName));
if (buttonElement == nullptr)
{
LogEntry("Could not find button corresponding to " + argBtnName);
throw gcnew InvalidOperationException("Could not find button corresponding to " + argBtnName);
}
return buttonElement;
}
Then we need to check that the SetService was launched, and click its Cancel button. I have omitted error handling here for simplicity - but in a production version I would not be attempting to click a button without first ensuring that the containing form has launched. This code is placed in the PositiveLogonTest() method following the code to click the "Log On" button:
In C#:
vtServ.VTSetServiceLaunched();
vtServ.GetInvokePattern(vtServ.GetSetServiceFrmButton("btnCancel")).Invoke();
In Visual C++/CLI:
vtServ->VTSetServiceLaunched();
vtServ->GetInvokePattern(vtServ->GetSetServiceFrmButton("btnCancel"))->Invoke();
At this stage, C# is completing its test successfully and tidying up by killing the VT_Service process that it launched. Visual C++/CLI needs a little work and is failing after it presents the main menu - giving us our first look at this main form:
The last act of the Visual C++/CLI version is a call to delete the instance of the VTService class, but it does not kill the process spawned to run the Application Under Test when doing so. This could be a garbage collection issue. C# doesn't have this call and part of its automatic termination process is to execute an 'Exit' on the Application Under Test.
A Standard Exit
Despite what I have written above, I am happier with the Visual C++/CLI instance at this point. There is nothing in the C# instance to prove that the main form was ever launched after it clicked 'Cancel' on the 'Set Service' form. So here I am going to include methods that will load the main form into the automation tree and click its 'Exit' button.
I begin this in the VTService class by defining private attribute _VTMainAutomationElement. New method VTMainLaunched is created by copying VTSetServiceLaunched, changing instances of 'SetService' to 'Main' and replacing "Set Your Route and Service" with "On-Board Service".
For button access, I copied method GetSetServiceFrmButton to create GetMainFrmButton, replacing 'SetService' as before with 'btnOK' and 'btnCancel' becomming 'Logout' and 'Exit'.
Two additional lines of code are required in the PositiveLogonTest method after the 'Cancel' was clicked on the 'Set Service' form. They are:
In C#:
vtServ.VTMainLaunched();
vtServ.GetInvokePattern(vtServ.GetMainFrmButton("Exit")).Invoke();
In Visual C++/CLI:
vtServ->VTMainLaunched();
vtServ->GetInvokePattern(vtServ->GetMainFrmButton("Exit"))->Invoke();
Now both versions of the harness now exhibit the same behaviours on the application under test. When the test machine is under heavy load, we can see it flick through the forms before finally exiting, but on a well spec'ed machine this is too fast for the eye to catch so it is time to consider some proof.
Test Evidence
When a test results in data updates or report production, proving that an objectice is no more than a matter of comparing the output against the expected results. But a scenario such as this were we are testing screen flow is both silent and invisible. I could add timer delays to each form call to allow us see them, and while this works well for one or two cases, it becomes self defeating from an efficiency perspective when the number of cases to be run through scales up. It is similarly ill advised to instuct the test method to ask for user confirmation after each step.
Some of the examples you will see elsewhere use assertions and exceptions to prove that tests are behaving as expected. While in time I may employ one or both of these, for now the approach I am adopting is event logging. The Application Under Test will make a log entry for each form opened and each button clicked. This example being a trivial demo, I have hard coded it, but in a production system I recommend configuring this logging so that it can be controlled at will. It can be used for more that automating your screen navigation tests as a means of tracing exactly how your user has wandered about your system when a particulary difficult bug comes in for correction.
| Typical log from this application under test: |
2013-10-02 17:23:09 - =====================================
[2013-10-02 17:23:09] - VT_Service Launched
[2013-10-02 17:23:09] - VT_Service - Call the Logon Form
[2013-10-02 17:23:09] - Logon - Presenting form
[2013-10-02 17:23:09] - Logon - LogOn_Click
[2013-10-02 17:23:09] - Logon - In Validate User
[2013-10-02 17:23:09] - 0:Username [suser] verified
[2013-10-02 17:23:09] - Logon - Process Retcode 0
[2013-10-02 17:23:09] - Logon - 0: Closing now
[2013-10-02 17:23:09] - Logon - form Closing
[2013-10-02 17:23:09] - Logon - LogOn_Click concluded
[2013-10-02 17:23:09] - Logon - Done, verified user : [suser]
[2013-10-02 17:23:09] - VT_Service - Back from the Logon Form
[2013-10-02 17:23:09] - VT_Service - Making Menu Updates
[2013-10-02 17:23:09] - VT_Service - Call the Set Service Frorm
[2013-10-02 17:23:10] - SetService - Presenting form
[2013-10-02 17:23:10] - SetService - Cancel Clicked
[2013-10-02 17:23:10] - SetService - Closing form
[2013-10-02 17:23:09] - VT_Service - Main - form entered
[2013-10-02 17:23:09] - VT_Service - Main - Exit Click
[2013-10-02 17:23:09] - VT_Service closed
2013-10-02 17:23:09 - =====================================
|
Multiple User Access Tests
The reason I introduced XML to my test harness was to test different data criteria without having to repeat code. You may note that earlier in the article I commented out the second user to be retrievd from the XML document. But the code as described above will produce a failed test when it attempts to process the second user. This is because when 'Exit' was clicked on the main menu, it killed the process that runs the application under test, so the call to create the class associated with it needs to move to within the navigation of the XML document.
In the C# implemntation, I got rid of the 'Using' clause described above in the PositveTestMethod, and the statement that creates the VT_Service class instance in the PostiveTestMethod of the Visual C++/CLI version is moved. Now both versions will instantiate the VT_Service class immediately prior to the do-while loop that loads in the username and password.
In C#:
vtServ = new VTService(m_sw);
vtServ.Clear();
In Visual C++/CLI:
vtServ = gcnew VTService(m_sw);
vtServ->Clear();
When I run again, I can see both users being applied, and the harness log confirms this. However the log from the application under test suggests that the same user was applied on both occasions. This is another of those errors that could be on either side. There might be an initalization issue in the harness where I have not reset correctly for the second user, or the application could be using the first user in its list regardless of what was entered.
On this occasion, I will run the application under test manually for the second user and check its log. This confirms my suspicion that the bug is in the application under test. You can reproduce the bug by running the harness against V2 of the demo app.
V3 of the demo app has this bug corrected, and logging is tidied up.
A Second Test
While having to write case specific code for each test is a cost, its benefit is an entry per test in the Test Explorer. In the event that I structure my XML document to allow me plug in tests with no additonal coding effort, the price to be paid will be the loss of any real value in the Test Explorer features.
Objective of Second Test
The second test will log on and select a route before accessing the main form.
Addining the Second Test
My first action before doing anything to the test harness is to create a new node on the XML document called ChooseServiceTest. To begin with, all I have are login credentials.
<ChooseServiceTest>
  <TestRun1>
    <Username>suser</Username>
    <Password>spass</Password>
  </TestRun1>
  </ChooseServiceTest>
Immediately after the PositiveLogonTest add the following code:
In C#:
[TestMethod]
public void ChooseServiceTest()
{
}
In Visual C++/CLI:
[TestMethod]
		void ChooseServiceTest()
		{
		}
I may as well have copied and renamed the entire PositiveLogonTest because the XML navigation and log on action is identical. The differences will start to come on the "SetService" form. So next up. I will copy the body of the first test method into the second.
We will replace the instuction to cancel set service with new test logic to select a service and click OK where the PositiveLogonTest clicked Cancel.
The VTService class is already aware of both buttons on the "SetService" form - but I now have to tell it about the Listbox and Combo box used for Route selection along with the list box for Service selection. The route selection listbox is constructed in the style of a spin button. A question from another learner on [StackOverflow] unlocked the list item, but not without issue. I began by adding three new attributes to the service class:
In C#:
private AutomationElement _RouteNoListBoxAutomationElement;
private AutomationElementCollection _RouteNoListBoxItems;
private AutomationElement _ItemToSelectInRouteNoListBox;
In Visual C++/CLI:
private AutomationElement _RouteNoListBoxAutomationElement;
private AutomationElementCollection _RouteNoListBoxItems;
private AutomationElement _ItemToSelectInRouteNoListBox;
When the SetService form is loaded, the route listbox and its constituent elements have to be laoded in too, so the following code is added to the VTSetServiceLaunched() method:
In C#:
_RouteNoListBoxAutomationElement = _VTSetServiceAutomationElement.FindFirst(TreeScope.Descendants, new PropertyCondition(AutomationElement.AutomationIdProperty, "listRoute"));
if (_RouteNoListBoxAutomationElement == null)
{
LogEntry("Could not find route list box");
throw new InvalidOperationException("Could not find route list box");
}
_RouteNoListBoxItems = _RouteNoListBoxAutomationElement.FindAll(TreeScope.Children, new PropertyCondition(AutomationElement.ControlTypeProperty, ControlType.ListItem));
In Visual C++/CLI:
_RouteNoListBoxAutomationElement = _VTSetServiceAutomationElement->FindFirst(TreeScope::Descendants, gcnew PropertyCondition(AutomationElement::AutomationIdProperty, "listRoute"));
if (_RouteNoListBoxAutomationElement == nullptr)
{
LogEntry("Could not find route list box");
throw gcnew InvalidOperationException("Could not find route list box");
}
_RouteNoListBoxItems = _RouteNoListBoxAutomationElement->FindAll(TreeScope::Children, gcnew PropertyCondition(AutomationElement::ControlTypeProperty, ControlType::ListItem));
Now I need a property to select a route on the SetService list. I have called it RouteNo. It can be positioned in the service class after the password property, and this is how it is coded:
In C#:
public object RouteNo
{
    get
    {
        return _RouteNoListBoxAutomationElement.GetCurrentPropertyValue(AutomationElement.NameProperty);
    }
    set
    {
        if (_RouteNoListBoxAutomationElement != null)
        {
            try
            {
                _ItemToSelectInRouteNoListBox = _RouteNoListBoxItems[System.Convert.ToInt32(value.ToString())];
                Object selectPattern = null;

                if (_ItemToSelectInRouteNoListBox.TryGetCurrentPattern(SelectionItemPattern.Pattern, out selectPattern))
                {
                    (selectPattern as SelectionItemPattern).AddToSelection();
                    (selectPattern as SelectionItemPattern).Select();
                }
                LogEntry("RouteNo value set to " + value.ToString());
            }
            catch (Exception e1)
            {
                LogEntry("Error " + e1.Message + " setting RouteNo Value in " + _RouteNoListBoxAutomationElement.Current.AutomationId.ToString());
                throw new InvalidOperationException("Error " + e1.Message + " setting RouteNo Value in " + _RouteNoListBoxAutomationElement.Current.AutomationId.ToString());
            }
        }
    }
}
In Visual C++/CLI:
property Object ^RouteNo
{
    Object ^get()
    {
        return _RouteNoListBoxAutomationElement->GetCurrentPropertyValue(AutomationElement::NameProperty);
    }
    void set(Object ^value)
    {
        if (_RouteNoListBoxAutomationElement != nullptr)
        {
            try
            {
                _ItemToSelectInRouteNoListBox = _RouteNoListBoxItems[System::Convert::ToInt32(value->ToString())];
                Object ^selectPattern = nullptr;

                if (_ItemToSelectInRouteNoListBox->TryGetCurrentPattern(SelectionItemPattern::Pattern, selectPattern))
                {
                    (dynamic_cast<SelectionItemPattern^>(selectPattern))->AddToSelection();
                    (dynamic_cast<SelectionItemPattern^>(selectPattern))->Select();
                }
                LogEntry("RouteNo value set to " + value->ToString());
            }
            catch (Exception ^e1)
            {
                LogEntry("Error " + e1->Message + " setting RouteNo Value in " + _RouteNoListBoxAutomationElement->Current.AutomationId->ToString());
                throw gcnew InvalidOperationException("Error " + e1->Message + " setting RouteNo Value in " + _RouteNoListBoxAutomationElement->Current.AutomationId->ToString());
            }
        }
    }
}
If I give the solutions a quick spin on the compiler now, the Visual C++/CLI version will give the dreaded link errors mentioned up top. But they disppear once I invoke the RouteNo property.
Now I return to the ChooseServiceTest method, and after I have hit 'OK' on the logon screen, I am going to hardcode in a selection of route 1 and click OK on the SetService form. Once I am happy with how I am managing the controls, this will be worked into the XML. So the revised code to handle SetService placed after the call to VTSetServiceLaunched is:
In C#:
vtServ.RouteNo = 1;
vtServ.GetInvokePattern(vtServ.GetSetServiceFrmButton("btnOK")).Invoke();
In Visual C++/CLI:
vtServ->RouteNo = 1;
vtServ->GetInvokePattern(vtServ->GetSetServiceFrmButton("btnOK"))->Invoke();
Both test harnesses will now correctly select route 1, and the log from the applciation under test confirms this, however when the application is run manually changes to the Route Listbox which shows route numbers automatically reflects itself in a Route combo where the routes are listed by name. This is not happening, broadly in line with the issue reported on the [StackOverflow] post. My intial suspicion falls on the application under test. Lets see.
ListRoute and cmbRoute on SetService move in tandem, but I have no explicit code to achieve this. I got this 'free' when I tied them both to the same data table during the development of SetService. More extensive manual testing of SetService e.g. pointing with the mouse to set listRoute and point to service next or ShitTab off listRoute will not populate cmbRoute and throws an exception most of the time. It would appear that I have a bug in SetService due to not handling the change of listRoute.
For the moment I am going to introduce an element of sympathetic testing. This is not normally a good idea, but in this case I am aiming to show the successful selection of a route and service so I will return to these bugs in production harness for my 'live' code. So given that the comboboxes for route name and service are from an automation perspective handled like the list box, I rolled out the code from the Route Number ListBox to the RouteName Combo. The Applicaiton Under Test populates the Service Combo based on the value of the RouteName selected item. But nothing happened!
The second and subsequent listbox or any combo box represents trouble for most budding MS UI Automation developers if an internat trawl is to be believed. Various tips including expand/collapse were tried with no success. Eventually I settled on a solution that involves caching the comboBox items.
In the end it came down to caching the combobox contents and selecting the chosen entry form that cached list.
To begin with, both instances get a new automation element, _RouteNameComboAutomationElement and two new methods are added to the VTService class. The first will cache the combo box into an automation element, and the second is used to select from the cache. They are shown here with comments, including those stating where I found them, removed for brevity:
In C#:
AutomationElement CachePropertiesWithScope(AutomationElement elementMain)
{
    AutomationElement elementList;

    CacheRequest cacheRequest = new CacheRequest();
    cacheRequest.Add(AutomationElement.NameProperty);
    cacheRequest.TreeScope = TreeScope.Element | TreeScope.Children;

    using (cacheRequest.Activate())
    {
        Condition cond = new PropertyCondition(AutomationElement.ControlTypeProperty, ControlType.List);
        elementList = elementMain.FindFirst(TreeScope.Children, cond);
    }
    if (elementList == null) return null;

    foreach (AutomationElement listItem in elementList.CachedChildren)
    {
        LogEntry("Caching:" + listItem.Cached.Name);
    }

    AutomationElement child = elementList.CachedChildren[0];
    LogEntry("Caching child:" + child.CachedParent.Cached.Name);

    return elementList;
}

{
    SelectionItemPattern select = (SelectionItemPattern)element.GetCurrentPattern(SelectionItemPattern.Pattern);
    select.Select();
}
In Visual C++/CLI:
AutomationElement ^CachePropertiesWithScope(AutomationElement ^elementMain)
{
    AutomationElement ^elementList;

    CacheRequest ^cacheRequest = gcnew CacheRequest();
    cacheRequest->Add(AutomationElement::NameProperty);
    cacheRequest->TreeScope = TreeScope::Element | TreeScope::Children;

    cacheRequest->Activate();
    try
    {
        Condition ^cond = gcnew PropertyCondition(AutomationElement::ControlTypeProperty, ControlType::List);
        elementList = elementMain->FindFirst(TreeScope::Children, cond);
    }
    finally
    {
    }
    if (elementList == nullptr)
        return nullptr;

    for each (AutomationElement ^listItem in elementList->CachedChildren)
    {
        LogEntry("Caching:" + listItem->Cached.Name);
    }

    AutomationElement ^child = elementList->CachedChildren[0];
    LogEntry("Caching child:" + child->CachedParent->Cached.Name);

    return elementList;
}

void Select(AutomationElement ^element)
{
    SelectionItemPattern ^select = safe_cast<SelectionItemPattern^>(element->GetCurrentPattern(SelectionItemPattern::Pattern));
    select->Select();
}
The XML navigation in the test method also needs to be updated. From now on the password node functionality is complete after it clicks "OK" and launches VTSetServiceLaunched. A new clause is added to handle the "Route" node that is added to the XML. This is the code to handle Route:
In C#:
if (m_Navigator.Name == "Route")
{
m_Navigator.MoveToFirstChild();
vtServ.RouteNo = System.Convert.ToInt32(m_Navigator.Value);
vtServ.GetInvokePattern(vtServ.GetSetServiceFrmButton("btnOK")).Invoke();
vtServ.VTMainLaunched();
vtServ.GetInvokePattern(vtServ.GetMainFrmButton("Exit")).Invoke();
}
In Visual C++/CLI:
if (m_Navigator->Name == "Route")
{
m_Navigator->MoveToFirstChild();
vtServ->RouteNo = System::Convert::ToInt32(m_Navigator->Value);
vtServ->GetInvokePattern(vtServ->GetSetServiceFrmButton("btnOK"))->Invoke();
vtServ->VTMainLaunched();
vtServ->GetInvokePattern(vtServ->GetMainFrmButton("Exit"))->Invoke();
}
The xml for this test now reads:
<ChooseServiceTest>
  <TestRun1>
    <Username>suser</Username>
    <Password>spass</Password>
    <Route>1</Route>
  </TestRun1>
</ChooseServiceTest>
Because I chose to select an item from the route name combobox after picking the route number from the route listbox, this triggered the leave event on the route listbox part of whoose role is to populate the services combobox for the chosen route. If I had not chosen to do this I would have had to find another way of triggering the listbox leave event. One option would be to change my application to load the services on a selection change event in the route listbox, but I have deliberately avoided it because I to not want if firing for every selection change that will occur if the user chooses to 'arrow' down the list.
So, I have chosen my route and the system has offered me a list of services for that route. I am adding _ServiceComboAutomationElement to the member variables of the VTService class to handle this. I have added some additional code to the RouteNo property of the VTService class that will cache the service list into the new automation element for it based on the route selected. It is coded as follows:
In C#:
_ServiceComboAutomationElement = CachePropertiesWithScope(_VTSetServiceAutomationElement.FindFirst(TreeScope.Descendants, new PropertyCondition(AutomationElement.AutomationIdProperty, "cmbService")));

if (_ServiceComboAutomationElement == null)
{
      LogEntry("Could not find service combo box");
      throw new InvalidOperationException("Could not find service combo box");
}
In Visual C++/CLI:
_ServiceComboAutomationElement = CachePropertiesWithScope(_VTSetServiceAutomationElement->FindFirst(TreeScope::Descendants, gcnew PropertyCondition(AutomationElement::AutomationIdProperty, "cmbService")));

if (_ServiceComboAutomationElement == nullptr)
{
    LogEntry("Could not find service combo box");
    throw gcnew InvalidOperationException("Could not find service combo box");
}
The VTService class also needs a new property, "ServiceNo" which will handle service settings specified in the XML. It can be positioned after RouteNo and takes the form:
In C#:
public object ServiceNo
{
   get
   {
      return _ServiceComboAutomationElement.GetCurrentPropertyValue(AutomationElement.NameProperty);
   }
   set
   {
       AutomationElement selectedServiceName = _ServiceComboAutomationElement.CachedChildren[System.Convert.ToInt32(value.ToString())];
       LogEntry("Service name set to " + selectedServiceName.Cached.Name);
       Select(selectedServiceName);
   }
}
In Visual C++/CLI:
property Object ^ServiceNo
{
    Object ^get()
        {
            return _ServiceComboAutomationElement->GetCurrentPropertyValue(AutomationElement::NameProperty);
        }
        void set(Object ^value)
        {
            AutomationElement ^selectedServiceName = _ServiceComboAutomationElement->CachedChildren[System::Convert::ToInt32(value->ToString())];
            LogEntry("Service name set to " + selectedServiceName->Cached.Name);
            Select(selectedServiceName);
        }
}
The test method itself needs to be udpdated to handle the service node (note that this involves slimming down the functionality in the route node):
In C#:
if (m_Navigator.Name == "Route")
{
m_Navigator.MoveToFirstChild();
vtServ.RouteNo = System.Convert.ToInt32(m_Navigator.Value);
}
else
if (m_Navigator.Name == "Service")
{
m_Navigator.MoveToFirstChild();
vtServ.ServiceNo = System.Convert.ToInt32(m_Navigator.Value);
vtServ.GetInvokePattern(vtServ.GetSetServiceFrmButton("btnOK")).Invoke();
vtServ.VTMainLaunched();
vtServ.GetInvokePattern(vtServ.GetMainFrmButton("Exit")).Invoke();
}
In Visual C++/CLI:
if (m_Navigator->Name == "Route")
{
m_Navigator->MoveToFirstChild();
vtServ->RouteNo = System::Convert::ToInt32(m_Navigator->Value);
}
else
if (m_Navigator->Name == "Service")
{
m_Navigator->MoveToFirstChild();
vtServ->ServiceNo = System::Convert::ToInt32(m_Navigator->Value);
vtServ->GetInvokePattern(vtServ->GetSetServiceFrmButton("btnOK"))->Invoke();
vtServ->VTMainLaunched();
vtServ->GetInvokePattern(vtServ->GetMainFrmButton("Exit"))->Invoke();
}
The XML also needs to have a Service node. Place it after Route.
MenuStrip Automation
Next, by way of illustration is clicking the Action menu and choosing Show Settings. Since this is just a demonstration, I have not included it in the XML, rather it is activated immediately after OK is clicked to leave the service selection menu.
| Automation element pattern for menu use |
The initial effort to click the action menu was carried out by exact replication of the logic used to click the edit menu in [KAILA]'s calculator example. Extensive mining of the menuElement illustrated his programmatic name as "ExpandCollapsePatternIdentifiers.Pattern" while mine was "InvokePatternIdentifiers.Pattern".
Research that varied from the intermittent to the intense was carried out over a period of six weeks. Towards the end I was on the point of applying command buttons as 'Shortcuts' to my main application desktop so that I could bypass the menu during automated testing. Fortunately in the same trawl where I read the legendry Dr. James McCaffery muse that UI Automation might not be possible with the menustrip control, I found the answer right here on CodeProject! It is the subject of what as I write is a little regarded article (now at tip) by Varun Jain, (UI Automation Framework Interesting Challenge).
From what I read, ExpandCollapse works for the older MFC forms and the newer WPF, because they use menuItem which implements it, but the variation inbetween, WindowsForms uses menuStrip which does not implement ExpandCollapse, it uses InvokePattern. I have retained the ExpandCollapse code for the day when I need to automate the testing of a qualifying form.
|
So, to the code.
In the test method the code that tests the service node from the XML is modified to open the Actions menu and click Show Settings as its last act. This action is too quick to observe on a fast machine, but it also triggers an entry in the log to prove both the menu action and the earlier choices made.
In C#:
vtServ.VTMainLaunched();
vtServ.OpenMenu(VTService.VTServiceMenu.Actions);
vtServ.ExecuteMenuByName("Show Settings");
vtServ.GetInvokePattern(vtServ.GetMainFrmButton("Exit")).Invoke();
In Visual C++/CLI:
vtServ->VTMainLaunched();
vtServ->OpenMenu(VTService::VTServiceMenu::Actions);
vtServ->ExecuteMenuByName("Show Settings");
vtServ->GetInvokePattern(vtServ->GetMainFrmButton("Exit"))->Invoke();
Before any methods are added to the VTService class, it needs an enumerated type to represent the main menu:
In C#:
public enum VTServiceMenu
{
Actions,
Help
}
In Visual C++/CLI:
enum class VTServiceMenu
{
Actions, Help
};
The new methods that are added to the VTService class to implement this are :
In C#:
public void OpenMenu(VTServiceMenu menu)
{
    InvokePattern invPattern = GetInvokeMenuPattern(menu);
    invPattern.Invoke();
}

public InvokePattern GetInvokeMenuPattern(VTServiceMenu menu)
{
    AutomationElement menuElement = _VTMainAutomationElement.FindFirst(TreeScope.Descendants, new PropertyCondition(AutomationElement.NameProperty, menu.ToString()));
    AutomationPattern[] autoPattern;
    autoPattern = menuElement.GetSupportedPatterns();

    InvokePattern invPattern = menuElement.GetCurrentPattern(InvokePattern.Pattern) as InvokePattern;
    return invPattern;
}
public void ExecuteMenuByName(string menuName)
{
    AutomationElement menuElement = _VTMainAutomationElement.FindFirst(TreeScope.Descendants, new PropertyCondition(AutomationElement.NameProperty, menuName));
    if (menuElement == null)
    {
        return;
    }

    InvokePattern invokePattern = menuElement.GetCurrentPattern(InvokePattern.Pattern) as InvokePattern;
    if (invokePattern != null)
    {
        invokePattern.Invoke();
    }
}
In Visual C++/CLI:
void OpenMenu(VTServiceMenu ^menu)
{
    InvokePattern ^invPattern = GetInvokeMenuPattern(menu);
    invPattern->Invoke();
}

InvokePattern ^GetInvokeMenuPattern(VTServiceMenu ^menu)
{
    AutomationElement ^menuElement = _VTMainAutomationElement->FindFirst(TreeScope::Descendants, gcnew PropertyCondition(AutomationElement::NameProperty, System::Convert::ToString(menu)));
    array<AutomationPattern^> ^autoPattern;
    autoPattern = menuElement->GetSupportedPatterns();

    InvokePattern ^invPattern = dynamic_cast<InvokePattern^>(menuElement->GetCurrentPattern(InvokePattern::Pattern));
    return invPattern;
}

void ExecuteMenuByName(String^ menuName)
{
    AutomationElement ^menuElement = _VTMainAutomationElement->FindFirst(TreeScope::Descendants, gcnew PropertyCondition(AutomationElement::NameProperty, menuName));
    if (menuElement == nullptr)
    {
        return;
    }

    InvokePattern ^invokePattern = dynamic_cast<InvokePattern^>(menuElement->GetCurrentPattern(InvokePattern::Pattern));
    if (invokePattern != nullptr)
    {
        invokePattern->Invoke();
    }
}
Conclusion
In putting together this article I have gained enough knowledge of UI Automation testing to deploy it effectively against my ticketing solution. To do this effectively I will need to reexamine how I am parsing the XML. Architecturally I will also consider Nunit by WeDoQA as an alternative to Visual Studio Test Explorer as a means of executing the tests. I believe it is also worth while exploring Excel as a means of driving the tests, with the commands and test data on different worksheets. However, from the perspective of developing a generic portable harness, Excel introduces a cost in the form of a license fee that does not exist in a pure Visual Studio Express or VS express + Nunit deployment.
Functionally I need to add code for check boxes and radio groups. I have chosen not to do this here becasue I needed to impose some scope boundaries and there are already good articles on CodeProject covering them. In time I will also need to automate the testing of the grid control on a multi grid form. In the event that it becomes a significant task, then I will also turn the notes I make as I proceed into an article.
History
2014-01-08 - V1.0 - Initial submission
My first program was written in Basic on a Sinclair Spectrum ZX 16K in the summer of '85. Having studied Computer Systems I attempted to break into the world of C but took a wrong turn and got immersed in COBOL!
I looked a C again in 1994 but didnt follow up on it. In 2001 I introduced myself to Visual C++ 6.0 courtesy of Ivor Hortons book, but found the going difficult. I tipped my toe in the .NET water in '05 but the first example I tried in VC++ 2005 express didnt work and allied with the absence of MFC in the express package, I parked that up.
Along the way my career got shunted into software testing
A personal machine change force me to migrate to VS2008 in 2008. The new edition of Ivor Hortons book for VC++ in VS2008 reintroduced me to .NET and I got curious whereupon I went out and acquired Stephen Fraser's "Pro Visual C++/CLI and
the .NET 3.5 Platform". I was hooked!
After 20 years I think I finally found my destination.
But it would take a further 8 years of exile before I was reappointed to a developer role. In that time I migrated to C# and used selenium wedriver (courtesy of Arun Motoori's Selenium By Arun) as the catalyst to finally grab the opportunity.


 General
  News
News  Suggestion
  Question
  Bug
Bug  Answer
  Joke
Joke  Praise
  Rant
Rant  Admin
Admin 


