Introduction
After a deep thinking, i decided to write my first article :). In this article, we are going to see how we can create a web api service in an Azure Worker Role and made it a self host using OWIN/Katana process. Then consume the service and bind it to the KendoGrid. It is a huge article for me because as it is first one, i will be very happy if you provide comments, suggestions and question any.
PreRequisites
You should be aware of Web API and Kendo Grid. If you aren't please go through the following.
http://www.asp.net/web-api/overview/getting-started-with-aspnet-web-api/tutorial-your-first-web-api
http://demos.telerik.com/kendo-ui/grid/api
Overview
Open Web Interface for .NET (OWIN) defines an abstraction between .NET web servers and web applications. OWIN decouples the web application from the server, which makes OWIN ideal for self-hosting a web application in your own process, outside of IIS–for example, inside an Azure worker role. (Definition from MSDN).
Firstly let us start creating a web api in azure worker process.
In order to create it we should have Microsoft Visual Studio 2013 with Windows Azure SDK tool kit.
You can dowload SDK from here.
Let us dip into the sea :).
Creating the Azure Project.
Note: In order to create/run the azure project we need to run the visual studio in the Administrator mode.
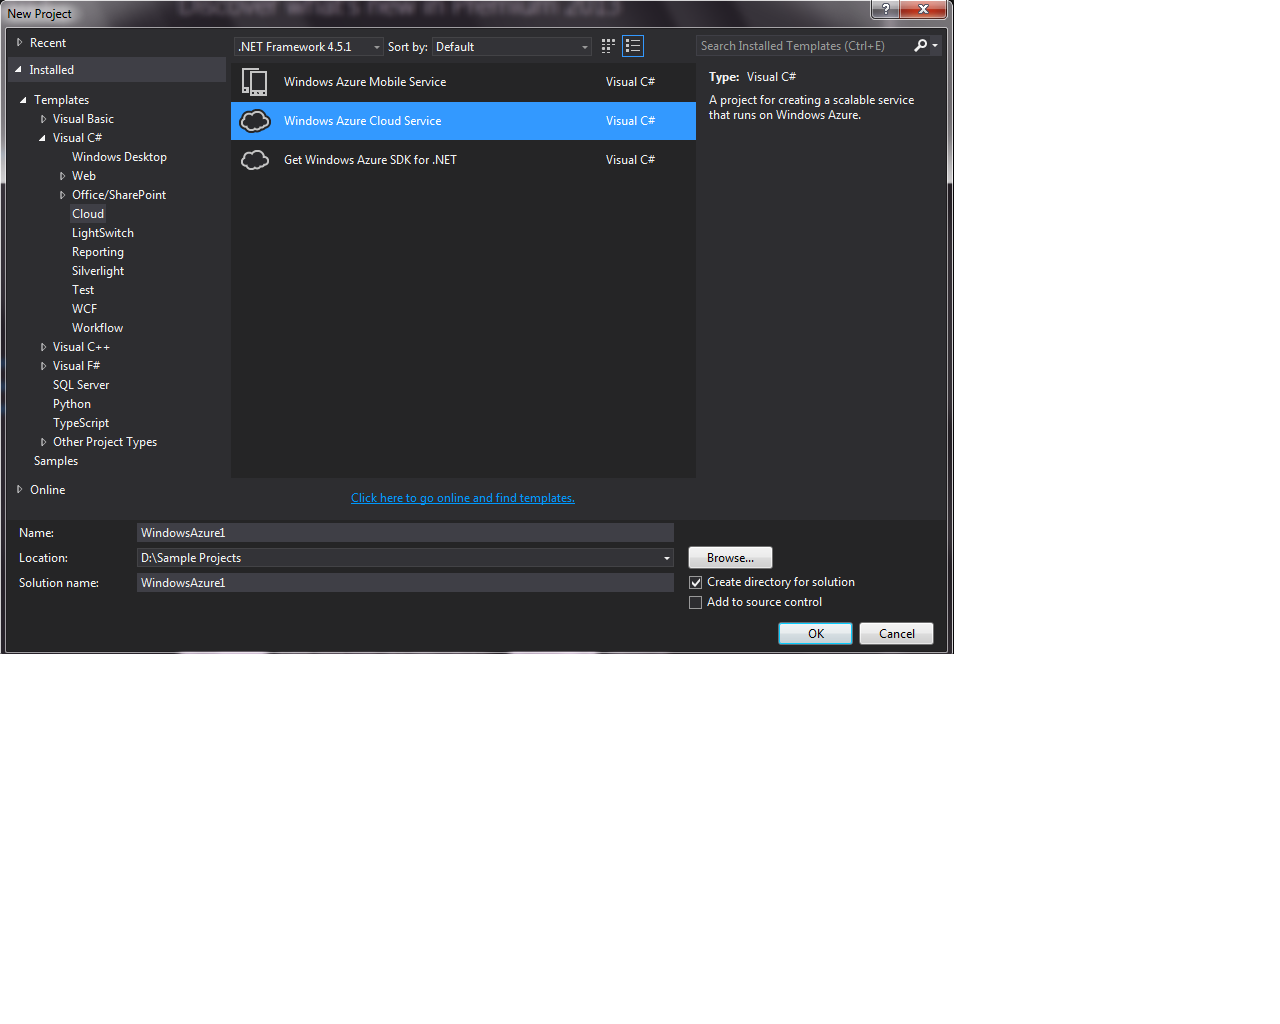
In the File menu, click New, then click Project. From Installed Templates, under Visual C#, click Cloud and then click Windows Azure Cloud Service. Name the project “AzureApp” and click OK.
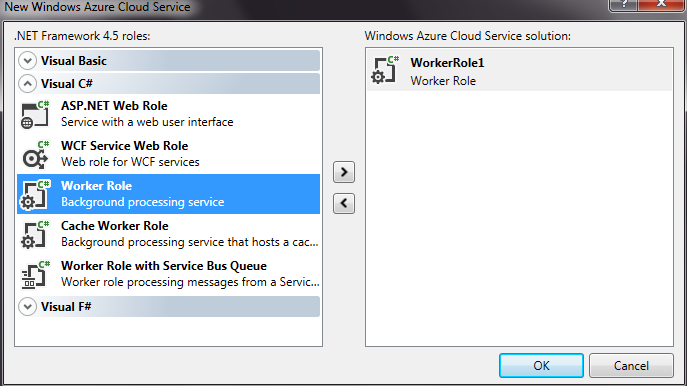
Name the project Name, in my case it is "MyFirstAzureApp". In the New Windows Azure Cloud Service dialog, double-click Worker Role. This step adds a worker role to the solution. Click OK. Don't change the Worker Role name (Keep it as it is "WorkerRole1").
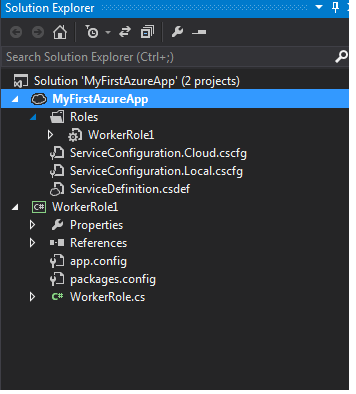
Now we are ready with the Azure project. The solution file contains two projects
1. MyFirstAzureApp
2. WorkerRole1
MyFirstAzureApp conains the Roles (WorkerRole1) and the configurations that are required for the azure application settings.
WorkerRole1 contains the business logics (in our case the webapi methods) which executes within the roles of the MyFirstAzureApp.
We can use either the WebRole or WorkerRole. A Web role will be considered when we are creating and deploying an application on the cloud. It provides a Internet Information Services (IIS) web-server used for hosting applications. The workerRole will be considered for the processes where we want to execute them as a background.
In our case we are just using the Web API (not considering as a web application), hence i have gone for the WorkerRole.
Adding and Configuring the EndPoint.
Now it is the time to configure the endpoint for the azure service. Double click the Workedrrole1 available under MyFirstAzureApp -> Roles. Select the EndPoints section. Now we are ready to add the end point. Click on AddEndPoint, you are ready to edit the predefined endpoint. (In our case we are not modifing the name of the end point). Select the http port from the Protocol, and give the public and private port values as 80 and save.
Add Controller
Now add a Web API Controller. Right Click on the WorkerRole1 Project -> Add -> Class. Name it as FirstController.
Add a get web method.
public JToken Get()
      {
          JToken json = JObject.Parse("{ \"firstName\": \"John\",  \"lastName\": \"Smith\",    \"isAlive\": true,    \"age\": 25,    \"height_cm\": 167.6,    \"address\": {        \"streetAddress\": \"21 2nd Street\",        \"city\": \"New York\",        \"state\": \"NY\",        \"postalCode\": \"10021-3100\"    },    \"phoneNumbers\": [        { \"type\": \"home\", \"number\": \"212 555-1234\" },        { \"type\": \"office\",  \"number\": \"646 555-4567\" }    ]}");
          return json;
      }
Make sure you add the namespace "using Newtonsoft.Json.Linq;"
Configuring the Web API.
Now we need to configure our Web API, in order to self host it. Add another class in the same location of controller and name it as StartUp.
Replace the available total code with the following code.
using Owin;
using System.Web.Http;

namespace WorkerRole1

{
    class Startup
    {
        public void Configuration(IAppBuilder app)
        {
            HttpConfiguration config = new HttpConfiguration();
            config.Routes.MapHttpRoute(
                "Default",
                "api/{controller}/{id}",
                new { id = RouteParameter.Optional });

            app.UseWebApi(config);
        }
    }
}
Now you will be finding that many errors regarding the namespaces and configurations regarding Owin. It is the time to add the nuget reference regarding the OWIN selfhosting.
Go to the nuget console manager and install the following nuget package.
Install-Package Microsoft.AspNet.WebApi.OwinSelfHost
Now we need to configure our workerrole process inorder to self host our web api.
Add "using Microsoft.Owin.Hosting;" in the "WorkerRole.cs" file available in the WorkerRole1 project.
And also add "private IDisposable _app = null;"
public class WorkerRole : RoleEntryPoint
{
private IDisposable _app = null;
}
Add the following code in the OnStart() method
var endpoint = RoleEnvironment.CurrentRoleInstance.InstanceEndpoints["Endpoint1"];
          string baseUri = String.Format("{0}://{1}",
              endpoint.Protocol, endpoint.IPEndpoint);

          _app = WebApp.Start<Startup>(new StartOptions(url: baseUri));
Finally the method looks.
public override bool OnStart()
{
ServicePointManager.DefaultConnectionLimit = 12;
var endpoint = RoleEnvironment.CurrentRoleInstance.InstanceEndpoints["Endpoint1"];
string baseUri = String.Format("{0}://{1}",
endpoint.Protocol, endpoint.IPEndpoint);
_app = WebApp.Start<Startup>(new StartOptions(url: baseUri));
return base.OnStart();
}
We are ready to rock the Azure application. Build the solution and make sure no errors available. Run the application.
Once we run the application, we will be finding an emulator running on the taskbar. Right click the emulator -> Show Compute Emulator UI. In that Select Service Details.
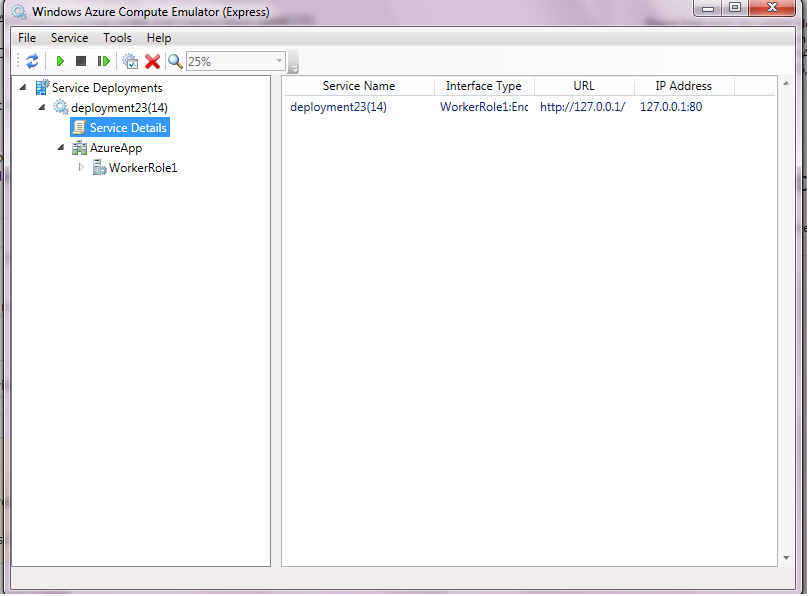
Note: I am not publishing my application on Azure for some technical problems. I am using this emulator as the hosted address and continuing. Please don't mind that.
Now we are ready to consume this selft hosted web api. Execute the url "http://127.0.0.1/api/First" in the browser.
You will get the json data like the follwoing.
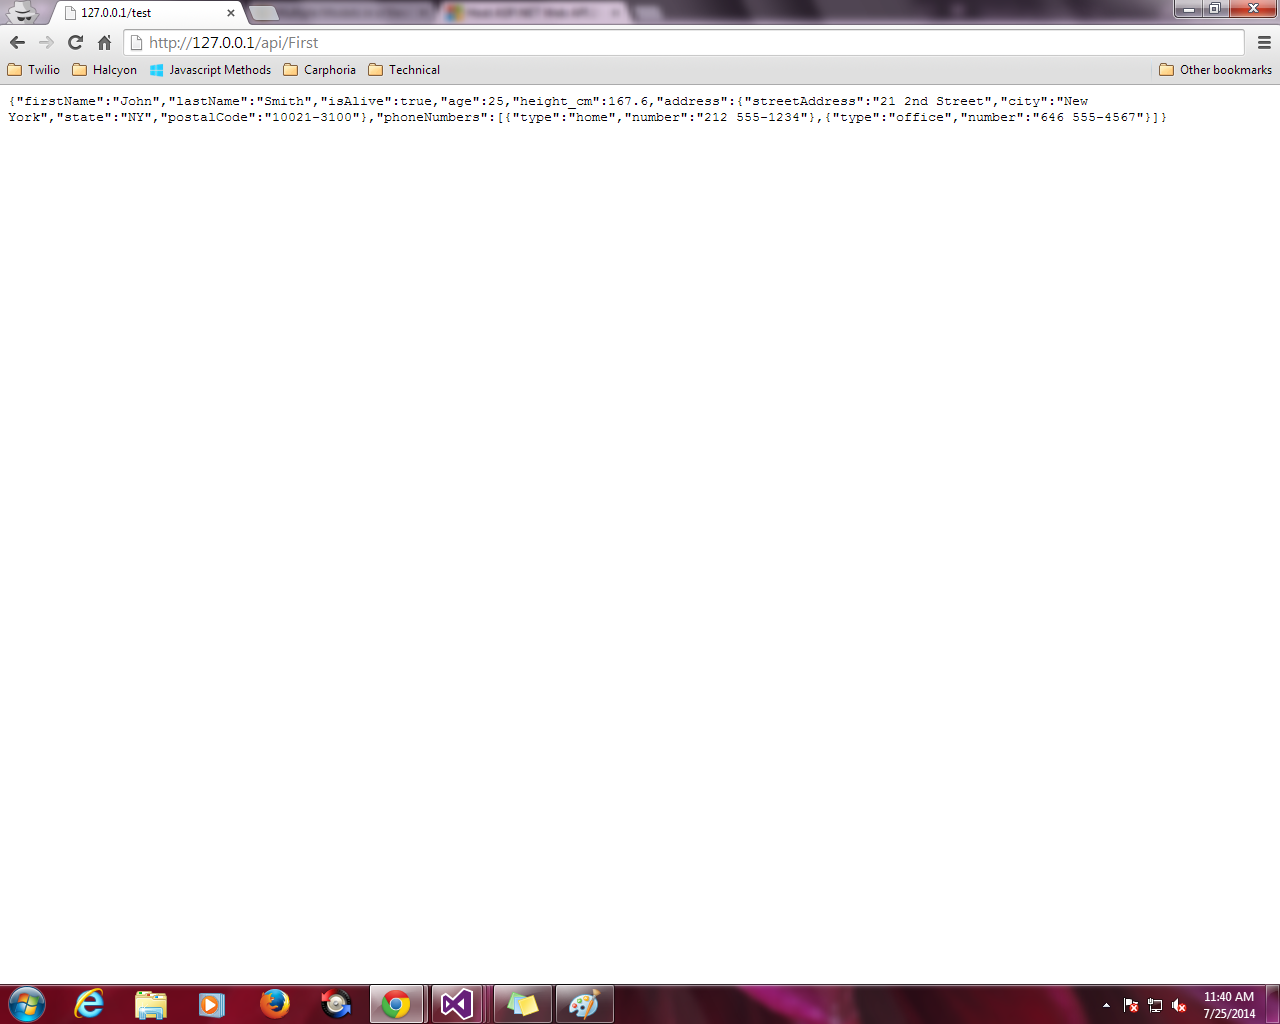
Well, Not yet completed! :).
We can create our web project in this project itself and consume the webapi here itself. But after you deploy your service and another team wants to consume the same service then the problem occurs in terms of accessing it.
The problem here i named as "Cross Origin Request".
In order to work with this, i am making my application cross domain access.
Enabling Cross Domain.
Let us enable the CORs for application. To do that please stop the emulator and stop the application.
Go to the console manager and install the following nuget package.
Install-Package Microsoft.AspNet.WebApi.Cors
You will be finding the references files will be added to your workerrole1 project.
Add the following namespaces and configure the EnableCors for the service. After added that the code look like the following.
using Owin;
using System.Web.Http;
using System.Web.Http.Cors;

namespace WorkerRole1
{
    class Startup
    {
        public void Configuration(IAppBuilder app)
        {
            HttpConfiguration config = new HttpConfiguration();
            var cors = new EnableCorsAttribute("http://localhost:51300", "*", "*");
            config.EnableCors(cors);
            config.Routes.MapHttpRoute(
                "Default",
                "api/{controller}/{id}",
                new { id = RouteParameter.Optional });

            app.UseWebApi(config);
        }
    }
}
Note: Here my client applicatication will be working under the localhost only (http://localhost:51300). If you want to enable the CORs for all you can replace the localhost url with "*".
Build the site and run it. It is now ready for the cross domain access.
That's it for Creating the self hosted web api in azure environment.
Consuming the Service in Kendogrid.
As you came to here, i think we know Kendogird, if not please use the above url to have a look.
Create an empty web application and add a page.
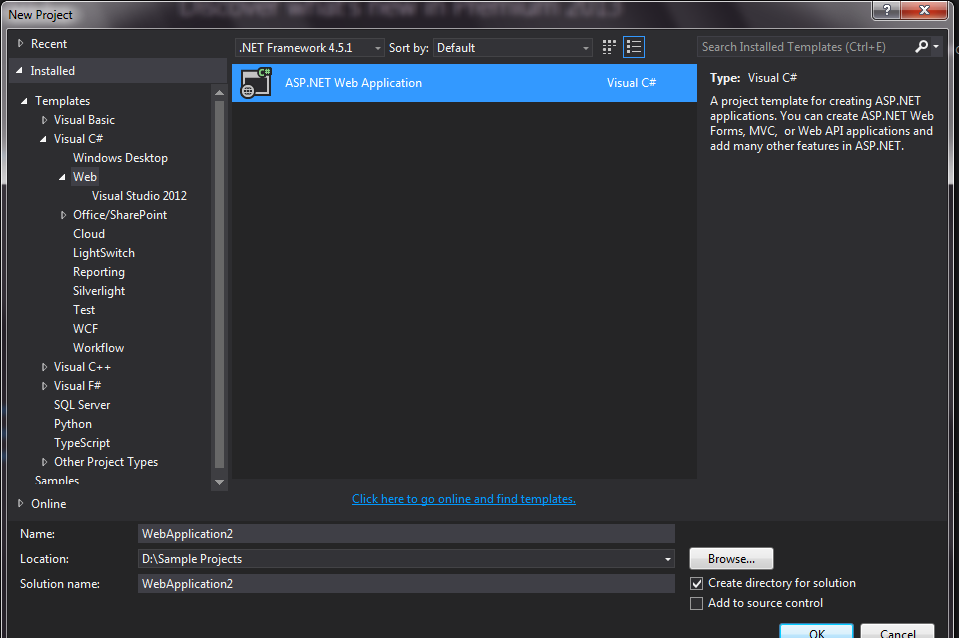
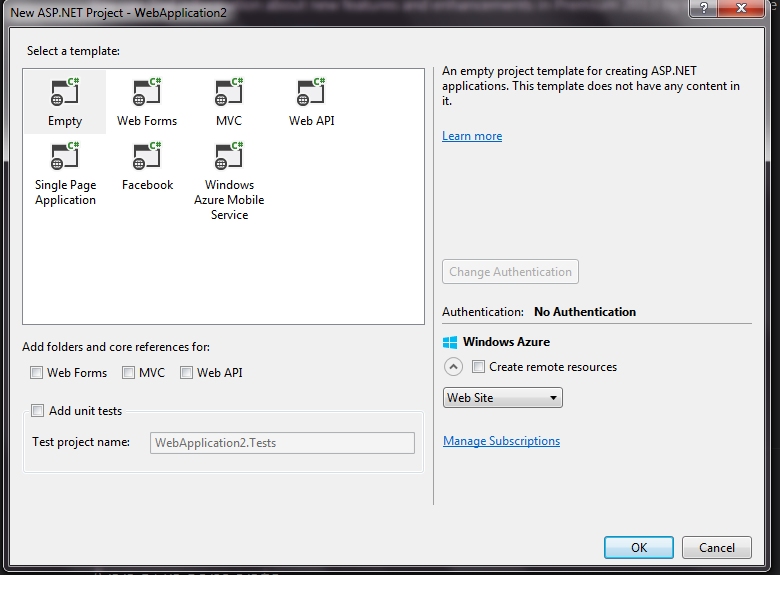
Start the Visual Studio, -> New Project -> Templates -> Visaul C#-> Web -> Select Asp.Net Web Application.
Name the application as you wish.
Select Empty template.
Once the project is opened add a web form and name as you wish (in my case it is Default.aspx).
Form is ready, we need to create a kendo grid and consume our service.
Now in order to work with kendo grid, we need to download a list of script and style files. Please download those or you can add online reference like following (Better practice is downloading files).
<base href="http://demos.telerik.com/kendo-ui/grid/api">
    <style>
       html
       {
           font-size: 12px;
           font-family: Arial,
           Helvetica, sans-serif;
       }
    </style>
    <title></title>

     <link href="http://cdn.kendostatic.com/2014.2.716/styles/kendo.common.min.css" rel="stylesheet" />
    <link href="http://cdn.kendostatic.com/2014.2.716/styles/kendo.default.min.css" rel="stylesheet" />
    <link href="http://cdn.kendostatic.com/2014.2.716/styles/kendo.dataviz.min.css" rel="stylesheet" />
    <link href="http://cdn.kendostatic.com/2014.2.716/styles/kendo.dataviz.default.min.css" rel="stylesheet" />
    <script src="http://cdn.kendostatic.com/2014.2.716/js/jquery.min.js"></script>
    <script src="http://cdn.kendostatic.com/2014.2.716/js/angular.min.js"></script>
    <script src="http://cdn.kendostatic.com/2014.2.716/js/kendo.all.min.js"></script>
And add an empty div within the form tag. We are going to bind the grid to this div.
Write the jQuery to bind the kendogrid which is available in ready function .( Here i am displaying the total page)
<%@ Page Language="C#" AutoEventWireup="true" CodeBehind="Default.aspx.cs" Inherits="Test.Default" %>

<!DOCTYPE html>

<html xmlns="http://www.w3.org/1999/xhtml">
<head>
    <base href="http://demos.telerik.com/kendo-ui/grid/api">
    <style>
        html
        {
           font-size: 12px;
           font-family: Arial,
           Helvetica, sans-serif;
        }
    </style>
    <title></title>

    <link href="http://cdn.kendostatic.com/2014.2.716/styles/kendo.common.min.css" rel="stylesheet" />
    <link href="http://cdn.kendostatic.com/2014.2.716/styles/kendo.default.min.css" rel="stylesheet" />
    <link href="http://cdn.kendostatic.com/2014.2.716/styles/kendo.dataviz.min.css" rel="stylesheet" />
    <link href="http://cdn.kendostatic.com/2014.2.716/styles/kendo.dataviz.default.min.css" rel="stylesheet" />
    <script src="http://cdn.kendostatic.com/2014.2.716/js/jquery.min.js"></script>
    <script src="http://cdn.kendostatic.com/2014.2.716/js/angular.min.js"></script>
    <script src="http://cdn.kendostatic.com/2014.2.716/js/kendo.all.min.js"></script>
</head>
<body>
    <script>
        $(document).ready(function () {

            $("#divId").kendoGrid({
                dataSource: {
                    transport: {
                        read: "http://127.0.0.1/api/First",
                    },
                    schema: {
                        model: {
                            fields: {
                                firstName: { type: "string" }
                            }
                        }
                    }
                },
                height: 500,
                scrollable: true,
                selectable: true,
                columns: [
                                    {
                                     field: "firstName",
                                     title:"First Name"
                                    },
                                    {
                                        field: "lastName",
                                        title: "Last Name"
                                    }, {
                                        field: "isAlive",
                                        title: "Alive"
                                    }, {
                                        field: "age",
                                        title: "Age"
                                    }, {
                                        field: "address.streetAddress",
                                        title: "Street Address"
                                    }
                                    , {
                                        field: "address.city",
                                        title: "City"
                                    }
                                    , {
                                        field: "address.state",
                                        title: "State"
                                    }
                                    , {
                                        field: "address.postalCode",
                                        title: "Postal Code"
                                    }
                                    , {
                                        field: "phoneNumbers[0].number",
                                        title: "Home Phone"
                                    }
                                    , {
                                        field: "phoneNumbers[1].number",
                                        title: "Office Phone"
                                    }
                ]
            });

        });
    </script>
    <form id="form1" runat="server">
    <div>
      <div id="divId">
        </div>
    </div>
    </form>
</body>
</html>
Now we are everything ready. Just run the application and you will see the magic.
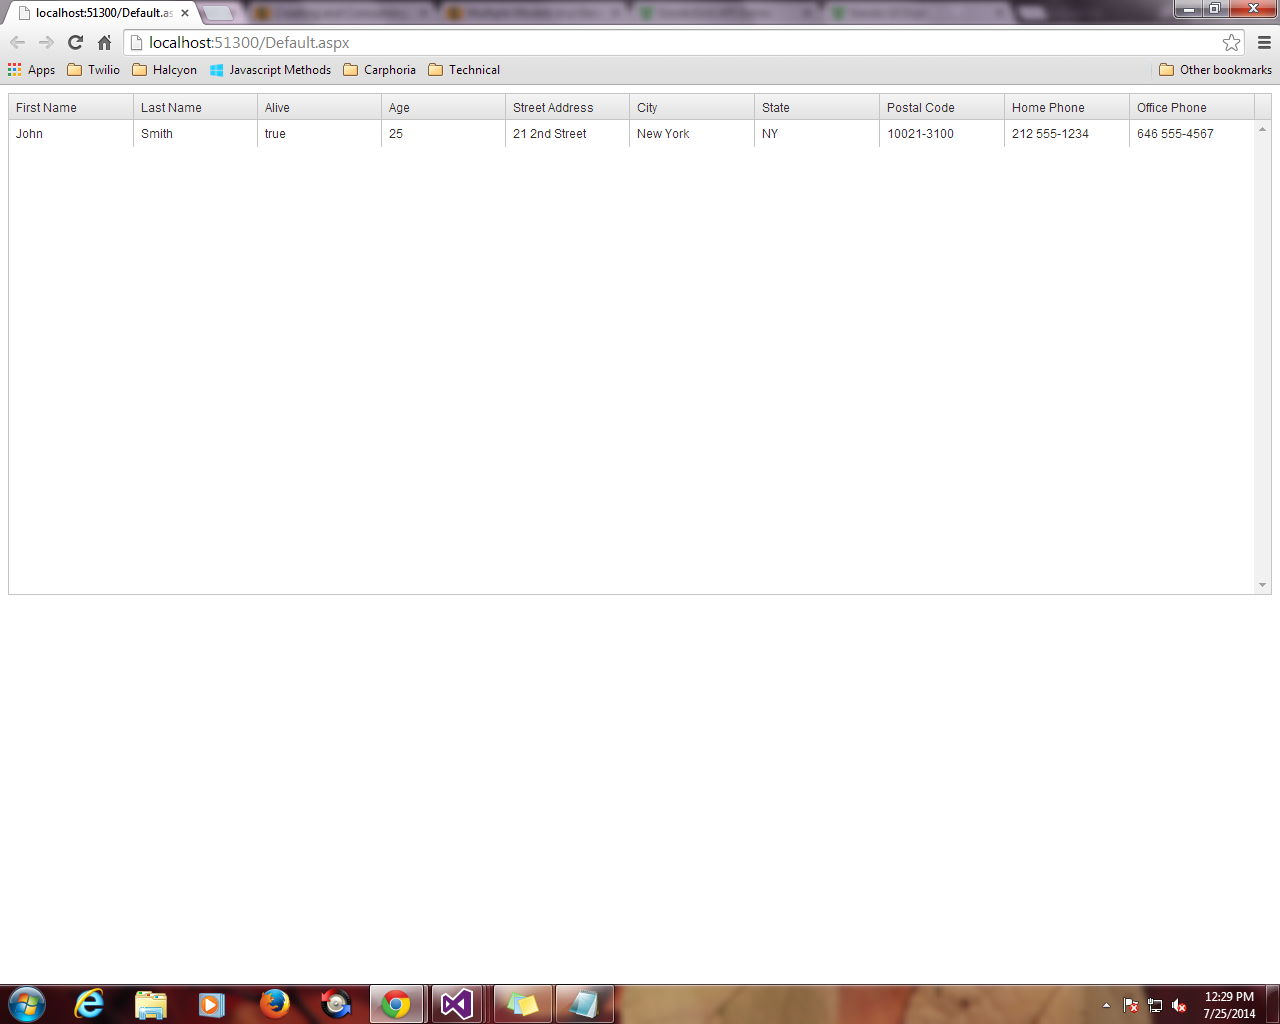
As in our service, we used only one record in json, if we make the multiple records then we can feel the beauty of the kendo grid (Here we are not focused on the kendo grid mainly).
Thank You
I am passion about the technology and coding. I would like to expose myself with the contemporary technology.


 General
  News
News  Suggestion
  Question
  Bug
Bug  Answer
  Joke
Joke  Praise
  Rant
Rant  Admin
Admin 


