Introduction
This article explains how to use Sitemap with Master pages to create a Master-Child navigation menu.
Scenario: We have pages with a top menu bar and a side menu in which the side menu displays pages/links based on what is selected in the top menu.
In this article, I will explain how to achieve this in ASP.NET 2.0. For an example, assume the following requirements:
- We have main menu links such as Home, Products, and Services.
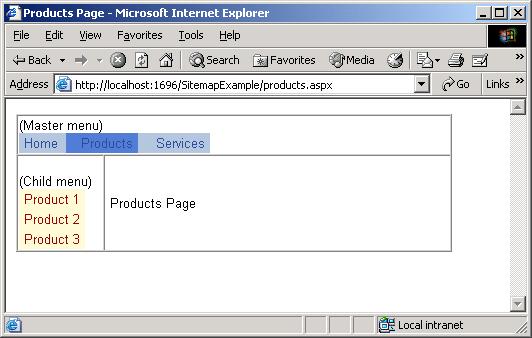
- When the Products link is clicked, the Products.aspx page should be displayed. In Products.aspx, the left menu should display links
to different product pages like Product1.aspx, Products2.aspx, and Products3.aspx.
- When the Services link is clicked, the Services page should be displayed. In the Services.aspx page, the left menu should display
different service pages like Service1.aspx, Service2.aspx, and Service3.aspx.
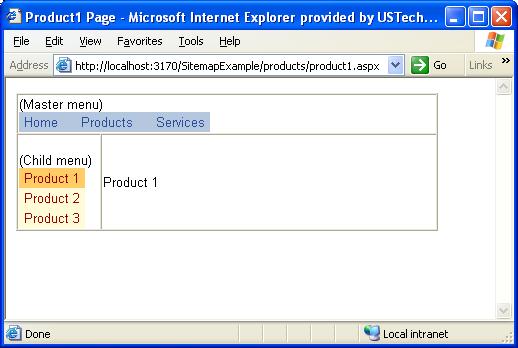
- Maintain the left menu listing when any of the pages in the products/services left menu is clicked.
This can be achieved by using a sitemap file, sitemap data source, and the menu controls available in ASP.NET 2.0.
The code
First of all, we need to create a sitemap file as shown below:
="1.0" ="utf-8"
<siteMap xmlns="http://schemas.microsoft.com/AspNet/SiteMap-File-1.0" >
<siteMapNode url="default.aspx" title="Home" description="Sitemap example's home page">
<siteMapNode url="products.aspx" title="Products" description="Products listing page">
<siteMapNode url="products/product1.aspx" title="Product 1" description="" />
<siteMapNode url="products/product2.aspx" title="Product 2" description="" />
<siteMapNode url="products/product3.aspx" title="Product 3" description="" />
</siteMapNode>
<siteMapNode url="services.aspx" title="Services" description="Services listing page" >
<siteMapNode url="services/service1.aspx" title="Services 1" description="" />
<siteMapNode url="services/service2.aspx" title="Services 2" description="" />
<siteMapNode url="services/service3.aspx" title="Services 3" description="" />
</siteMapNode>
</siteMapNode>
</siteMap>
Now create a master page and format it as per your requirements. Then add two sitemap data source controls and name the controls smdsMaster
and smdsChild.
For the smdsChild control, set the following properties:
ShowStartingNode -> FalseStartFromCurrentNode -> True
Then add a menu control in the top section of the master page, name it mnuMaster, and apply any auto-formats available.
Set the following properties of the smdsMaster control:
DataSource –> smdsMasterMaximumDynamicDisplay -> 0Orientation -> HorizontalStaticDisplayLevels -> 2
Add a menu control in the left section of the master page, name it mnuChild, and set the following property of the control:
Now your master page may look some thing like below:
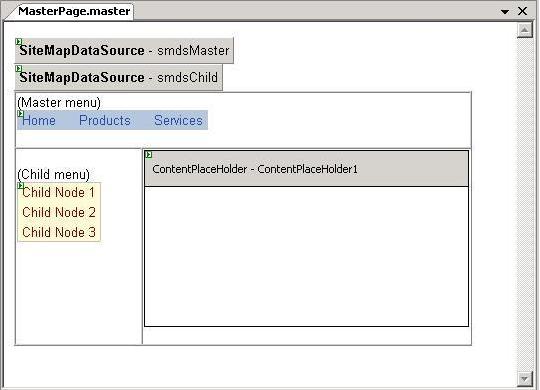
Add three child pages (which derive from the above MasterPage) named Default.aspx, Products.aspx, and Services.aspx in the project root.
Also add two folders named Products and Services under the root folder. Create Product1.aspx, Product2.aspx, and Product3.aspx under
the Products folder, and Service1.aspx, Service2.aspx, and Service3.aspx under the Services folder, as shown below:
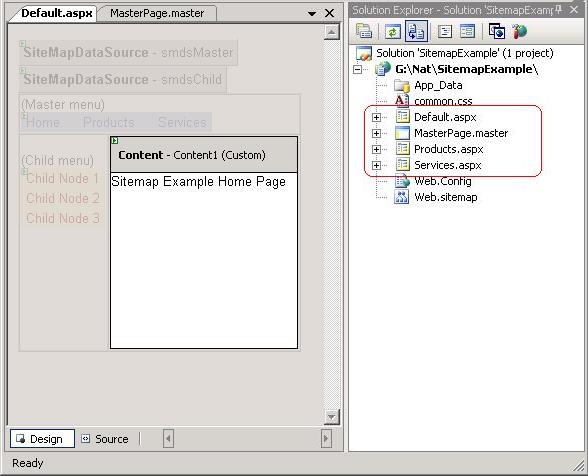
In the home page, you may want to hide the child menu and also display the left menu even when any of the child pages in the products
or services category is selected. For this, you can add the code below in the master page’s load event, as I did in the sample application.
protected void Page_Load(object sender, EventArgs e)
{
    if (!IsPostBack)
    {
        string sURL = Request.Url.ToString().ToLower();
        if (sURL.EndsWith("default.aspx"))
        {
            mnuChild.Visible = false;
        }
        else if (sURL.Contains("/products/") ||
                      sURL.Contains("/services/"))
        {
            smdsChild.StartingNodeOffset = -1;
        }
    }
}
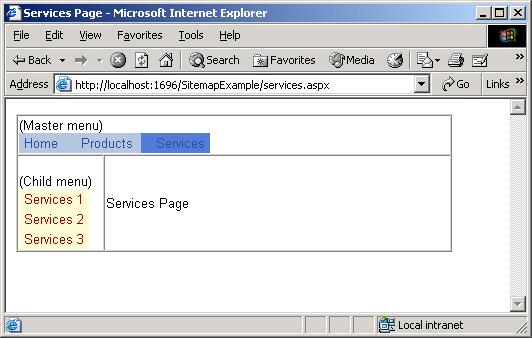
Now run the application and check the navigation menus in each page. You may get screens similar to those shown below.
Hope you find this article informative.
