Contents
Let's set the scene. You create a fabulous new application. You want to give away a free edition of your application, but you also want a pro edition that you are going to charge for. The free edition will obviously need to lack some features to encourage people to buy the pro edition.
How do you go about building multiple editions, and importantly, how do you maintain them effectively? In this article, I'll describe some of the basic techniques for managing multiple versions of an application, and discuss the advantages and drawbacks of each.
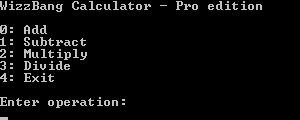
As a guide for this article, I'll use a small sample application that comes in two editions. The WizzBang Calculator is a command line calculator. The pro edition is fully featured and supports addition, subtraction, multiplication, and division. WizzBang also comes in a lite edition that offers just addition and subtraction.

The first step in building a multi-edition application is to abstract your functionality away from the user interface and calling code. This is good design practice regardless of your intentions for multiple editions, so hopefully, you've already done something like this. The cleaner you make your separation, the easier you'll find it to manage your different editions of the application.
The WizzBang Calculator application has an abstract Command class that takes the user input and performs an operation. A subclass is created for each type of operation that overrides the PerformOperation method and provides the specific calculation.
public abstract class Command
{
public void ExecuteCommand()
{
.
.
.
.
.
.
int result = PerformOperation(firstNumberValue, secondNumberValue);
Console.WriteLine("The answer is: " + result);
}
public abstract int PerformOperation(int firstNumber, int secondNumber);
}
public class AddCommand : Command
{
public override int PerformOperation(int firstNumber, int secondNumber)
{
return firstNumber + secondNumber;
}
}
When the application starts up, an instance of each of the command subclasses is created and added to a list of commands. This list is used to build up the user interface menus and provide a way for the user to invoke the various commands.
private static List<command> CreateCommands()
{
    List<command> commands = new List<command>();

    commands.Add(new AddCommand());
     commands.Add(new SubtractCommand());
    commands.Add(new MultiplyCommand());
    commands.Add(new DivideCommand());

    return commands;
}
Now you need to create your various editions. There are several options you have here. We'll walk though each possibility, and take a look at the pros and cons of each technique.
The first approach that many people take is to create a copy of their application, and modify the copy to remove some of the key features. Although it seems like the easy option to begin with, it is only going to cause further problems down the road. If you have bug fixes or improvements to make, you'll find yourself making the changes multiple times, once for each edition of your application. You should generally rule this option out.
A slight step up from maintaining multiple code bases for each edition is to shift all the common code into shared assemblies, and maintain multiple editions of just one assembly that performs the calls into the functionality in the shared libraries. This helps a little with some of the problems of maintaining multiple copies of a huge code base, but you still have the same issue, just to a slightly lesser extent.
Imagine you were to maintain a separate set of your source code for each edition, but imagine there was a way to merge changes between the different sets of source code to prevent you from having to do too much repeated work. Well there is. Most modern source control products offer a way to branch your code into two versions, work on the versions independently, and merge changes from one branch to the other. (Check with your source control documentation for specific methods for achieving this.)
You would start with the primary edition containing all the functionality. You then create a branch from the primary edition for each edition you want to offer to your users. In each of these branches, you would be able to make the necessary changes to remove any functionality that was not offered in that specific edition.
Now, you are able to make base changes and fixes in the primary branch, and merge these changes into each of the other branches to prevent duplicate work.
This obviously has the advantage of reducing the code duplication. It does, however, add its own complexities. Multiple branches can be tricky to manage. It's not easy to keep track of what changes have been merged to which branches. It takes some careful discipline and strict procedures to ensure that the various branches don't get too far out of sync and cause problems.
A popular option that many developers take is to maintain just one edition of the application, and decide at run time which functionality the user is allowed to invoke. This decision is often made via the use of some key or serial number. Different values of keys can relate to different unlocked editions for the user. You can either choose to build this kind of functionality yourself, or you can use one of the many application protection libraries available online.
Initially, this does sound like an attractive option, and it does have some benefits:
- You only have one edition of the application to maintain.
- Users can easily upgrade to higher editions by just purchasing a new serial number.
But, it also has its drawbacks. Code for locked functionality is still compiled into the binaries. This leaves it open for crackers to break your application and provide a way of accessing the locked functionality. This is even more of an issue with .NET, as code is easily readable using tools like Reflector or ILDASM. Obfuscators and IL encryptors can help, but the effectiveness of obfuscators and similar tools is still widely questioned.
The final technique addresses many of the problems associated with some of the other methods. Conditional compilation is a technique where using a series of 'directives', you can instruct the compiler to either compile or not compile specific blocks of code under different conditions. What I will demonstrate is the various commands available to you for working with conditional compilation, and how these commands can be used to manage multiple editions of an application.
Conditional compilation in C# and VB.NET centers around several 'pre-processor directives'. First, a little background - pre-processor directives originated in C. C and C++ both have a pre-processor that would parse the code base before the compiler and do some advance processing. Directives could be provided to the pre-processor to instruct it on what it should do. C# and VB.NET don't have formal pre-processors, but the compiler does however recognize several pre-processor directives and processes them in the same way. If you come from a C or C++ background, you'll find some limitations in what C#/VB.NET compilers do (for example, you can't create macros), but what they can do is more than enough to handle the conditional compilation scenarios we are looking at. The pre-processor directives we are interested in are:
#define (Or #CONST in VB.NET)
#undef

#if
#elif (Or #ElseIf in VB.NET)
#else
#endif
#define and #undef allow you to define (and undefine) constants. The remaining four directives allow you to restrict the code that is compiled based on those constants.
Let's start with an example:
#define TEST

#if TEST
    Console.WriteLine("Test defined");
#else
    Console.WriteLine("Test not defined");
#endif
The #define and #undef directives must come first in a file, before any other code, and affect the constant only for code within that file. The #undef directive is used to undefine globally declared constants (more on that later).
You'll notice that unlike regular if statements, you don't use curly braces to surround the if block; instead, you have an #endif directive at the bottom of the block. OK, let's run this and see what we get:
Pretty much as you would expect, it outputs "Test defined". Let's just see what happens if we remove the #define directive and run the code again:
Again, as expected, "Test not defined" is the output.
Let's take a quick peek at the compiled assembly in Reflector and see what it looks like.
What you are looking at here is the compiled version of the Main method containing our pre-processor directives. Interestingly, there's no #if/#else/#endif directives in the compiled assembly, and importantly, the code from the else block is totally missing. So, what has happened here? Pre-processor directives don't work like normal if statements. Unlike normal if statements, pre-processor directives are evaluated at compile time, not runtime. The compiler processes the directives, evaluates and determines the result of the #if directive, and only compiles the half of the #if/#else block that matches with the evaluated #if statement.
Now, we have a useful way of including or removing code from a source file depending on some defined constants. Let's quickly apply this to our WizzBang Calculator application and see how it helps.
private static List<command> CreateCommands()
{
    List<command> commands = new List<command>();

    commands.Add(new AddCommand());
    commands.Add(new SubtractCommand());

#if ProEdition
    commands.Add(new MultiplyCommand());
    commands.Add(new DivideCommand());
#endif

    return commands;
}
If we slightly modify our CreateCommands method to include some pre-processor directives, we can ensure that the commands for multiply and divide are only created in the pro edition. We can also wrap our MultiplyCommand and DivideCommand classes with #if/#endif directives to ensure that not only are the command objects not created for the lite edition, but their respective classes aren't even compiled into the final assembly, preventing any nefarious users from finding a way to bypass our protection and re-include them in the lite edition.
#if ProEdition
    public class MultiplyCommand : Command
    {
        .
        .
        .
    }
#endif
Finally, we can also include some directives in the DisplayTitle method to write a different title depending on the edition.
The remaining pre-processor directive we haven't mentioned is #elif. This directive stands for "else if". It works much like a regular elseif statement, and allows you to chain multiple if statements together.
You can still use all the normal conditional operators with pre-processor directives. For example, if you want a block of code included in the compiled assembly if either the LiteEdition constant or the ProEdition constant is defined, you could do the following:
#if LiteEdtion || ProEdition
    commands.Add(new AddCommand());
    commands.Add(new SubtractCommand());
    .
    .
    .
#endif
Now, we have our differentiated WizzBang application that can be compiled into two editions based upon some defined constants. But it is a bit tricky to define those constants in the source code. They would have to be defined in every single source file, and would have to be changed every time we want to compile a different edition. What we need is a way of defining these constants globally, and at build time. Fortunately, there are several ways to do this. The easiest and most common way is though the project properties dialog in Visual Studio.
First let's create some new build types for our different editions. If you click on the "Build" menu and open up "Configuration Manager" you will be able to configure some different types of builds. Pull down the "Active Solution Configuration" combo box and create some new Configurations. You can choose to copy the configuration options from an existing configuration to save you some work. Here you can see I've created a Debug and Release configuration for each of my application editions:
Once you have created build configurations for your various editions, go to the project properties for your application and go to the "Build" tab. You'll see at the top that you can select which build configuration you are currently editing. Just beneath that, you'll see a text entry box labeled "Conditional compilation symbols". Here, you can list any constant you want to be defined for this build configuration. You can use commas if you want to define more than one constant. (Note that conditional compilation constants are case sensitive). You can also use the tick boxes underneath to decide if the DEBUG or TRACE constants are defined for this build configuration. (Usually, TRACE is defined always, and DEBUG is defined for debug builds only.)
Now you'll find that the appropriate constants are defined automatically when the compiler starts. You can change the active build configuration using the drop down combo box on the standard tool bar. Visual Studio also helps you out by colouring any code that won't be compiled with the current configuration in grey, and automatically providing one of the region style +/- collapse boxes.
You can also define constants in MSBuild scripts using the <DefineConstants></DefineConstants> tags, and these can be included conditionally in property groups like any other MSBuild properties. Alternatively, you can define your constants via the command line with the /d switch:
MSBuild:

<DefineConstants>ProEdition</DefineConstants>

Visual Basic command line:
vbc /d:ProEdition=TRUE MyApplication.vb

C# command line:
csc /d:ProEdition MyApplication.cs
One final trick in the conditional compilation toolbox is the conditional attribute. The conditional attribute can be applied to methods, and indicates to the compiler that calls to this method should only be compiled if the specified constant is defined.
[Conditional("ProEdition")]
private static void CreateProCommands(List<command> commands)
{
    commands.Add(new MultiplyCommand());
    commands.Add(new DivideCommand());
}
Using the conditional attribute like this has the advantage that your code isn't littered with the #if/#endif directives cluttering the flow of your main methods.
One thing worth noting about the conditional attribute is that it is the equivalent of wrapping the call to the method in #if/#endif directives, and not the contents of the method. This means that the method itself and all the code in it are still compiled into the assembly, it is just the calls to the method that are removed.
The two techniques are often used together:
[Conditional("ProEdition")]
private static void CreateProCommands(List<command> commands)
{
#if ProEdition
    commands.Add(new MultiplyCommand());
    commands.Add(new DivideCommand());
#endif
}
By doing this, you get the best of both worlds. The contents of the method are not compiled into the application, and the calls to the method are removed without cluttering your main methods with lots of #if/#endif directives. (Additionally, you don't have the performance waste of calling into empty methods. This is especially useful for regularly called methods, like logging or debugging calls.)
You can apply multiple conditional attributes to a single method if you require the method to be called when any one of a set of constants have been defined.
It probably is worth noting that the Common Language Specification does permit compilers to ignore the conditional attribute. The C#, J#, and Visual Basic compilers do support the conditional attribute; but the C++ and JScript compilers do not. This does not affect the support of the pre-processor directives we discussed earlier.
As I mentioned at the beginning, conditional compilation does require that your code is well structured and functionality is carefully separated so the appropriate parts of the code can be easily removed from the compiled assemblies, but this is something that is considered good practice anyway.
We started by taking a brief look at the various possible techniques for managing multiple editions of an application. We looked at the pitfalls associated with each of the simplistic methods. Then we looked at more detail into conditional compilation. We discovered how conditional compilation can be used to restrict parts of the source code from being included in each of the different editions of your application, and we looked at how Visual Studio can help you manage the different build configurations for each of your editions.
Finally, we took a look at the conditional attribute and how it can help improve the quality of your code by providing some of the conditional compilation behavior automatically.
Conditional compilation is one of the best tools available to help you build and manage different editions of your application.
Some additional references for more information:
- 18 March 2009 - Added contents menu & improved ordering
- 16 March 2009 - Initial version
Thanks to Mustafa for originally suggesting I write this article.
I discovered programming aged 11 with my school's BBC micro, and a book titled "Write your own space action games". (Their ideas of "space action" games were very different to mine. My ideas didn't include a bunch of * signs controlled via a text based menu)
I got hooked on VB for a while (mainly because I discovered I could replace the * signs with .bmp files) until someone pointed out the wonderful world of objects and Java. I also went thought a c++ phase.
I've now been a professional developer for 5 years.
My current language of choice is C#. I spend my free time playing with XNA and microcontrollers.


 General
  News
News  Suggestion
  Question
  Bug
Bug  Answer
  Joke
Joke  Praise
  Rant
Rant  Admin
Admin 


 Nice. I started on them.