Introduction
If you've ever created a custom WPF window, or will, you notice that you somehow ‘lose’ the ability to resize the window as is common in standard windows. In this tutorial, you are going to learn how to enable resizing of your custom window using VB.NET code. We shall create our custom window using Expression Blend and you can do the coding in either Blend’s code editor, if you're using Blend 3, or Visual Studio.
Step 1: Designing the Custom Window
Let’s start off by creating our WPF project in Expression Blend. Start Blend and create a WPF Application project named “Custom Resize”. Ensure that the language is set to Visual Basic in the Language combobox.
In the following steps, we'll create our custom window and later write the necessary code:
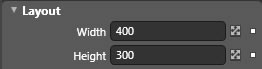
- Select Window element in Objects and Timeline panel. In the Layout section of the Properties panel, set the Width to 400 and the Height to 300.
- In the Appearance section of the Properties panel, check the AllowsTransparency checkbox.
- In the Brushes section of the Properties panel, set Background to NoBrush.

- Notice that you now have an empty window. Draw a rectangle inside the window, then rename the rectangle as ‘Background’.
- Right click the rectangle and select AutoSize > Fill. Your rectangle should now fill the whole window.
- Give the rectangle rounded corners using the Corner Resize Handles and change the Fill to a gradient brush similar to the following image:
- Draw another rectangle inside the window close to its bottom. Ensure that its Vertical Alignment is set to Bottom in the Layout section and the Margins are similar to the following image.
- Rename our new rectangle as “BottomResizeRect”. This rectangle will enable us to adjust the height of our window. It should therefore be at the top of the stack of our UI Elements.
- Adjust the height of
BottomResizeRect to 4 and set its Opacity to zero. - In the Common Properties section, set the Cursor for
BottomResizeRect to SizeNS.
Finally, let’s add a TextBlock to our Window and change the text to “Custom Resize”. My final result looks like the following image:
Run the project. Notice that when you run the cursor over the bottom edge of our Custom Window application resize handles appear. Despite this, we can't adjust our application’s height. We shall add coding for this purpose next. Press ALT+F4 to stop the app.
Step 2: Coding
To enable our window to resize, we shall cater to several mouse events for BottomResizeRect. Onwards:
- Right click Custom Resize project in the Project panel and select ‘Edit in Visual Studio’.
- After a brief moment, the project should open in Visual Studio. Double click on ‘MainWindow.xaml.vb’ to open it for editing.
- Type in the following code after the class declaration:
Private bottomResize As Boolean
Private initBtmY As Double
- Select
BottomResizeRect from the ClassName combobox and MouseLeftButtonDown from the MethodName combobox. In the MouseLeftButtonDown event of BottomResizeRect, type in the following code:
bottomResize = True
initBtmY = e.GetPosition(Me).Y
- In
BottomResizeRect’s MouseMove event procedure, type in the following code:
Dim newBtmY As Double = e.GetPosition(Me).Y
Dim diff As Double = initBtmY - newBtmY
Dim minHeight As Integer = 200
If bottomResize = True Then
BottomResizeRect.CaptureMouse()
Dim newHeight = e.GetPosition(Me).Y - diff
If newHeight > minHeight Then
Me.Height = newHeight
End If
End If
- In the MouseLeftButtonUp event procedure of
BottomResizeRect, type in the following code:
bottomResize = False
BottomResizeRect.ReleaseMouseCapture()
- I noticed, and you might too, that when running the app in its current state, clicking the bottom edge will at times cause the window to resize when the cursor approaches the bottom of the window. This occurs especially when you click too close to the bottom edge in an almost simultaneous click of the screen background and our window’s bottom edge. To avoid this, type in the following code in
BottomResizeRect’s MouseEnter event procedure:
bottomResize = False
Our coding is now complete. Your MainWindow class should be similar to the following code:
Class MainWindow
Private bottomResize As Boolean
Private initBtmY As Double
Private Sub BottomResizeRect_MouseEnter _
(ByVal sender As Object, ByVal e As _
System.Windows.Input.MouseEventArgs) _
Handles BottomResizeRect.MouseEnter
bottomResize = False
End Sub
Private Sub BottomResizeRect_MouseLeftButtonDown _
(ByVal sender As Object, ByVal e As _
System.Windows.Input.MouseButtonEventArgs) _
Handles BottomResizeRect.MouseLeftButtonDown
bottomResize = True
initBtmY = e.GetPosition(Me).Y
End Sub
Private Sub BottomResizeRect_MouseLeftButtonUp _
(ByVal sender As Object, _
ByVal e As System.Windows.Input.MouseButtonEventArgs) _
Handles BottomResizeRect.MouseLeftButtonUp
bottomResize = False
BottomResizeRect.ReleaseMouseCapture()
End Sub
Private Sub BottomResizeRect_MouseMove _
(ByVal sender As Object, ByVal e As _
System.Windows.Input.MouseEventArgs) _
Handles BottomResizeRect.MouseMove
Dim newBtmY As Double = e.GetPosition(Me).Y
Dim diff As Double = initBtmY - newBtmY
Dim minHeight As Integer = 200
If bottomResize = True Then
BottomResizeRect.CaptureMouse()
Dim newHeight = e.GetPosition(Me).Y - diff
If newHeight > minHeight Then
Me.Height = newHeight
End If
End If
End Sub
End Class
Run the project by pressing F5. When the application opens, run your cursor over the bottom edge of the window. Notice that a North-South resize handle appears. Check to see whether you can resize the window’s height. If it’s not resizing, check your code. If it’s working, notice that you can increase the windows height and reduce it upto a certain size. This is because of our minimum height which we set as 200.
Most of the code is self explanatory from the comments I added but I will offer some explanation on various sections of the code. In the MouseLeftButtonDown event procedure, we set our boolean value to true to indicate our intention to resize the window’s height. We also assign a value to one of the class members (initBtmY), the initial location of the cursor on the window.
During the rectangle’s MouseMove event procedure, we check for the new cursor location and assign its Y coordinate to a variable. The difference between the initial and new cursor location is our intended change in window height. In the if statement, we cause our rectangle to capture the mouse so that we can continue resizing the window even when the cursor is no longer over the rectangle (BottomResizeRect).
You can draw other rectangles and use them to adjust the other edges of the window. I'm sure you'll figure that part out. That completes this tutorial.
External Links
History
- 16th April 2010: Initial publication
- 17th April 2010: Added project file


 General
  News
News  Suggestion
  Question
  Bug
Bug  Answer
  Joke
Joke  Praise
  Rant
Rant  Admin
Admin 


