Overview
When starting an nHydrate project, you can import a model from an existing SQL Server database or create one from scratch. We will import a model for simplicity. Importing allows you to get a working model very quickly. We will import the AcmeDemo database from my local machine.
Create a Project
In VS.NET 2010, create a blank solution. After you have a solution, right-click in the project explorer and choose "Add New Item" from the context menu. Select the "Model Files" section from the "Installed Templates" left bar. Select the only option in the right list, which is "Model". This will create a blank model in your solution and open it in the nHydrate designer.
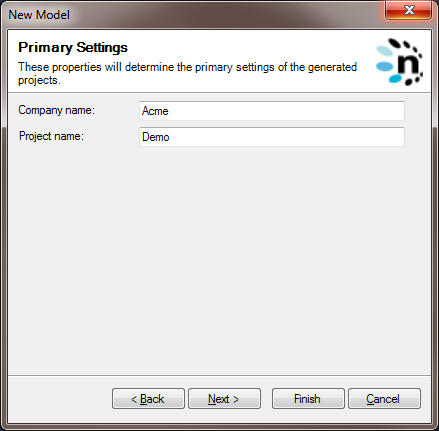
The wizard is displayed, and asks for a company name and project name. After pressing the "Next" button, you can input your database settings and press the "Import" button. This will load all of the tables from the database. Press the "Finish" button to see your new model with all the tables loaded.
The second wizard screen allows you to set the database properties and import from that location.

After you import, you can choose which tables to add to the model.
Entity Differences
You will notice that the icons for the tables differ. The importer looks at the relationships to determine how entities should be setup. Notice that there is a one-to-one relation between the SYSTEM_USER and CUSTOMER tables and also between the SYSTEM_USER and EMPLOYEE tables. These table sets also had a relation between them and a common primary key. With this criteria, the importer decided to make CUSTOMER and EMPLOYEE inherit from SYSTEM_USER. The two former tables have a parent table setting of the latter. You can change this if you wish, in the designer. You will also notice that the EMPLOYEE_TERRITORY table has a different icon. This is an associative table. It is an intermediary table between the EMPLOYEE and TERRITORY tables, and holds the many-to-many relation.
There is also a type table in this model that you must set up manually. The EMPLOYEE_TYPE table is used to hold the types of employees. We must set the IsTypeTable and Immutable properties to true. We must also add some static data in the designer. We will add two values to this table with a primary key of 1 and 2, and values BigFish and Normal. This will generate an enumeration that we can use to set related tables. There is no need to remember the magic numbers like 1. We simply set the related foreign keys to the enumeration value BigFish.
Now, for the sake of consistency, code beauty, and best practice, we will change the names of the tables and columns. The generator engine uses the names to create objects, properties, methods, etc., of course. By default, it creates Pascal names out of the database names. Each element has a codefacade property that allows you to define the code names that map to the database name. This is done automatically by replacing the underscores and title casing names; however, you can define an entirely new name for a table or property using the codefacade property. We will use the defaults in this example. The rules engine formats names like follows. A column named "user_id" will be displayed in code as "UserId". Tables have a similar pattern. A table named "CUSTOMER" will be generated in code as the title case "Customer". Best practice dictates that all tables are singular since there will be collections and lists that are plural in your generated database access layer. If you have a table named "CUSTOMERS", you will have code with a "Customers" object and a "CustomersList", etc.
Generate
On the Tools menu, you will see three new menus: Generate, Import, and Verify, and nHydrate Settings. You can verify the model to ensure that there are no validation errors. This process is performed when you actually generate as well. Select the "Generate" menu to perform the actual generation and watch the generation. You will be prompted for the projects to generate. We only need the database installer and the Entity Framework data access layer (DAL). Choose these two options, and then press OK.
Since nHydrate is integrated in to the VS.NET environment, all projects and files will be added directly to the solution. You will see two new projects and many files added to the project explorer. You should be able to build with no problems. That is it! You have a generated framework that you can use in an application.
There were two projects added to the solutions. The first is "Acme.Demo.Install". The name is based on the company name, project name, and then install. The second project is the "Acme.Demo.EFDAL". This is the Entity Framework DAL.
Database Installer
First, let us address the database installer. This project can be run directly from the environment with the .NET install utility. To setup this functionality, right-click on the install project and select the Properties menu. Next click the Debug tab. Check the "Start External Program" radio button, and choose the install utility provided with the .NET Framework. On my machine, it is located at C:\Windows\Microsoft.NET\Framework\v2.0.50727\InstallUtil.exe. You can use the path to the 4.0 framework as well, but by default, this project is generated as a 3.5 project. In the command line arguments box, enter the compiled assembly's name Acme.Demo.Install.dll. You can now run the project by pressing F5, or right clicking on the project and selecting Debug|Start New Instance.
Before we run the installer, we need to understand what it is doing. It will run any generated scripts and then compile the needed Stored Procedures on the database. One of the generated scripts is CreateSchema.sql. This file creates all the tables, indexes, relationships, etc., on the database.
The nHydrate framework manages all of your tables, fields, indexes, etc. As such, these will be generated based on the information in your model. If you have an existing database, you will need to remove all indexing, relationships, primary keys, defaults, etc. The generated Create script will handle all of this for you with nicely formatted names. If you need to do this to an existing database, add your Remove scripts to the FirstRun.sql file. This will only be run the first time a database is upgraded to a nHydrate model. Below is a Remove script you can use to do this.
In the generated script stub file in the folder Upgrade Scripts\Generated, we need to add the following script to remove these objects. This file will be run because of the schema file.
declare @schema nvarchar(128), @tbl nvarchar(128), @constraint nvarchar(128)
DECLARE @sql nvarchar(255)
declare cur cursor fast_forward for
select distinct cu.constraint_schema, cu.table_name, cu.constraint_name
from information_schema.table_constraints tc
join information_schema.referential_constraints rc on _
rc.unique_constraint_name = tc.constraint_name
join information_schema.constraint_column_usage cu on _
cu.constraint_name = rc.constraint_name
open cur
fetch next from cur into @schema, @tbl, @constraint
while @@fetch_status <> -1
begin
select @sql = 'ALTER TABLE [' + @schema + '].[' + @tbl + '] _
DROP CONSTRAINT [' + @constraint + ']'
exec sp_executesql @sql
fetch next from cur into @schema, @tbl, @constraint
end
close cur
deallocate cur
GO
declare @name nvarchar(128), @parent nvarchar(128)
DECLARE @sql nvarchar(255)
declare cur cursor fast_forward for
select so.[name], sop.[name] as [parentname] from sysobjects _
so inner join sysobjects sop on so.parent_obj = sop.id where so.xtype = 'D'
open cur
fetch next from cur into @name, @parent
while @@fetch_status <> -1
begin
select @sql = 'ALTER TABLE [' + @parent + '] DROP CONSTRAINT [' + @name + ']'
exec sp_executesql @sql
fetch next from cur into @name, @parent
end
close cur
deallocate cur
GO
We can now run the installer project, and the AcmeDemo database will be updated appropriately. The Stored Procedures that are necessary for the DAL to manipulate data will be added. The entire CRUD layer is handled through these Stored Procedures. There is no need for you to ever modify or even look at the scripts. In fact, you should never modify them because they are regenerated each time you change and regenerate the model.
Generated Code
The sample application displays many examples of how to add, edit, select, and remove data. The employee add code is shown here. We loop and add a number of employees to the Entity Framework context and save. Each object has its properties assigned arbitrary values. Notice that there is a related EmployeeType field, but we set an enumeration, not a number. In the database, there is an EMPLOYEE_TYPE table with a primary key of integer, but we never use it. We simply use the generated mapping.
private void AddEmployees()
{
using (DemoEntities context = new DemoEntities())
{
for (int ii = 0; ii < 10; ii++)
{
Employee newItem = new Employee();
newItem.BirthDate = new DateTime(2010, 1, 1);
newItem.Address = "123 Elm Street";
newItem.City = "Atlanta";
if ((rnd.Next(0, 2) % 2) == 0)
newItem.EmployeeType =
Acme.Demo.EFDAL.EmployeeTypeConstants.BigFish;
else
newItem.EmployeeType =
Acme.Demo.EFDAL.EmployeeTypeConstants.Normal;
newItem.HireDate = new DateTime(2010, 2, 1);
newItem.Country = "USA";
newItem.FirstName = "John";
newItem.LastName = "Smith";
newItem.PostalCode = "12345";
context.AddItem(newItem);
}
context.SaveChanges();
}
}
The many to many relation is also interesting in that we never see the intermediary table. In the example below, we load a list of employees and a list of territories. We loop through the employee list and assign an arbitrary territory object to its TerritoryList property. Each Employee object has a TerritoryList, and each Territory has an EmployeeList.
private void AddEmployeeTerritories()
{
using (DemoEntities context = new DemoEntities())
{
var employeeList = (from x in context.Employee
select x).ToList();
var territoryList = (from x in context.Territory
select x).ToList();
foreach (Employee employee in employeeList)
{
Territory territory =
territoryList[rnd.Next(0, territoryList.Count)];
if (!employee.TerritoryList.Contains(territory))
employee.TerritoryList.Add(territory);
}
int count = context.SaveChanges();
}
}
Another interesting feature of nHydrate on top of Entity Framework is inheritance. EF does handle inheritance, but does not allow you to select entities like you would expect. A derived entity cannot be called like a real entity. You have to use a syntax that specifies its type. The two code snippets that follow demonstrate the difference in syntax.
var employees = from x in context.Employee
select x;
var employees = from x in context.SystemUser.OfType<Employee>()
select x;
The nHydrate generator makes accessing your database in an object-oriented fashion quite easy. The bulk of the operations you perform are straight EF. The difference comes in modeling. This way of creating code enhances Entity Framework by giving you database tracking built right into the framework. There are also other project types to work with off the same model. Unlike using the default functionality of Entity Framework, nHydrate allows you to use EF while enhancing the generated code.
For more information, please visit the nHydrate site, or read our blog posting (Why Implement an Entity Framework based solution in nHydrate?).
This member has not yet provided a Biography. Assume it's interesting and varied, and probably something to do with programming.


 General
  News
News  Suggestion
  Question
  Bug
Bug  Answer
  Joke
Joke  Praise
  Rant
Rant  Admin
Admin 


