Introduction
The Magnifier control can be used to magnify portions of the screen at runtime. It can be used to magnify text as well as images. The Magnifier
is not a built-in control in Visual Studio. To use it, a reference to the WPFToolkit.Extended.dll file must be added to your WPF project. The WPFToolkit.Extended.dll
file can be downloaded from its CodePlex site.
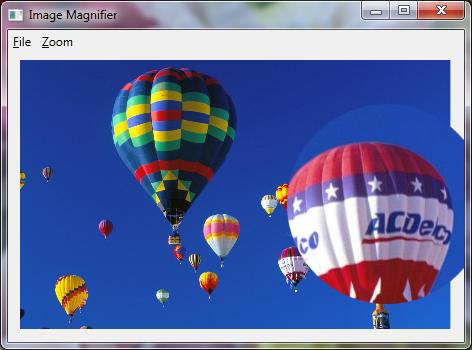
In this article, I have demonstrated the use of the WPF Magnifier control using a simple WPF GUI application created using Visual C# 2010 Express Edition.
The application allows you to browse and open any image file and view magnified portions of the image.
Background
To use the magnifier control in code, a reference to the WPFToolkit.Extended.dll file is required in the project.
Also, the following attribute must be added to the main Window element:
xmlns:xt="http://schemas.microsoft.com/winfx/2006/xaml/presentation/toolkit/extended"
The Magnifier control can be customized using certain properties as follows:
BorderBrush: Sets the border color of the magnifier.BorderThickness: Sets the border thickness of the magnifier.Radius: Sets the size as radius of the magnifier.ZoomFactor: Sets the magnification value. The value of this attribute must be between 0 and 1, where 1 represents no zoom and 0 represents maximum zoom.
Using the Code
Following is the XAML code of the application:
<Window x:Class="ImageMagnifier.MainWindow"
        xmlns="http://schemas.microsoft.com/winfx/2006/xaml/presentation"
        xmlns:x="http://schemas.microsoft.com/winfx/2006/xaml"
        xmlns:xt="http://schemas.microsoft.com/winfx/2006/xaml/presentation/toolkit/extended"
        Title="Image Magnifier" Height="350" Width="525">
    <Grid>
        <Menu IsMainMenu="True">
            <MenuItem Name="mnuFile" Header="_File" MouseEnter="mnuFile_MouseEnter"
                         MouseLeave="mnuFile_MouseLeave">
                <MenuItem Name="mnuOpen" Header="_Open" Click="mnuOpen_Click"/>
                <Separator/>
                <MenuItem Name="mnuExit" Header="_Exit" Click="mnuExit_Click"/>
            </MenuItem>
            <MenuItem Name="mnuZoom" Header="_Zoom" MouseEnter="mnuZoom_MouseEnter"
                       MouseLeave="mnuZoom_MouseLeave">
                <Slider Name="sliderZoom" Orientation="Horizontal" Minimum="0" Maximum="1"
                   SmallChange="0.025" LargeChange="0.1" Width="100"
                   TickPlacement="Both" TickFrequency="0.1" />
            </MenuItem>
        </Menu>
        <Image Height="269" HorizontalAlignment="Left" Margin="12,30,0,0"
            Name="image1" Stretch="Uniform" VerticalAlignment="Top" Width="479" />
        <xt:MagnifierManager.Magnifier>
            <xt:Magnifier Name="MyMagnifier" Radius="100"
                      ZoomFactor="0" BorderThickness="3"></xt:Magnifier>
        </xt:MagnifierManager.Magnifier>
    </Grid>
</Window>
The above XAML code creates a Window having menu options to open an image file and set the zoom level for the magnifier. It also adds
an Image control and a Magnifier control. The zoom menu contains a slider control to set the zoom level between 0 and 1.
Following is the code to browse for an image file and display the image on the Image control:
private void mnuOpen_Click(object sender, RoutedEventArgs e)
{
    try
    {
        FileDialog dialog = new OpenFileDialog();
        dialog.Filter = "Image files(*.jpg)|*.jpg|Image files(*.jpeg)|" +
          "*.jpeg|Image files(*.gif)|*.gif|Image files(*.bmp)|" +
          "*.bmp|Image files(*.png)|*.png)|All files(*.*)|*.*";
        dialog.FilterIndex = 1;
        Nullable<bool> result=dialog.ShowDialog();
        if (result == true)
        {
            BitmapImage image = new BitmapImage();
            image.BeginInit();
            image.UriSource = new Uri(dialog.FileName);
            image.EndInit();
            image1.Source = image;
        }
    }
    catch (Exception ex)
    {
        MessageBox.Show(ex.Message, "Error", MessageBoxButton.OK, MessageBoxImage.Error);
    }
}</bool>
The above code uses the OpenFileDialog class from the Microsoft.Win32 namespace to browse and open an image file.
It creates a BitmapImage object and sets its UriSource property to the URI of the selected file. It finally sets the
BitmapImage object as the source of the Image control.
Following is the code for the Mouse Enter and Mouse Leave events of the File menu and Zoom menu.
private void mnuFile_MouseEnter(object sender, System.Windows.Input.MouseEventArgs e)
{
    EnableDisableZoom(false);
}

private void mnuFile_MouseLeave(object sender, System.Windows.Input.MouseEventArgs e)
{
    EnableDisableZoom(true);
}

private void mnuZoom_MouseEnter(object sender, System.Windows.Input.MouseEventArgs e)
{
    EnableDisableZoom(false);
}

private void mnuZoom_MouseLeave(object sender, System.Windows.Input.MouseEventArgs e)
{
    EnableDisableZoom(true);
}

private void EnableDisableZoom(bool enable)
{
    if (enable)
    {
        MyMagnifier.ZoomFactor = sliderZoom.Value;
    }
    else
    {
        MyMagnifier.ZoomFactor = 0;
    }
}
In the above code, zoom is disabled to prevent the menu items from being magnified when the mouse enters the menu items and to restore the zoom factor
to the value of the slider control when the mouse leaves the menu items. The EnableDisable user-defined function uses the ZoomFactor property
of the Magnifier control to enable or disable zoom.
The following code can be used to exit from the application using the Exit option in the File menu:
private void mnuExit_Click(object sender, RoutedEventArgs e)
{
    Application.Current.Shutdown();
}
Points of Interest
This article is a very simple demonstration of what can be achieved using the Magnifier control of WPF. Creating a similar application using GDI or other libraries
is a tedious task. I hope that this article will be helpful in understanding the working of the WPF Magnifier.


 General
  News
News  Suggestion
  Question
  Bug
Bug  Answer
  Joke
Joke  Praise
  Rant
Rant  Admin
Admin 


