ASP.NET MVC Model Binding
ASP.NET MVC model binding allows you to map HTTP request
data with a model. This document details how model binding works for various
types of models (simple types, complex types, collections etc.). It also shows
how to create a custom model binder and calls for it.
Introduction
ASP.NET MVC model binding allows
you to map and bind HTTP request data with a model. Model binding makes it easy
for you to work with form data because the request data (POST/GET) is
automatically transferred into a data model you specify. ASP.NET MVC
accomplishes this behind the scenes with the help of Default Binder. This
document details how model binding works for various types of models viz.
simple types, class types and lists. It also shows how to create a custom model
binder if situation calls for it.
Before you begin working with the
examples that follow, create a new ASP.NET MVC Web Application using Visual
Studio. Add a controller named Home in the Controllers folder. You will add
various action methods to this Home controller class to illustrate how model
binding works. The views used by all of our examples simply deal with employee
data such as employee ID, First Name, Last Name, Address etc.
No Binding at All
Before you delve into the model
binding, let's see how an ASP.NET MVC application can use form data without any
model binding at all. Consider a simple view as shown in Figure 1.
View code:
<fieldset>
    <legend>PersonModel</legend>
    <div class="editor-label">
        <label name="FName">Person First Name</label>
    </div>
    <div class="editor-field">
        <input name="FName" type="text" />

    </div>
    <div class="editor-label">
        <label name="LName">Last Name</label>
    </div>
    <div class="editor-field">
        <input name="LName" type="text" />
    </div>
    <div class="editor-label">
        <label name="Gender">Gender</label>
    </div>
    <div class="editor-field">
        <input name="Gender" type="text" />
    </div>
    <p>
        <input type="submit" value="Create" />
    </p>
</fieldset>
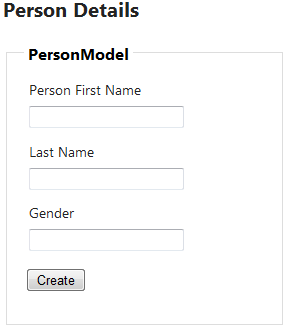
Figure 1: A simple view accepting person details
To handle the data POSTed by the view, we need to create an action method in the Home controller. The action method is shown below:
[HttpPost]
public ActionResult Person()
{
if (Request.Form.Count > 0)
{
string fName = Request.Form["Fname"];
string lName = Request.Form["LName"];
string gnder = Request.Form["Gender"];
}
return View();
}
The above Person action method makes use of Form collection to access persons details. As you can see it checks if any values exist in the form collection using the
Count property.
Individual values are then accessed using form field names (FName,
LName, and Gender). Since you are accessing the form collection directly there is no model
binding as such. This approach is bit raw and you should avoid it wherever you can.
Binding with simple types
The default model binding in MVC
is handled by a DefaultBinder object. A model binder is a class that implements
IModelBinder interface. ASP.NET MVC provides the default implementation
(System.Web.Mvc.DefaultModelBinder) that works with simple types, classes, and
collections.
Now let's see how the default
binding works with simple types.
Add two action methods in the Home
controller as shown below:
public ActionResult Person()
{
    return View();
}

[HttpPost]
public ActionResult Person(string FName, string lName, string Gender)
{
    ViewBag.StatusMessage = "Person data received successfully for First Name " + FName + "!";
    return View();
}
The first version of the action
method (without any parameters) takes care of the GET requests and the other
version (with parameters and marked with the [HttpPost] attribute) takes care of
the POST requests. Notice the names of the parameters of the Person() action
method. It is important that you keep the parameter names same as the form
field names (see HTML markup from the view below).
<td>
      <input name="FName" type="text" />
</td>
<td>
  <input name="LName" type="text" />
</td>
<td>
  <input name="Gender" type="text" />
</td>
If you don't then the mapping
between a form field and action method parameter will not happen correctly and
instead of the actual value you will receive a default value for that parameter
(e.g. 0 for integer fields, null for string fields and so on).
Note: Notice that
the form field names are FName and LName, respectively whereas the action method
names if changed to FirstName and LastName, respectively. Due to this mismatch
the default binder cannot map the form data correctly and you get FirstName and
LastName parameter values as null.
Binding with class types
In the previous example you used
one or more method parameters to receive the form field data. Though this
approach works, it becomes cumbersome when there are too many pieces of data
being submitted. In such cases it is better to create a class that encapsulates
all the required information. This way your action method will have just one
parameter. For example, instead of accepting First Name, Last Name and Gender
as three separate parameters of the action method you can create a Person class
with required properties and then code an action method like this:
[HttpPost]
public ActionResult Person(PersonModel per)
{
    ViewBag.StatusMessage = "Person data received successfully for First Name " + per.FirstName + "!";
    return View();
}
The PersonModel class used by the
Person() action method is a simple class with get and set public properties.
The following code shows the Employee class with FirstName, LastName, and
Gender
properties.
public class PersonModel
{
    public string FirstName { get; set; }
    public string LastName { get; set; }
    public string Gender { get; set; }
}
In this case, the default model binder automatically maps the form field names with the property names of the
Employee class and assigns the values accordingly.
Binding with class properties
The default binding also takes
care of properties that are class types. For example, the Employee class may
have a property named AddressModel as shown below:
public class PersonModel
{
    public string FirstName { get; set; }
    public string LastName { get; set; }
    public string Gender { get; set; }
    public AddressModel Address { get; set; }
}
As you can see the Address
property is of type Address. The Address class in turn has three public
properties: Street, Country, and PostalCode, and is shown below:
public class AddressModel
{
    public string Street { get; set; }
    public string Country { get; set; }
    public string PostalCode { get; set; }
}
The View that accepts the data for
the Person class needs to follow certain naming conventions so that the
address
values are bound correctly. Have a look at the following HTML markup from the
associated View:
<tr>
...
<td>
        <input name="Address.Street" type="text" /></td>
</tr>
...
<td>
    <input name="Address.Country" type="text" /></td>
</tr>
...
<td>
    <input name="Address.PostalCode" type="text" /></td>
</tr>
Notice the <input> tags from
the above markup carefully. These input elements have their name attribute set
in a specific way. Recollect that Address is the property of the
Employee class
and is of type Address. Further, Street, Country, and
PostalCode are the
property names of the Address class. Figure 6 shows the Address property values
populated by the default binder.
Model binding using HTMLHelper Classes
Introduction
The HtmlHelper class provides methods that help you create HTML controls programmatically. All
HtmlHelper methods generate HTML and return the result as a string. Extension methods for
the HtmlHelper class are in the System.Web.Mvc.Html namespace. These extensions add helper methods for creating forms, rendering HTML controls, rendering
partial views, performing input validation, and more. Helper methods and extensions are called using the
Html property of the view, which is an instance of the HtmlHelper class.
(Note - The HtmlHelper class is designed to generate UI. It should not be used in controllers or models.)
Default HTMLHelper classes
ASP.NET MVC 4 provides lot of HTML helper classes
which are present under System.Web.Mvc.Html namespace. So html helper classes
are nothing but extension methods which get called while creating view. These
methods provide HTML output based on the data annotations provided in the
model. When we create a strongly typed view with a model, HTML helper classes
takes care of generating html code for the specific control which may be
validated using “jquery.validate.js” which is available by default in MVC 4.
For an example, if we want to
create a view for address details whose model look like:
public class AddressModel
{
    [Required]
    [Display(Name="Street 1 check")]
    public string Street1 { get; set; }

    [Required]
    [Display(Name = "Street 2")]
    public string Street2 { get; set; }

    [Display(Name = "City")]
    public string City { get; set; }

    [Display(Name = "State")]
    public string State { get; set; }

    [Display(Name = "Country")]
    public string Country { get; set; }

    [Required]
    [Display(Name = "Pin Code")]
    public int PinCode { get; set; }
}
In the model all the necessary details for data annotation provided. The view generated by .NET MVC framework is as follows.
@model CustomModelBinder.Models.AddressModel

@{
    ViewBag.Title = "Index1";
}

<h2>Index1</h2>

@using (Html.BeginForm()) {
    @Html.ValidationSummary(true)

    <fieldset>
        <legend>AddressModel</legend>

        <div class="editor-label">
            @Html.LabelFor(model => model.Street1)
        </div>
        <div class="editor-field">
            @Html.EditorFor(model => model.Street1)
            @Html.ValidationMessageFor(model => model.Street1)
        </div>

        <div class="editor-label">
            @Html.LabelFor(model => model.Street2)
        </div>
        <div class="editor-field">
            @Html.EditorFor(model => model.Street2)
            @Html.ValidationMessageFor(model => model.Street2)
        </div>

        <div class="editor-label">
            @Html.LabelFor(model => model.City)
        </div>
        <div class="editor-field">
            @Html.EditorFor(model => model.City)
            @Html.ValidationMessageFor(model => model.City)
        </div>

        <div class="editor-label">
            @Html.LabelFor(model => model.State)
        </div>
        <div class="editor-field">
            @Html.EditorFor(model => model.State)
            @Html.ValidationMessageFor(model => model.State)
        </div>

        <div class="editor-label">
            @Html.LabelFor(model => model.Country)
        </div>
        <div class="editor-field">
            @Html.EditorFor(model => model.Country)
            @Html.ValidationMessageFor(model => model.Country)
        </div>

        <div class="editor-label">
            @Html.LabelFor(model => model.PinCode)
        </div>
        <div class="editor-field">
            @Html.EditorFor(model => model.PinCode)
            @Html.ValidationMessageFor(model => model.PinCode)
        </div>

        <p>
            <input type="submit" value="Create" />
        </p>
    </fieldset>
}
HTML generated for the above view at runtime will be like:
<h2>Address</h2>

<form action="/Person/Address" method="post">    <fieldset>
        <legend>AddressModel</legend>

        <div class="editor-label">
            <label for="Street1">Street 1 check</label>
        </div>
        <div class="editor-field">
            <input class="text-box single-line" data-val="true"
              data-val-required="The Street 1 check field is required."
              id="Street1" name="Street1" type="text" value="" />
            <span class="field-validation-valid"
              data-valmsg-for="Street1" data-valmsg-replace="true"></span>
        </div>

        <div class="editor-label">
            <label for="Street2">Street 2</label>
        </div>
        <div class="editor-field">
            <input class="text-box single-line" data-val="true"
              data-val-required="The Street 2 field is required."
              id="Street2" name="Street2" type="text" value="" />
            <span class="field-validation-valid"
              data-valmsg-for="Street2" data-valmsg-replace="true"></span>
        </div>

        <div class="editor-label">
            <label for="City">City</label>
        </div>
        <div class="editor-field">
            <input class="text-box single-line" id="City" name="City" type="text" value="" />
            <span class="field-validation-valid"
              data-valmsg-for="City" data-valmsg-replace="true"></span>
        </div>

        <div class="editor-label">
            <label for="State">State</label>
        </div>
        <div class="editor-field">
            <input class="text-box single-line" id="State" name="State" type="text" value="" />
            <span class="field-validation-valid"
              data-valmsg-for="State" data-valmsg-replace="true"></span>
        </div>

        <div class="editor-label">
            <label for="Country">Country</label>
        </div>
        <div class="editor-field">
            <input class="text-box single-line" id="Country" name="Country" type="text" value="" />
            <span class="field-validation-valid"
              data-valmsg-for="Country" data-valmsg-replace="true"></span>
        </div>

        <div class="editor-label">
            <label for="PinCode">Pin Code</label>
        </div>
        <div class="editor-field">
            <input class="text-box single-line" data-val="true"
                data-val-number="The field Pin Code must be a number."
                data-val-required="The Pin Code field is required."
                id="PinCode" name="PinCode" type="number" value="" />
            <span class="field-validation-valid"
              data-valmsg-for="PinCode" data-valmsg-replace="true"></span>
        </div>

        <p>
            <input type="submit" value="Create" />
        </p>
    </fieldset>
</form>
In this way HTML helper will generate HTML code for the
related field. So the HTML helper which was like
@Html.EditorFor(model => model.Street1)
Will look like as following at runtime:
<input class="text-box single-line" data-val="true"
  data-val-required="The Street 1 check field is required."
  id="Street1" name="Street1"
  type="text" value="" />
For which model was like:
[Required]
[Display(Name="Street 1 check")]
public string Street1 { get; set; }
So if you notice above three all the details for model are created in View at runtime and this is the main purpose of HTML helper
classes. Now as we already seen model binding you will notice everything is there which will required for binding object with action methods.
We have provision to make client side validation in view, by default it is true, i.e.:
@model CustomModelBinder.Models.PersonModel
@{
    ViewBag.Title = "Person";
    Layout = "~/Views/Shared/_Layout.cshtml";
    HtmlHelper.ClientValidationEnabled = true;
}
Now this tag will use “jquery.validate.js” to perform its client side validation.
jQuery.validate.js with HTMLHelper Classes
By default MVC 4 framework provide jQuery validate script for client side validation. As mentioned above for default
HTMLHelper classes, creates addition tags for validating on client side
(when set HtmlHelper.ClientValidationEnabled = true; in the view); we just have to add reference for the
jQuery.validate.js script in the view. jQuery.validate.js has default behavior set for HTML types and that get attached from the same script after adding reference for the script.
If we set HtmlHelper.ClientValidationEnabled = false; to view see the difference for the HTML output displayed for the view at runtime.
<input class="text-box single-line" id="Street1"
  name="Street1" type="text" value="" />
In this case after adding reference for script will not get any error message as script will check for validation
of required field only when data-val="true" is set and display error messages from
data-val-required="The Street 1 check field is required." to view.
By default MVC 4 framework provide client side validation for all data annotation provided for .NET Framework 4.0 and validation script is compatible with it.
Custom HTMLHelper Classes
As discussed in the above example situations may arise where we may not be able to use available HTML helper classes;,
or they may not be working for complex object types like model containing a variable of type class which may also contain variable of type class. In such
scenarios we may want to write our own custom HTML helper, or if I want to prompt for whether to delete something on delete button in my application many
times, for the reported problem we would create a HTML Helper class which has helper method like:
public static MvcHtmlString SubmitConfirm(this HtmlHelper helper, string buttonText, string alertMessage)
{
    return MvcHtmlString.Create(String.Format(
                                "<input type=\"submit\" value=\"{0}\" onClick=\"return confirm('{1}');\" />",
                                buttonText, alertMessage));
}
And for calling this helper method in view we need to add reference for the same in web.config (like in my case):
<system.web>
  <pages>
     <namespaces>
        <add namespace="CustomModelBinder.CustomHTMLHelpers"/>
     </namespaces>
  </pages>
</system.web>
And need to add a reference at the view like:
@using CustomModelBinder.CustomHTMLHelpers;
And now we can use our customized HTML helper as:
@Html.SubmitConfirm("Delete", "Are you sure you wan to delete this record?");
We may write JavaScript for validating our custom helper class and do client validation likewise.
This member has not yet provided a Biography. Assume it's interesting and varied, and probably something to do with programming.


 General
  News
News  Suggestion
  Question
  Bug
Bug  Answer
  Joke
Joke  Praise
  Rant
Rant  Admin
Admin 


