Introduction
With reference to the previous post we have successfully made the sample android app and now we need to run it, For running your apps there are two possible ways
- Running on the emulator
- Running on a device
Running on the emulator
Emulator are the Android Virtual Devices (AVD) that we need to configure in order to run our android apps.
Step 1
Open AVD Manager
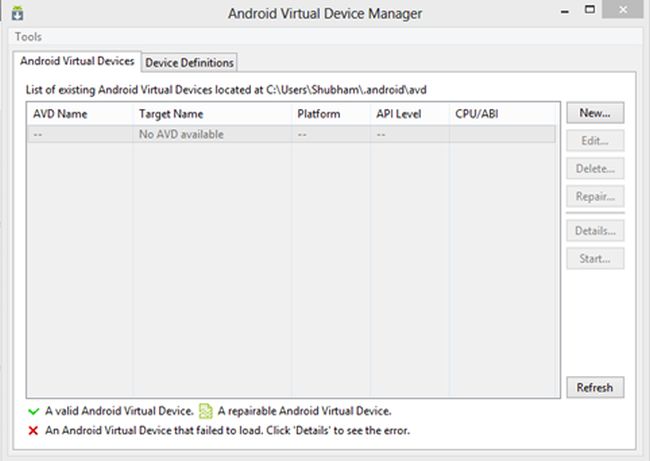
Step 2
Click on New Button to add a new device, and configure your device settings.

Step 3
There will be a result window showing all the configuration you had chosen on the previous screen.
Step 4
Press 'Ok' and you will see your device listed in there and now you can close this window now.
Step 5
Run your android app project from eclipse and if there is only one AVD configured it will automatically deploy the app to it else a window will appear to choose your AVD.
Emulator will start.
Running on the Device
Android app can directly be deployed on the android device, for this few configurations are needed.
Step 1
Set the application in the debug-able mode by setting android:debuggable attribute of the <application>element to true. For ADT 8.0 this is done by default.
(In our ADT we do not need to perform this step).
Step 2
Enable USB debugging on your device:
For Android 3.2 or older Goto Settings>Applications>Development and enable USB Debugging.
On Android 4.0 and newer, it's in Settings > Developer options.
Note: On Android 4.2 and newer, Developer options is hidden by default. To make it available, go to Settings > About phone and tap Build number
seven times. Return to the previous screen to find Developer options.
Step 3
Install USB drivers for your device so that the computer recognizes your device.
Step 4
Once set up and your device is connected via USB, install your application on the device by selecting Run > Run (or Run >Debug) from the Eclipse menu bar.
I'm Software Engineer Associate at Accenture Services Pvt. Ltd. and I love Microsoft Technologies.


 News
News  Suggestion
  Question
  Bug
Bug  Answer
  Joke
Joke  Praise
  Rant
Rant  Admin
Admin