Introduction
jQuery is the powerful JavaScript library nowadays. jQuery is a cross-browser JavaScript library designed to simplify client-side scripting of HTML.
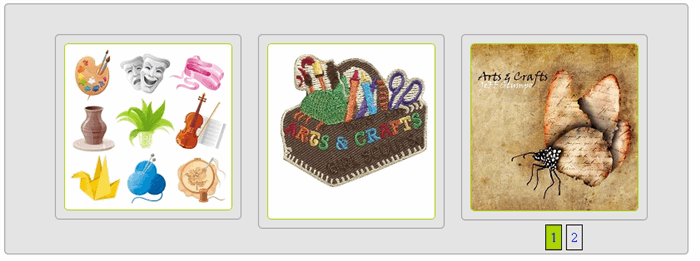
This script helps you when you want to implement paging in your script. By using this script, you can add as much data (images or text for paging) between <ul> <li> tags. I used images between <li> tags for a photo gallery.
I wrote a script for paging of <ul> <li> tags. Here, I show you how to implement this paging to any project step by step.
Step by Step Code Explanation
Step 1
Download the jquery from http://www.jquery.com/. I am using the jquery-1.8.3.min.js or you can find this file into attached sample and add Pagination.js from the attached file. Pagination.js is core logic behind the paging functionality. Both JavaScript files must be required for paging in photo gallery which we call in our HTML file.
Step 2
Followed by step 1, please call jquery-1.8.3.min.js and Pagination.js files in to your HTML page between <head> tag like below:
<script type="text/javascript" src="js/jquery-1.8.3.min.js"></script>
<script type="text/javascript" src="js/Pagination.js"></script>
Step 3
Now, here is the code used in HTML file for photo gallery. Put this code anywhere in <body> tag where you want to call your photo gallery.
<div class="phGallary">
    <ul id="gallary">
        <li>
            <div>
                <img src="images/1.jpg" />
            </div>
            <div>
                <img src="images/2.jpg" />
            </div>
            <div>
                <img src="images/3.jpg" />
            </div>
        </li>
        <li>
            <div>
                <img src="images/5.jpg" />
            </div>
            <div>
                <img src="images/6.jpg" />
            </div>
            <div>
                <img src="images/4.jpg" />
            </div>
        </li>
    </ul>

    <center>
        <span id="PageList" class="clear"></span>
    </center>
</div>
As mentioned in the above code, first, we have to create a <div> tag and assign the id phGallary. Under that element, we add the <ul> & <li> tag. I considered each <li> as a unique page so whatever you want to show on page, you have to add everything under li. And at the end, you can see the <span> with the id PageList. This is the our paging number area so you can move this to anywhere you want it to be like I set it at the bottom. But you can set it to the top of gallery too.
Step 4
Now we apply the CSS to the control as below:
li
{
list-style:none;
}
.phGallary
{
padding:10px;
width:800px;
}
.phGallary div
{
float:left;
margin:10px;
background-color:#e4e4e4;
padding:10px;
border:1px solid #9f9f9f;
border-radius: 5px 5px 5px 5px;
-moz-border-radius: 5px;
-webkit-border-radius: 10px;
}
.phGallary img
{
border-radius: 5px 5px 5px 5px;
border:1px solid #abd305;
-moz-border-radius: 5px;
-webkit-border-radius: 5px;
}
.phGallary a
{
text-decoration:none;
padding:5px;
border:1px solid #000;
margin-right:5px;
}
.activePageLink
{
background-color:#abd305;
}
.phGallary a:hover
{
background-color:#abd305;
}
.clear {
clear:both
}
In the above code, .phGallary as a parent CSS and rest are under that. So whatever element I add under this assign CSS tag reflects the same. (.phGallary div) This style is applied all the div under the .phGallary css element. I just set basic property like background color, border and the round corner effect is new in CSS3. Sometimes, the browser with old version can show the round corner like Internet Explorer 6. But it's common now a days, and then the same way all the img elements besides this has something same property of round corner effects, border.
Step 5
Finally, we have to apply the pagination to the code as below:
<script type="text/javascript">
$(document).ready(function() {
$("#gallary").Pagination();
});
</script>
Now, you can see the output of the page. You can find the page numerics can generate automatically and you can see the paging work properly.
Let Me Explain the Pagination JS File As You Find in the Download File
$.fn.Pagination = function (options) {

    var defaults = {
        PagingArea: 'PageList',
        noOfPage: 0,
        curObj: this,
        ParentID: $(this).attr("id"),
        curPage: 1
    };
As I mentioned earlier, this is the core logic of pagination. First, we have to declare the pagination object and attach it with the jQuery. Then, we have to assign the default value to the member variables like PagingArea = 'pageList' this is the id of the HTML tag where the numeric page will bind.
$("li", this).each(function () {
    options.noOfPage++;

    if (options.noOfPage == 1) {
        $(this).show();
    }
    else {
        $(this).hide();
    }

    $(this).attr('id', options.ParentID + '_li_' + options.noOfPage);
    $("#" + options.PagingArea).append('<a id="Page_' + options.noOfPage +
       '" href=\"javascript:void(0);\">' + options.noOfPage + '</a>');
    $("#Page_" + options.noOfPage).click(function () {
        $("#Page_" + options.curPage).removeClass("activePageLink");
        $("#" + options.ParentID + " li:nth-child(" + options.curPage + ")").hide();
        options.curPage = $(this).text()
        $("#Page_" + options.curPage).addClass("activePageLink");
        $("#" + options.ParentID + " li:nth-child(" +
        options.curPage + ")").fadeIn("slow");

    });
});
Now I will traverse the all <li> under the passing object and count how many <li>'s are under the object and then I call jQuery show() function to make the first li visible and set hide() on the rest of li. So, only the first <li> can be visible and rest are hidden. After that, one by one, create the <a> tag for each li and set it the numeric number of the page and also generate the click event of each <a> tag for making that page visible. So whenever anyone clicks on that link, I made the relaying page show() and set the current visible page to hide().
History
Now I am working on AJAX paging for dynamic data using jQuery only.
Ronak Patel has 6+ years experience in developing website using c#.net. And he has very good command over linq, jquery, entity framework, mvc.


 General
  News
News  Suggestion
  Question
  Bug
Bug  Answer
  Joke
Joke  Praise
  Rant
Rant  Admin
Admin 


