Introduction
I recently encountered an issue with the ListView control's selection behavior. The issue is that although there is a property for setting SelectionMode to Multi/Extended; it requires the use of keyboard-keys Ctrl/Shift. Naturally with more than a dozen years experience working on the Windows platform, it is easy to see how non-user-friendly this can be.
This article is a write-up of an afternoon's worth of effort in trying to achieve the following:
- Multiple
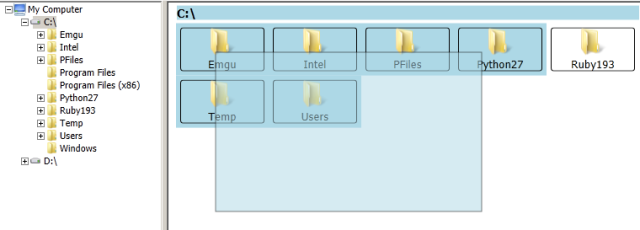
ListBox/ListView items should be selectable without the use of control/shift keyboard keys. - While dragging the mouse to select items, a visual-cue should be displayed (i.e., a rectangular bounding box like the one we see in Windows Explorer).
Background
A typical research project for me usually starts at my favorite goo sites and searching for keywords such as "WPF, listbox, listview, multiselect, similar to windows explorer", etc. After almost an hour of reading and testing what other people had, I figured it's probably easiest to apply my C# CLR knowledge to this problem.
Some of the more interesting articles I encountered include:
In the end, all I wanted was a quick-fix. It didn't need to be testable nor pretty. So this is what I came up with. I can provide sample code to those who email me.
Using the Code
Basically to solve the issue of selecting items, we are going to programmatically monitor the movement of the mouse device when it is over the listbox/listview. The four events we will monitor are as follows: PreviewMouseDown, MouseMove, MouseUp, and MouseLeave. The idea is to define a variable to know when the user has pressed down on the left-mouse-button so that we can select the items defined by a bounding-box drawn as the mouse is moved. Further to that, we will need some helper methods to perform hit-testing of items bound by the bounding-box we have just created (although still only in our minds, at the moment). And finally, we will draw that bounding-box as an Adorner UIElement so that we get a visual-cue of the bounding-box we are drawing with the mouse pointer.
First, let's discuss the helper method - rather simple and there's not much to it, so let's get that out of the way first.
I create a public static class and place the following ListBox extension method in it.
public static List<T> GetItemAt<T>(this ListBox listbox, Rect areaOfInterest)
{
  var list = new List<T>();
  var rect = new RectangleGeometry(areaOfInterest);
  var hitTestParams = new GeometryHitTestParameters(rect);
  var resultCallback = new HitTestResultCallback(x => HitTestResultBehavior.Continue);
  var filterCallback = new HitTestFilterCallback(x =>
  {
    if (x is ListBoxItem)
    {
      var item = (T)((ListBoxItem)x).Content;
      list.Add(item);
    }
    return HitTestFilterBehavior.Continue;
  });

  VisualTreeHelper.HitTest(listbox, filterCallback, resultCallback, hitTestParams);
  return list;
}
This generic-extension method will later allow me to test which of the listbox items are touching or inside the our bounding-box (area-of-interest). Of course, if you are using MVVM in your project, then Content of the ListBoxItem should contain your type T; which would have automatically been set by your default data-template.
Next, we need to define another class for the Adorner - because that is how we use Adorners in WPF. Why? I'm not quite sure. But at the time of this writing, it's the only way.
public class ListViewSimpleAdorner : Adorner
{
public SolidColorBrush backgroundBrush { get; set; }
public SolidColorBrush penBrush { get; set; }
public Pen drawingPen { get; set; }
public Rect HighlightArea
{
get { return (Rect)GetValue(HighlightAreaProperty); }
set { SetValue(HighlightAreaProperty, value); }
}
public static readonly DependencyProperty HighlightAreaProperty =
DependencyProperty.Register("HighlightArea", typeof(Rect),
typeof(ListViewSimpleAdorner), new FrameworkPropertyMetadata(new Rect(),
FrameworkPropertyMetadataOptions.AffectsRender));
public ListViewSimpleAdorner(UIElement element)
: base (element)
{
backgroundBrush = new SolidColorBrush(Colors.LightBlue);
backgroundBrush.Opacity = 0.5;
penBrush = new SolidColorBrush(Colors.Black);
penBrush.Opacity = 0.5;
drawingPen = new Pen(penBrush, 1);
this.IsHitTestVisible = false;
}
protected override void OnRender(DrawingContext dc)
{
dc.DrawRectangle(backgroundBrush, drawingPen, HighlightArea);
}
}
The key-point here is the definition of the dependency property. Framework-property-metadata-options-affects-renderer - with this line, anytime we update the property from our code, the OnRender method will be invoked drawing the updated rectangle. This solves the issue of displaying a visual-cue. Also to note is the line that sets IsHitTestVisable to false. Go ahead and comment out this line. You'll see that the rendering doesn't work quite right because the Adorner being drawn will actually capture the mouse events; which in-turn means our mouse events won't fire.
Finally, we are going to wire everything up. But first, we need an instance variable for the Adorner:
ListViewSimpleAdorner myAdorner { get; set; }
Point? myDragStartPoint { get; set; }
this.SourceInitialized += delegate
{
AdornerLayer.GetAdornerLayer(myListView).Add(myAdorner =
new ListViewSimpleAdorner(myListView));
myListView.PreviewMouseDown += (o, e) =>
{
if (e.ChangedButton == MouseButton.Left)
{
myDragStartPoint = e.GetPosition(myListView);
myListView.SelectedItems.Clear();
}
};
myListView.MouseMove += (o, e) =>
{
if (myDragStartPoint.HasValue)
{
Rect r = new Rect(myDragStartPoint.Value,
e.GetPosition(myListView) - myDragStartPoint.Value);
myAdorner.HighlightArea = r;
var items = myListView.GetItemAt<CardItem>(r);
if (items.Count > 0)
{
myListView.SelectedItems.Clear();
foreach (var i in items)
myListView.SelectedItems.Add(i);
}
else
myListView.SelectedItems.Clear();
}
};
myListView.MouseUp += (o, e) =>
{
if (e.ChangedButton == MouseButton.Left)
{
myDragStartPoint = null;
myAdorner.HighlightArea = new Rect();
}
};
myListView.MouseLeave += (o, e) =>
{
myDragStartPoint = null;
myAdorner.HighlightArea = new Rect();
};
The nullable-point object (myDragStartPoint) is used to define the start point of where the mouse-drag operation started. The AdornerLayer.GetAdornerLayer line initializes myAdorner and adds it to the system's adorner collection. Finally, the mouse events:
- On mouse-down, we simply check if the mouse button is the one we want to use for selection (in this case, it's the left-mouse button). We need to handle the preview version of this event because the
listview actually handles the mouse-event and selects an individual item, and then it will set e.Handled to true and we won't be able to catch the mouse-down event anymore. Finally, on-mouse-down, we should simply clear whatever was selected previously. - On mouse-move, we check if
myDragStartPoint != null; which means the left-mouse-button is being held. Next we create a rect-instance by using the point-vector constructor - which helps tremendously since we don't need to calculate all those negative-sizes and what-not issues if we had just two points on a grid. We set this new rectangle to the adorner which will automatically redraw itself by highlighting the bounding-area. Finally, we use this rect instance in our extension method to get a list of all the list-view-items "hit" by this rectangle. With this list, we can programmatically go and select each item. - On mouse-up, we again make sure it was the left-button that came up, and clear the adorner by setting its
HighlightArea to a new rect (in a sense, it is still being drawn - but with a size of zero). Also we set the drag-start-point to null so that subsequent movement of the mouse over the control won't draw anything. - On mouse-leave, same thing - set drag-start-point to
null and clear the visual-cue. I had some issues with the hit-test method when I didn't do this.
Points of Interest
Highly recommended reading:
History
- 2013-04-23 - First draft.
This member has not yet provided a Biography. Assume it's interesting and varied, and probably something to do with programming.


 General
  News
News  Suggestion
  Question
  Bug
Bug  Answer
  Joke
Joke  Praise
  Rant
Rant  Admin
Admin 


