Introduction
This article describes a very simple COM component created with C# and the way to deploy it as an MSI installation file created with NAnt and NAntContrib. The created MSI will build and install the COM component so that it can be used from VBS and C++ clients. The created type library can also be used from a VBA code after a few manual operations.
Background
NAnt, NAntContrib, as well as the .NET Framework deliver all the tools needed for compiling and deploying .NET programs and .NET based COM components. They are easy to install and use, and a handy replacement for the widely used Microsoft Visual Studio. In the domain of automatic build processes, NAnt is at least as good as Microsoft's MSBuild. With a few tricks and some knowledge about COM, it can also be used for deploying COM components as an MSI installation file.
Using the code
You'll need the following components in order to build and run the code:
- .NET Framework, version 2.0 or later, and a C# compiler. You mostly already have it under %SystemRoot%Microsoft.NET\Framework.
- NAnt from nant.sourceforge.net and NAntContrib from nantcontrib.sourceforge.net. Download the installation files. Download the binary releases, unpack them, and set the search path to the directory containing the executable nant.exe. See readme.txt in the NAntContrib package for detailed installation instructions. After reading it, I decided to copy the NANtContrib files to the NAnt directory structure.
- .NET SDK. The attached NAnt build script uses tlbexp.exe and (under certain circumstances) sn.exe, which are included in the .NET SDK.
- Optionally, if you want to build the attached C client, you'll need the Microsoft C++ compiler, the nmake build utility, and the Platform SDK.
- Optionally, you'll need uuidgen.exe for generating unique GUIDs for your components, the attached example code contains a few GUIDs of mine, which are not supposed to be unique. uuidgen.exe is also included in the Microsoft Platform SDK.
After everything has been correctly installed, you can unpack the attached code and issue a simple nant from cmd.exe, and in the directory where the code was extracted. This should result in an MSI file comtest.msi, which can be installed by simply calling it from cmd.exe, double-clicking on it in Explorer, or using msiexec /i comtest.msi.
The call to nant executes a NAnt build script located in the file nant.build. The build script does the following:
- It compiles the C# program ComTest.cs to a DLL, comtest.dll. The program implements a simple class
ComTest which is designed to be exported as a COM class. The C# code is compiled using the NAnt task csc. - Then the build script creates a type library from the previously compiled DLL using the NAnt task tlbexp. Type libraries are needed for the so called "early binding" often used in VBA or in C++.
- The source code is documented; it contains documentation tags in the source file ComTest.cs as well as a small introduction in namespaces.xml. From these documentation tasks, the build script generates an MSDN-like HTML documentation in the directory doc using the NAnt task ndoc.
- Finally, the MSI file comtest.msi is generated using the NAntContrib task msi. The MSI file will install the generated DLL library, the documentation, the type library, and will also apply the Windows Registry keys needed in order to register the DLL as a COM component.
- With nant clean, the generated files can be deleted.
A COM component in C#
There are many sources of information on how to implement a COM component in C#, on MSDN as well as in other places. A very brief and clear description can be found, for example, here. Generally, first you have to define an interface, assign a GUID to it, and also a so called Disp-ID for each method defined in the interface. The attributes GuidAttribute and DispId needed for that are defined in the namespace System.Runtime.InteropServices. The methods may contain default values for parameters, a feature which is not allowed in C#, but may be used from Visual Basic & Co.; for this reason, the attributes Optional and DefaultParameterValue can be used.
using System.Runtime.InteropServices;

[GuidAttribute("11111111-1111-1111-1111-111111111111")]
public interface IComTest {

  [DispId(1)]
  string MyMethod([Optional, DefaultParameterValue(1.0)] double param);
}
Next, you have to create an implementation of the defined interface containing implementations of the methods; in the case of our example, it will be the implementation of MyMethod. The implementing class also gets its own GUID and information about the class interface type. See MSDN for more information about the class interface type.
[GuidAttribute("11111112-1112-1112-1112-111111111112")]
[ClassInterface(ClassInterfaceType.None)]
public class ComTest : IComTest {

  private int m_counter;

  public ComTest() {
    this.m_counter = 0;
  }

  public string MyMethod([Optional, DefaultParameterValue(1.0)] double param) {
    this.m_counter++;
    return string.Format("MyMethod call {0} parameter {1}", this.m_counter,
                                                            param);
  }
}
The example implementation of the method MyMethod produces a simple string containing the number of calls to it performed until now and the passed parameter. I decided to use ClassInterfaceType.None in order not to expose the IDispatch interface and to keep the example as simple as possible.
Strong names
See http://www.codeproject.com/KB/security/StrongNameExplained.aspx for more details on the reason for using strong names. For COM components, it is enough to know that strong names simply must be used. In order to obtain a strong named .NET library, you have to:
- generate a strong name key using the command line utility sn.exe
- include the generated key file to the compilation using the command line parameter -keyfile of the compiler csc.exe
The command line program sn.exe is included in the .NET SDK, in the sub-directory bin of the .NET SDK installation folder. From the command line, the strong name key can be generated by calling:
sn.exe -q -k comtest.key
In the attached code, the strong name key file is generated from NAnt with:
<property name="keyfile" value="comtest.key" />
<if test="${not file::exists(keyfile)}">
  <exec program="sn.exe">
    <arg value="-q"/>
    <arg value="-k"/>
    <arg value="${keyfile}"/>
  </exec>
</if>
The file is generated only if it doesn't exist already. The attached code already contains a strong name key file, and the call to sn.exe won't be issued.
The code can be compiled using:
csc.exe -target:library -keyfile:comtest.key -doc:comtest.xml ComTest.cs
In NAnt, it is realized with the following task csc; see also http://nant.sourceforge.net/release/latest/help/tasks/csc.html.
<csc target="library"
     output="ComTest.dll"
     keyfile="comtest.key"
     doc="comtest.xml"
     debug="false">
  <sources basedir="${project::get-base-directory()}">
     <include name="ComTest.cs" />
  </sources>
</csc>
The setting debug="false" causes that the debug file comtest.pdb is not generated so that no debugging and no accurate stack traces are possible. If you prefer to generate debug information as well, set this parameter to true and include the resulting PDB file in the MSI installation. The attribute keyfile="comtest.key" ensures to the command line parameter -keyfile of csc.exe that the resulting library will be strong named.
The type library file can be very useful for using the COM component with VBA or with C++, and it can be exported using the command line tool tlbexp.exe, also contained in the .NET SDK.
tlbexp.exe /out:comtest.tlb comtest.dll
With NAnt, the type library can be exported using the task tlbexp:
<tlbexp assembly="comtest.dll" output="comtest.tlb" />
The goal of this document is to describe the installation of the COM component with MSI. For tests etc., frequent generation and installation of an MSI file can be time consuming and confusing. The generated DLL file can be installed as COM using:
regasm.exe -codebase comtest.dll
regasm.exe is located in the .NET Framework directory; for .NET Framework 2.0: %SystemRoot%\Microsoft.NET\Framework\v2.0.50727. The parameter codebase lets RegAsm generate Registry entries pointing to the current location of the file comtest.dll. Without this command line parameter, we will have to install comtest.dll in the Global Access Cache (GAC) using gacutil.exe (which is not a good idea, especially for broken assemblies... ).
Documentation can be extracted from the compiled DLL using NDoc: http://ndoc.sourceforge.net. Fortunately, you don't have to separately install NDoc, because NAnt already contains a fully functioning task definition and all dependencies. The documentation is generated as a set of HTML files with an MSDN-like look, using the following call in the NAnt build file:
<ndoc>
  <assemblies>
     <include name="comtest.dll" />
  </assemblies>
  <summaries>
    <include name="namespaces.xml" />
  </summaries>
  <documenters>
    <documenter name="MSDN">
      <property name="OutputDirectory" value="doc" />
      <property name="OutputTarget" value="Web" />
      <property name="IncludeFavorites" value="False" />
      <property name="Title" value="Using COM with C# and NAnt" />
      <property name="SplitTOCs" value="False" />
      <property name="DefaulTOC" value="" />
      <property name="ShowVisualBasic" value="True" />
      <property name="ShowMissingSummaries" value="True" />
      <property name="ShowMissingRemarks" value="False" />
      <property name="ShowMissingParams" value="True" />
      <property name="ShowMissingReturns" value="True" />
      <property name="ShowMissingValues" value="True" />
      <property name="DocumentInternals" value="True" />
      <property name="DocumentProtected" value="True" />
      <property name="DocumentPrivates" value="True" />
      <property name="DocumentEmptyNamespaces" value="False" />
      <property name="IncludeAssemblyVersion" value="True" />
      <property name="CopyrightText" value="No copyright"/>
      <property name="CopyrightHref" value=""/>
    </documenter>
  </documenters>
</ndoc>
- The file set
assemblies defines the .NET binaries from which we want to generate the documentation. The binaries have to be compiled with the option -doc of the compiler csc.exe, and - of course - they have to contain plausible documentation tags, like summary, param etc. See http://ndoc.sourceforge.net/content/tags.htm for more details on documentation tags recognized by NDoc. - The file set
summaries contains a list of XML files containing an overall documentation of namespaces used in the code. The attached code uses a namespace Com which is documented as follows:
<namespaces>
  <namespace name="Com">
    Example of a COM component in C# and how to build it with NAnt
  </namespace>
</namespaces>
We use an MSDN style documenter with the value "Web" for the property OutputTarget. This ensures generation of the mentioned HTML code with an MSDN like look. See http://ndoc.sourceforge.net/content/documenters.htm for more details on the available documenters and formats which can be generated using NDoc.The property OutputDirectory defines the directory where the resulting HTML files are generated.See http://ndoc.sourceforge.net/content/msdn.htm for details on other properties used for the MSDN style documenter MSDN.
Creating the MSI
The installation file comtest.msi is created using the NAntContrib task MSI: http://nantcontrib.sourceforge.net/release/latest/help/tasks/msi.html.
<msi sourcedir="." license="license.rtf" output="comtest.msi">
...
</msi>
The resulting MSI file will be created under sourcedir\output, so in .\comtest.msi. The license file in the attribute license is not obligatory, though if you do not define it, the resulting MSI will contain a warning about a missing license.
The MSI task contains the following sub elements, most (if not all) of them must be defined in the specified order:
- summaryinformation
- properties
- directories
- environment
- components
- registry
- shortcuts
- features
Contains informational entries describing the package.
<summaryinformation>
  <title>COM with C# and NAnt</title>
  <subject>comtest</subject>
  <author>Daniel Stoinski</author>
  <keywords>COM, C#, NAnt</keywords>
  <comments>Installation package for comtest</comments>
  <template>;1033</template>
  <revisionnumber>{11111121-1121-1121-1121-111111111121}</revisionnumber>
  <creatingapplication>NAnt</creatingapplication>
</summaryinformation>
Please ensure that the revision number always contains the same GUID, else it will be generated automatically by NAnt, and you'll be unable to upgrade, reinstall, or repair the existing installation with the newly created MSI file.
See Property Reference on MSDN for a description on the MSI properties. From the properties defined below, the most interesting are:
ProductCode and UpgradeCode - please use the same unique GUIDs for one version; else upgrading, reinstalling, or repairing of the MSI package will fail.ALLUSERS - set it to a value <> 0 if you want to install the package for all users, set it to 0 if the package has to be installed for the current user only. The difference can be seen, for example, in the section shortcuts, which is installed either under C:\Documents and Settings\All Users\Start Menu or C:\Documents and Settings\%USERNAME%\Start Menu. If ALLUSERS is non zero, then you'll need admin rights in order to install the MSI.
<properties>
  <property name="ProductName" value="comtest" />
  <property name="ProductVersion" value="0.0.0" />
  <property name="Manufacturer" value="Daniel Stoinski" />
  <property name="ProductCode" value="{11111122-1122-1122-1122-111111111122}" />
  <property name="UpgradeCode" value="{11111123-1123-1123-1123-111111111123}" />
  <property name="ALLUSERS" value="2" />
</properties>
Properties can be also set from the command line parameters of msiexec.exe. Properties defined in this section overwrite properties set from the command line. Please use really unique GUID values, preferably generated with uuidgen.exe. uuidgen.exe uses small letters in hexadecimal numbers, while capitals are required for the MSI definition. You'll need to convert these small caps to capitals before inserting the GUID number generated with uuidgen.exe into the MSI definition.
We decided to install the package into the following directory structure:
- %ProgramFiles%
- comtest - our main installation directory
- bin - binary files; in our case, the DLL comtest.dll
- com - COM files; in our case, the type library comtest.tlb
- doc - documentation, created with ndoc above
<directories>
  <directory name="D_COMTEST" foldername="comtest" root="ProgramFilesFolder">
    <directory name="D_COMTESTB" foldername="bin" />
    <directory name="D_COMTESTC" foldername="com" />
    <directory name="D_COMTESTD" foldername="doc" />
  </directory>
  <directory name="D_COMTESTS" foldername="ComTest" root="ProgramMenuFolder" />
</directories>
The directories are connected to components in the section components, which are also connected to features. If the user decides not to install a certain feature, the corresponding component is also not installed, and then the directory connected to this component is also not created.
MSI is able to set environment variables. It can be useful for setting, for example, the search path in PATH, or the paths for C include files (INCLUDE) or libraries and type libraries (LIB). Here, we set the environment variable LIB to the directory %ProgramFiles%\comtest\com, where the type library comtest.tlb is located.
<environment>
  <variable name="LIB" append="[D_COMTESTC]" component="C_COMTESTC" />
</environment>
Thus we can simply compile the C++ client without entering any additional -I command line parameters to the C compiler.
The value of the environment variable is defined only if the feature for the component C_COMTESTC is intended to be installed. The value of the environment variable may be a so called formatted string (see also http://msdn.microsoft.com/en-us/library/Aa368609); it may contain references to properties or directories defined within the MSI, which are then expended by the installer during the installation process.
Setting environment variables in MSI still has one drawback - the environment variables are set only for the current user, regardless of the value of the MSI property ALLUSERS set in the properties section.
Components connect features and underlying elements, like directories, environment variables, shortcuts, and Registry keys together. The components entries also contain the most important information: which files have to be installed with the MSI.
The structure of our example installation is quite simple: it contains three features, each feature contains one component, each component is responsible for one directory, and some of the components have additional issues, like environment variables, shortcuts, or Registry keys.
| Element | Feature | Component | Directory | Files to install | Additional issues |
| binary files | F_COMTESTB | C_COMTESTB | D_COMTESTB | comtest.dll | |
| COM entries | F_COMTESTC | C_COMTESTC | D_COMTESTC | comtest.tlb | Registry keys, environment variable LIB |
| documentation | F_COMTESTD | C_COMTESTD | D_COMTESTD | HTML files for the ndoc documentation | shortcut under Start/Programs |
The components definition for our example looks like:
<components>
  <component name="C_COMTESTB"
             id="{11111124-1124-1124-1124-111111111124}"
             attr="2"
             directory="D_COMTESTB"
             feature="F_COMTESTB">
    <key file="${bdllfile}" />
    <fileset basedir="${bindir}">
      <include name="${bdllfile}" />
    </fileset>
  </component>
  <component name="C_COMTESTC"
             id="{11111125-1125-1125-1125-111111111125}"
             attr="2"
             directory="D_COMTESTC"
             feature="F_COMTESTC">
    <key file="${btlbfile}" />
    <fileset basedir="${bindir}">
      <include name="${btlbfile}" />
    </fileset>
  </component>
  <component name="C_COMTESTD"
             id="{11111126-1126-1126-1126-111111111126}"
             attr="2"
             directory="D_COMTESTD"
             feature="F_COMTESTD">
    <key file="index.html" />
    <fileset basedir="${docdir}">
      <include name="*.*" />
    </fileset>
  </component>
</components>
The attributes and sub elements have the following meaning:
- component name: symbolic name of the component referenced in other elements like environment, features etc.
- component id: unique GUID of the component, preferably generated with uuidgen; remember that it must not contain hexadecimal letters in small caps.
- component attr: estimates how the component can be installed. See the description of the NAntContrib task MSI for more details.
- component directory: contains the name of the directory for the component defined in the section directories.
- component feature is the name of the feature to which the component belongs.
- the element key file names are files within the particular component directory with which the installer can discover if the component is already installed.
- the fileset defines the whole set of files to install for this component.
Registering the COM component requires setting of few Windows Registry keys and values. For more details about registering COM components and the Registry keys needed, please see the documentation on MSDN. Similar to the registration described in the chapter Installing the COM component without MSI, you can use the program regasm.exe in order to generate a text file in regedit format:
regasm /regfile:comtest.reg /codebase comtest.dll
For our example component in comtest.dll, the call generated the following file comtest.reg:
REGEDIT4

[HKEY_CLASSES_ROOT\Com.ComTest]
@="Com.ComTest"

[HKEY_CLASSES_ROOT\Com.ComTest\CLSID]
@="{11111112-1112-1112-1112-111111111112}"

[HKEY_CLASSES_ROOT\CLSID\{11111112-1112-1112-1112-111111111112}]
@="Com.ComTest"

[HKEY_CLASSES_ROOT\CLSID\{11111112-1112-1112-1112-111111111112}\InprocServer32]
@="mscoree.dll"
"ThreadingModel"="Both"
"Class"="Com.ComTest"
"Assembly"="comtest, Version=0.0.0.0,
        Culture=neutral, PublicKeyToken=7616258ad77c5bde"
"RuntimeVersion"="v2.0.50727"
"CodeBase"="file:///D:/temp/comtest.dll"

[HKEY_CLASSES_ROOT\CLSID\{11111112-1112-1112-1112-111111111112}\InprocServer32\0.0.0.0]
"Class"="Com.ComTest"
"Assembly"="comtest, Version=0.0.0.0,
           Culture=neutral, PublicKeyToken=7616258ad77c5bde"
"RuntimeVersion"="v2.0.50727"
"CodeBase"="file:///D:/temp/comtest.dll"

[HKEY_CLASSES_ROOT\CLSID\{11111112-1112-1112-1112-111111111112}\ProgId]
@="Com.ComTest"

[HKEY_CLASSES_ROOT\CLSID\{11111112-1112-1112-1112-111111111112}\
         Implemented Categories\{62C8FE65-4EBB-45E7-B440-6E39B2CDBF29}]
The MSI task allows to define the Registry keys and values which will be put into the Registry during installation. They are defined in the section registry with the XML elements key, having the attributes:
- attribute component - is the name of the MSI component for which the installer will define the Registry key, see also components.
- attribute root - the name of the root key; use the string <c>classes for HKEY_CLASSES_ROOT.
- attribute path - the name of the key to define.
- the sub element value - the value of the key. It has two attributes:
- name - is the name of the value; if not given, then the default name @ is used.
- value - is the key value itself.
Generally, I copied all entries from the Registry file generated with regasm to the NAnt file, and I changed only the following entries:
- The value for CodeBase was set to [D_COMTESTB]\comtest.dll; thus the location of the DLL file will be finally estimated by the Windows installer. We can't forecast where the file finally will be installed; in our example, %ProgramFiles% may be located on C:, D:, or somewhere else, or you can even generate an MSI where the user may enter her/his own location.
- The .NET run-time version must always be 2.0.50727 also if using a newer .NET Framework for the compilation of our code.
- The assembly name:
"Assembly"="comtest, Version=0.0.0.0, Culture=neutral, PublicKeyToken=7616258ad77c5bde"
of our comtest.dll can be found with the NAnt functions assembly::get-name() and assembly::load-from-file(), so that you don't have to keep the version and the strong name key in your mind :-)
- The Registry keys were connected to the component
C_COMTESTC, and they're applied only if this component is intended to be installed.
Thus the Registry definitions for our COM component looks like follows:
<property name="assname"
          value="${assembly::get-name(assembly::load-from-file('comtest.dll'))}" />
<property name="fkver" value="2.0.50727" />
<property name="codebase" value="[D_COMTESTB]\comtest.dll" />
<registry>
  <key component="C_COMTESTC" root="classes" path="Com.ComTest">
    <value value="Com.ComTest" />
  </key>
  <key component="C_COMTESTC" root="classes" path="Com.ComTest\CLSID">
    <value value="{11111112-1112-1112-1112-111111111112}" />
  </key>
  <key component="C_COMTESTC"
       root="classes"
       path="CLSID\{11111112-1112-1112-1112-111111111112}">
    <value value="Com.ComTest" />
  </key>
  <key component="C_COMTESTC"
       root="classes"
       path="CLSID\{11111112-1112-1112-1112-111111111112}\InprocServer32">
    <value value="mscoree.dll" />
    <value name="ThreadingModel" value="Both" />
    <value name="Class" value="Com.ComTest" />
    <value name="Assembly" value="${assname}" />
    <value name="RuntimeVersion" value="${fkver}" />
    <value name="CodeBase" value="${codebase}" />
  </key>
  <key component="C_COMTESTC"
       root="classes"
       path="CLSID\{11111112-1112-1112-1112-111111111112}\InprocServer32\0.0.0.0">
    <value name="Class" value="Com.ComTest" />
    <value name="Assembly" value="${assname}" />
    <value name="RuntimeVersion" value="${fkver}" />
    <value name="CodeBase" value="${codebase}" />
  </key>
  <key component="C_COMTESTC"
       root="classes"
       path="CLSID\{11111112-1112-1112-1112-111111111112}\ProgId">
    <value value="Com.ComTest" />
  </key>
  <key component="C_COMTESTC"
       root="classes"
       path="CLSID\{11111112-1112-1112-1112-111111111112}\
                Implemented Categories\{62C8FE65-4EBB-45E7-B440-6E39B2CDBF29}">
   <value value="NAnt required dummy value" />
  </key>
</registry>
The MSI installer is able to create shortcuts. This is mostly used to create shortcuts under the menu Start or on the Desktop. For our example, I decided to create a shortcut for the documentation of our example package under Start/Programs/comtest:
<shortcuts>
  <shortcut name="documentation"
            directory="D_COMTESTS"
            filename="documentation"
            component="C_COMTESTD"
            target="[$C_COMTESTD]\index.html">
    <description>documentation</description>
  </shortcut>
</shortcuts>
The shortcuts are installed only if the user decides to install the documentation.
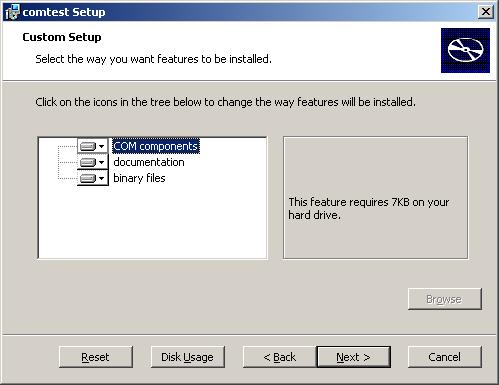
Last but not least, the features section defines finally what has to be installed. We defined three features in our example:
- binary files
- documentation
- COM components
See also the table under components.
<features>
  <feature name="F_COMTESTB" title="binary files" display="1" typical="true" />
  <feature name="F_COMTESTD" title="documentation" display="1" typical="true" />
  <feature name="F_COMTESTC" title="COM components" display="1" typical="true" />
</features>
If the user decides not to install a specific feature, let's say she/he won't install the documentation, then the feature F_COMTESTD won't be installed; similarly, the Windows installer omits all components belonging to F_COMTESTD, in our case C_COMTESTD, so that finally the directory D_COMTESTD won't be created and the NDoc generated files won't be copied into it. In this case, the shortcut under Start/Programs won't be created.
Using the COM component
Visual Basic Script VBS
The example VBS code:
Dim obj
Dim s

Set obj = CreateObject("Com.ComTest")
s = obj.MyMethod
WScript.Echo s
s = obj.MyMethod(2.0)
WScript.Echo s
creates an instance of the ComTest class and calls the method MyMethod in it, first using the default parameter 1.0 and then using the parameter 2.0. The resulting string is stored in the variable s which is then printed using the VBS function WScript.Echo. The VBS script can be called using either cscript.exe or wscript.exe, included in every Windows installation under %SystemRoot%\System32:
D:\>cscript comclnt.vbs
Microsoft (R) Windows Script Host Version 5.7
Copyright (C) Microsoft Corporation. All rights reserved.

MyMethod call 1 parameter 1
MyMethod call 2 parameter 2
The only difference between cscript.exe and wscript.exe is that the first interpreter uses stdout of the current console cmd.exe for printing the output, and the latter uses a message box.
Visual Basic for Applications: VBA
The type library must be added to the references of the VBA project. The screenshots below show how to do it in Excel:
- Launch Excel and open the VBA window using Alt-F11 in it. In the VBA window, select menu Tools/References.

- Press the button "Browse" and select the file %ProgramFiles%\comtest\com\comtest.tlb.
- Activate the selected COM component comtest.
- Test the code in the VBA module. While typing in the code, the VBA IDE should help you and propose the COM component name (comtest.comtest) and the method name (
MyMethod) with its arguments.
- The new component should also be visible in the Object Browser, F2.
The following C++ program comclnt.cpp:
#include <windows.h>
#include <atlbase.h>
#include <stdio.h>
#import <comtest.tlb>
using ComTest::IComTest;
#ifndef SPRTF
# ifdef UNICODE
# ifdef __CEGCC__
extern int _snwprintf(wchar_t*, size_t, const wchar_t*, ...);
# endif
# define SPRTF _snwprintf
# else
# define SPRTF _snprintf
# endif
#endif
#ifdef UNICODE
# define PRTERR(aHR) { TCHAR buf[128]; printf("%s:%d %ls\n",
__FILE__, __LINE__, _errMsg(buf, 127, aHR)); }
#else
# define PRTERR(aHR) { TCHAR buf[128]; printf("%s:%d %s\n",
__FILE__, __LINE__, _errMsg(buf, 127, aHR)); }
#endif
static LPCTSTR _errMsg(LPTSTR theBuf,
size_t aMaxLen,
HRESULT aSysErr) {
if (theBuf != NULL) {
FormatMessage(FORMAT_MESSAGE_FROM_SYSTEM,
NULL,
aSysErr,
0,
theBuf,
aMaxLen,
NULL);
theBuf[aMaxLen] = TEXT('\0');
}
return theBuf;
}
int main() {
CComBSTR str;
CLSID clsid;
HRESULT hr;
IComTest *ct;
ct = NULL;
hr = CoInitialize(NULL);
if (!SUCCEEDED(hr)) {
PRTERR(hr);
goto end;
}
hr = CLSIDFromProgID(L"Com.ComTest", &clsid);
if (!SUCCEEDED(hr)) {
PRTERR(hr);
goto end;
}
hr = CoCreateInstance(clsid,
NULL,
CLSCTX_INPROC_SERVER,
__uuidof(IComTest),
(void **) &ct);
if (!SUCCEEDED(hr)) {
PRTERR(hr);
goto end;
}
USES_CONVERSION;
hr = ct->raw_MyMethod(1.0, &str);
if (!SUCCEEDED(hr)) {
PRTERR(hr);
goto end;
}
#ifdef UNICODE
printf("MyMethod returned: %ls\n", OLE2CT(str));
#else
printf("MyMethod returned: %s\n", OLE2CT(str));
#endif
hr = ct->raw_MyMethod(2.0, &str);
if (!SUCCEEDED(hr)) {
PRTERR(hr);
goto end;
}
#ifdef UNICODE
printf("MyMethod returned: %ls\n", OLE2CT(str));
#else
printf("MyMethod returned: %s\n", OLE2CT(str));
#endif
end:
if (ct != NULL) ct->Release();
return 0;
}
uses the Microsoft specific command #import in order to apply the type library file comtest.tlb. Since we added the subfolder com of the installation directory in the MSI to the environment variable LIB (see also environment), the compiler cl.exe will be able to find the type library file, and we don't need to put this directory to the #import command or define it in the command line option -I of the compiler. The code then initializes the COM operations, creates an instance of the class ComTest, and - similar to the VBS code described above - calls the method MyMethod twice in it. The code may be compiled using simply cl.exe comclnt.cpp.
D:\>cl.exe -nologo comclnt.cpp
comclnt.cpp

D:>comclnt.exe
MyMethod returned: MyMethod call 1 parameter 1
MyMethod returned: MyMethod call 2 parameter 2
The attached code also contains a makefile for this C++ program so that the code can be compiled using nmake.exe -f makefile.vc. Of course, you can also compile C programs using the task cl (http://nant.sourceforge.net/release/latest/help/tasks/cl.html) of NAnt.
History
- 2010-08-31: Initial version of the document.
- 2010-09-05: Reedited HTML code.
This member has not yet provided a Biography. Assume it's interesting and varied, and probably something to do with programming.


