Introduction
Some time ago I was looking for a quick reference for a FilmStrip Control as seen in Windows XP. I was amazed to see that there was not a single article. At that time I decided I will write one article to at least give a general idea about implementing it. So I wrote this short and simple article explaining how to write your own FilmStrip control using the .NET framework. In this article I will be making a custom control and a test application which will use it. I have also added some custom events and properties do some basic operations. Since this is just a beginning step readers can add logic and make this control more versatile.
Building the Control
- Open the Visual Studio and start a new Windows Control Library Project. Call your project FilmStrip.
- Once you have your project open, delete the UserControl from the project.
- Now go to the 'Project' menu: Project->Add User Control... and select the User Control. Call it the FilmStripControl.
- A small rectangular piece of form will apear in your window. Now add a panel on the form and resize it to the size of the already existing form.(A pannel is used since it gives you the option to set its AutoScroll property. So when you add images you scroll like the film strip in windows)
- Now start adding code to handle the images and events related to film strip.
- A Film strip requires images to be displayed in a row and can be scrolled horizontally. In this sample I have used picture boxes to display the images because of their simplicty to handle images and its inherent events.
- A Film Strip can have any number of images which will be decided during runtime. So we have to add the picture boxes dynamically during runtime.
- Now we will write a function that adds a picturebox to the control and then add the image to be displayed to the picturebox.
public bool AddPicture(string ImagePath)
{
    Bitmap bm = new Bitmap(ImagePath);
    Label lb = new Label();
    int width=0,height=0;
    height = this.Height-50;
    width  = height;

    string[] folderparts= ImagePath.Split('\\');

    PictureBox pb = new PictureBox();
    pb.Name = pictureBoxNumber .ToString();
    pb.BorderStyle = BorderStyle.FixedSingle;

    pb.Size = new Size(width,height);
    pb.Location = new Point(pictureBoxOffset,5);
    pb.SizeMode = PictureBoxSizeMode.CenterImage;

    lb.Text = folderparts[folderparts.GetLength(0)-1];
    lb.Size = new Size(width,15);
    lb.Location = new Point(pictureBoxOffset,height+2);

    if(bm.Height>bm.Width)
    {
        pb.Image = (Image)bm.GetThumbnailImage(
            Convert.ToInt32(((float)height/(float)bm.Height)*bm.Width),
                            height,null,IntPtr.Zero);
    }
    else
    {
        pb.Image = (Image)bm.GetThumbnailImage(width,
                Convert.ToInt32(((float)height/
                    (float)bm.Height)*bm.Height),
                    null,IntPtr.Zero);
    }
    pb.Click +=new EventHandler(Image_Click);

    pictureBoxOffset = pictureBoxOffset + width + 21;
    this.FilmStripPanel.Controls.Add(pb);
    this.FilmStripPanel.Controls.Add(lb);
    pictureBoxNumber++;

    return true;
}
As you can see we add the picturebox and the label each time you will call the AddPicture function. We use the pictureBoxNumber global counter to keep track of how many pictureboxes we have added.
- Now we need to add the resize handler to provide the user of the control flexibility to resize it in the host application.
private void FilmStrip_Resize(object sender, System.EventArgs e)
{
    this.FilmStripPanel.Size = new System.Drawing.Size(this.Width,
        this.Height);
    this.FilmStripPanel.AutoScroll = true;
}
- Finally we need to add the event handler in case if the user of the controls wants to know which picturebox was cliked.
protected void Image_Click(object sender,EventArgs e)
{
    int PictureBoxNumber=0;
    PictureBox pb= (PictureBox)sender;
    PictureBoxNumber =Convert.ToInt32(pb.Name);
    if(OnImageClicked!=null)
    {
        OnImageClicked((object)pb.Name,e);
    }
}
It can be seen that the event returns the picturebox name that was clicked which is the string representation of the picturebox number.
- Finally we add the function to remove all the picture from the strip so that new set of images can be added.
public bool RemoveAllPictures()
{
    ControlCollection controlCollection
                 = this.FilmStripPanel.Controls;
    Control pb;
    for(int i=pictureBoxNumber-1;i>-1;i--)
    {
        pb = (Control)controlCollection[i*2];
        controlCollection.Remove(pb);
        pb = (Control)controlCollection[i*2];
        controlCollection.Remove(pb);
    }
    return true;
}
Using the Control
- Open a new instance of the VS .NET. Create a new project choosing the Windows Application template.
- From a new Windows Forms project, we can add the compiled custom control to the toolbox.
- To do this right-click the toolbox, select Customize Toolbox, and from the .NET Framework Components tab, click Browse and locate the Control Library DLL (FilmStrip.dll).
- The component FilmStrip will appear in the toolbox and ready to use.
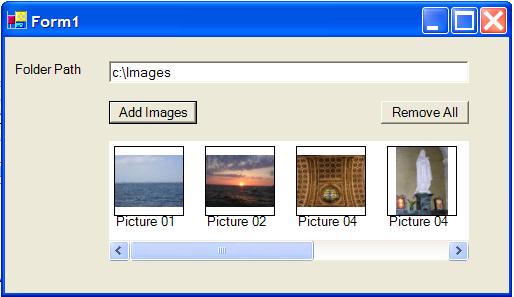
- Just click and drag the control on the application dialog.
- Now add the code to add images to the control.The code will look something like this with control added instantiated with the filmStrip1 name.
string dirpath = @"C:\Test\Images1";
  DirectoryInfo dirinfo = new DirectoryInfo(dirpath);
  FileInfo[] fileList = dirinfo.GetFiles("*.jpg");
  foreach (FileInfo f in fileList)
  {
      filmStrip1.AddPicture(f.FullName);
      Application.DoEvents();
  }
- Now lets add the event handling logic. Add the EventHandler from the properties window
this.filmStrip1.OnImageClicked +=
            new System.EventHandler(filmStrip1_OnImageClicked);

public void filmStrip1_OnImageClicked(object sender, EventArgs e)
     {
         MessageBox.Show("ImageBox " + (string)sender + " Clicked");
     }
As can be seen, I have just implemented the code to display a MessageBox displaying the picturebox number that was clicked.
Please download the zip files and feel free to modify it. As mentioned earlier this is a very basic filmstrip control. It is good for less than 50 images at a time. So you can add logic to handle more images and add other required properties and events. I am now working on another filmstrip control which will utilize the GDI+ to display images and can handle more images. It will also be faster than this filmstrip control. Check back for the new control.
Please feel free to contact me for clarifications and I would also appreciate suggestions to make this control faster and to make it capable of handling more images.
Hi I am Masters Student in West Virginia Uinversity.


 General
  News
News  Suggestion
  Question
  Bug
Bug  Answer
  Joke
Joke  Praise
  Rant
Rant  Admin
Admin 


