To run the demo, download the source code, open the csproject file, compile and run. (The code contains the code behind approach. If you would like me to add the MVVM example code, drop me a message or leave a comment).
Introduction
This will give you a quick and simple introduction to the DatePicker in .NET, and show you some tricks on its usage.
Also, some thoughts and tips for MVVM will be discussed.
Background
I'm assuming you are not completely new to .NET and WPF, but even if you are, this should be quite a simple and straight forward article.
Usage and Visual Example
So, without further ado, let's dig in.
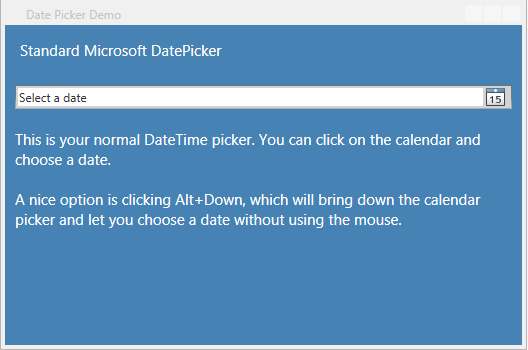
I was coding happily the other day when I ended up looking into the DatePicker in .NET. There's not much to say about it, since it's quite straight forward. You add it (manually in your XAML using <DatePicker .../>, or dragging it from the toolbox into your window), and you can use it straight away. Here's what it looks like:
Now, Sacha Barber wrote an excellent article about DatePickers (you can read it here). He has covered styling, adding buttons to the control, disabling dates, and what not. Alas, it also involves adding code and some complexity which I didn't really want to introduce to my little project. So here's my stripped down, straight forward "get the job done" thoughts and solutions.
To insert a date, you could either type it in: (for example: 04/10/2013), or click on the calendar icon to pop up the selection calendar, and just click on the date that will make you happy. (As the screenshot above says, you can achieve the save by clicking the "ALT+Down" key combination.

So far, so good. so, what's next? First I thought about implementing "Up" and "Down" buttons and creating a style with them so the user can simply add or subtract a day by hitting then, instead of manually editing the date, or going through the date picker and selecting the next day. But then I really liked Sacha's solution of adding/subtracting days using the up and down arrow keys.
Now this is where paths diverse. The easy "get it done" solution calls for some lines of code behind, while the MVVM "do it right or else..." solution will require a different approach with some more work. We'll cover both.
The Simple "Get it done" Option
Here, we assume you just want to get it done and keep going, as a true agile warrior with lots to do, and no time to do it.
Round 1: Simple Usage (Won't Work As We Want Yet)
Add a PreviewKeyDown event to your DatePicker, (either from the events menu in the IDE, or in code, like this:
<DatePicker ... PreviewKeyDown="PreviewKeyDown_EventHandler" ... />
(Do note that we're handling the PreviewKeyDown and not the KeyDown, since the KeyDown won't work well with the arrow keys,
Now, head into your code behind and add the implementation, that will look like this:
private void PreviewKeyDown_EventHandler(object sender, System.Windows.Input.KeyEventArgs e)
{
if ( sender == null
|| ((DatePicker)sender).SelectedDate == null )
return;
if (e.Key == Key.Up)
{
((DatePicker)sender).SelectedDate =
((DatePicker)sender).SelectedDate.GetValueOrDefault().AddDays(1);
}
if (e.Key == Key.Down)
{
((DatePicker)sender).SelectedDate =
((DatePicker)sender).SelectedDate.GetValueOrDefault().AddDays(-1);
}
}
Now, this works, but there's a little "bug" we've introduced. If you'll open the DatePicker and try to navigate with the arrows, hitting down will move diagonally down and left, and hitting up will move diagonally up and right.
The reason is that I believe they are doing the exact same thing in the control source code, adding 7 days when you hit down (adds a week) in the calendar, and subtracting 7 when you hit up (goes a week back). Now our code intercepts that, adds or removes one, and instead of 7 days we're adding (or subtracting) 6 days.
Round 2: Simple Usage (Drop Down Works Properly As Well)
This is easily solved though by adding a check to see if the "IsDropDownOpen" is true and returning straight away if it is.
private void PreviewKeyDown_EventHandler(object sender, System.Windows.Input.KeyEventArgs e)
{
if ( sender == null
|| ((DatePicker)sender).SelectedDate == null
|| ((DatePicker)sender).IsDropDownOpen )
return;
...
}
Done. You can now easily click "Up" to add a day to your date (or "Down" to subtract one), without needing to click buttons or go through the manual editing process.
The Bit Longer MVVM Option
Now, depending on if you're on (or off) the whole MVVM-WPF wagon, you might have heard things like : "If you'll put code in your code behind files, you'll go blind, or grow hair on the palms of your hands" ... While I'm sure some people experienced those symptoms, that's probably not because of their code behind files.
The first difference is that you'll probably have this code in your View, and you'll want to hook it to your ViewModel, to have a clean separation of concerns ... You'll probably also have a property of type DateTime that you'll expose and bind to. Something along the lines:
<DatePicker Name="fancy_name_here" SelectedDate="{Binding your_date_property_here}">
Now comes the tricky bit. You could use the InputBindigs, like this:
<DatePicker Name="fancy_name_here"  SelectedDate="{Binding your_date_property_here}">
  <DatePicker.InputBindings>
    <KeyBinding Key="Up" Command="{Binding TestMeCommand}" Modifiers="Shift" />
    <KeyBinding Key="Up" Command="{Binding TestMeCommand}" Modifiers="Alt"  />
    <KeyBinding Key="Up" Command="{Binding TestMeCommand}" />
  </DatePicker.InputBindings>
</DatePicker>
Now, while "Alt+Up" seems to work for me, "Shift+Up", or just "Up", do not (binding to normal keys works flawlessly, but I didn't want to use "U" and "D" for my bindings, I wanted the "Up" and "Down" arrows). According to this, the reason is that the control catches and handles some of the key bindings. The same answer on SO then suggest the use of behaviors in order to get you up and running ...
The other option I've found is using the System.Windows.Interactivity (comes with Blend, or if you don't have it installed, you can get it from Blend SDK, which you can download here ) . It will look like:
<Window ...
        xmlns:i="clr-namespace:System.Windows.Interactivity;assembly=System.Windows.Interactivity"
        ...
>

<DatePicker Name="fancy_name_here" SelectedDate="{Binding your_date_property_here}">
  <i:Interaction.Triggers>
    <i:EventTrigger EventName="PreviewKeyDown">
    <i:InvokeCommandAction Command="{Binding Path=TestMeCommand}" />
    </i:EventTrigger>
  </i:Interaction.Triggers>
</DatePicker>
To be honest, I didn't play too much with this option. You will have to pass the key as a CommandParameter so you can handle it in the ViewModel, and it all started to seem like I'm working too hard and making my ViewModel very View specific with lots of code that I don't want it to have.
Wrapping It Up Thoughts
So, whichever way you decide to go, I hope you learned something from this article.
I ended up choosing the code behind approach (while leaving a comment on top of my ViewModel property saying: "Warning, magic happens in code behind event handler", so if I ever wonder why my property is working or how was it achieved, it'll be easy to find the place it's referring to.
Having said that, I'm still not a big fan of code behind, but in this case I find it acceptable. (In my last job, I've seen some bad things happening when people decided to be too clever for their own good and put logic and other obscure things in the code behind, failing to comment on them, and leading to many a goose chase trying to figure out why some things aren't working as expected).
Summary
- We've seen how to use the
DatePicker - Nifty shortcut to pop up the date selector (Alt+Down from inside the
DatePicker) - Code behind approach
- Partial MVVM approaches
History
- 27/11/2014 -> Fixed some typos and brushed up the code and comments
- 4/10/2013 -> First release
Coding since I Remember myself ... went through Basic on Commodore 64 to C# on a 24 cores AMD cpu... In between worked with c, c++, java, assembler, php, pascal, JavaScript, SQL based DB's and a bit of NoSQL as well.
Love software, and I'm usually fidgeting around with technology software and hardware on my free time.


