During the Corona crisis, our (Belgian) government sends out regular updates for medical professionals. I created a small UWP app that will notify all the subscribed doctors when new information is available. The doctors can download and install this application from the Microsoft Store to see the updates pop up in a toast message.
Introduction
I am working for a company specialized in software for general practitioners. The practitioners use our software to keep data about patients, and use a whole lot of (almost) mandatory services provided by the government. This is all initiated from the client.
Now we need to work in the other direction. When we receive an update (in this case, typically about Corona), we must push it to all the connected doctors. This can be done using polling (every x minutes, we check if there is something new), or using push notifications.
Architectural Choice
For communication from the server to clients, there are two main possibilities in Microsoft Azure: either use SignalR, or use Azure Notification hubs. My first choice was to use SignalR, but this is mainly supported for web applications (web sockets).
I decided to use Azure Notification Hubs.
- In the free tier, we can push 1 million messages per day to max 500 active devices. Currently, this is sufficient, but when more users install this app, we’ll upgrade to the basic tier. This allows for 200 000 devices and 10 million messages per day, for a wobbling 8,43€ / month. That will do!
- But to start pushing messages to devices, we first need to create and register a UWP application. For this, we have to create an account, and then register our application in this account. Once this is done, we can send messages from the notification hub to this application, hence to devices where the application is installed.
Steps to Register the UWP Application
These are the steps to take to set up a UWP application showing popups when a notification is sent. Below are more details for each step.
- If this is your first UWP application, register your company (or you personally) in Windows Store.
- Register the app in Windows store, to obtain the necessary IDs.
- Create a notification hub in MS Azure, link it with the app IDs that we just registered.
- Create a UWP app to receive the notifications and show Toast messages to the users.
- Deploy this app in the Windows Store.
Registering the Company in the Windows Store
- Go to the Windows Dev Center and sign in with your Microsoft account.
- Now click on “Windows / XBOX” and follow the steps to register yourself or your company.
- The registration is finalized by entering your creditcard data. At the moment of writing (March 2020), it costs 14€ for an individual developer, and 75€ for a company. There is a warning that registering a company can take some time (possibly weeks) to verify the account. Creating a personal account seems to be immediate.
Create an App in the Windows Store
Now that we have a developer account, we can create a new app in that same portal. Click on “Create a new app” to start the registration.
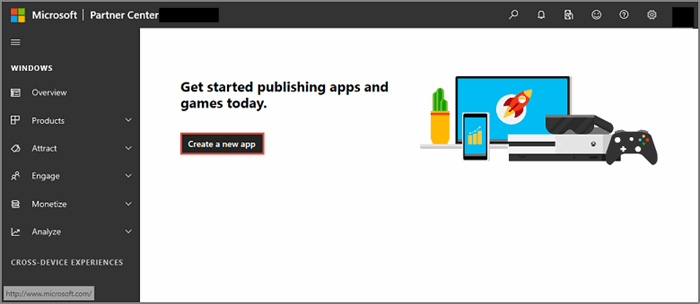
Enter a name for your app and click on “Check Availability”. If this is OK, you can proceed by clicking on “Reserve product name”. To be able to send notifications to this application, we need to retrieve some IDs.

- In the menu on the left, click on “Product Management” > “WNS/MPNS”. This opens the Push notifications page.
- In the page is a link “Live Services site”. The link opens your Notifications Registration page in a new tab.
- On this page, you find the Application Secrets and the Package SID. Either keep this page open, or take a note of the values. We will need them when setting up the Notification hub.
On this page, you can also add a logo if you want.
Create a Notification Hub
To create the notification hub, you will of course need an Azure account. If you don’t have an Azure account yet, follow the steps outlined here.
Log in to the portal to create the notification hub. The easiest way to do this is by clicking on the “hamburger menu” in the top left corner and then select “Create a resource”.
Type “Notification Hub” in the search box and press Enter. You can review the overview and the plans. Click on “Create” to start the creation of the resource.
This takes us to the Basics tab:
The main things to fill out here are:
- Resource group: You can select an existing resource group or create a new one. I usually create a resource group per application, and per environment (ACC / PROD). I also apply naming conventions to nicely separate all. The name of this resource group can be something like “
myapp-rg-dev”. - Notification Hub Namespace: Enter a unique name here. Also apply naming conventions.
- The same for Notification Hub.
- Don’t change the pricing tier. You can do that later, when the application outgrows the capacity.
You can now go to the “Tags” tab to enter some tags if you want, or click “Create” directly. This will create the Notification hub namespace and the Notification hub itself.
Link the UWP App to the Notification Hub
Once the notification hub is created, you can go to the “Windows (WNS)” tab to enter the package SID and the Security key from the UWP app that we just registered. Don’t forget to click “Save”!
Create a UWP App to Show Notifications
We will keep the app very simple, the only thing it needs to do is wait for a notification to arrive, and then display that notification as a Windows toast. The nice thing is that once the app installed via the Microsoft store, it doesn’t have to be running to receive the toasts. When the app is installed, it will be opened so all we want is some static welcome screen.
- In Visual Studio 2019, you need to have the UWP app-development tools installed. This can be done by running the VS2019 setup. When you create a new project, you can now pick the “Blank App (Universal Windows)” project template.
- Give the application a name, and use the defaults for the other settings.
- Hit F5 and admire the empty application.
MainPage.xaml
Nothing fancy here, especially given that I am “graphically handicapped.”
<Page
    x:Class="****Notifications.MainPage"
    xmlns="http://schemas.microsoft.com/winfx/2006/xaml/presentation"
    xmlns:x="http://schemas.microsoft.com/winfx/2006/xaml"
    xmlns:d="http://schemas.microsoft.com/expression/blend/2008"
    xmlns:mc="http://schemas.openxmlformats.org/markup-compatibility/2006"
    mc:Ignorable="d"
    Width="Auto" Height="Auto"
    >
    <Page.Background>
        <AcrylicBrush TintColor="#FF35B2A6"/>
    </Page.Background>

    <StackPanel>
        <TextBlock Text="**** Notifier" Foreground="#FCFFFFFF"
        FontSize="72" HorizontalAlignment="Center"/>
        <TextBlock Text="This application will show a message in the system tray
        when new COVID updates are available." Foreground="#FCFFFFFF" FontSize="18"
        HorizontalAlignment="Left" TextWrapping="WrapWholeWords" />
        <TextBlock Text="You can safely close this window,
        you will still receive the notifications." Foreground="#FCFFFFFF"
        FontSize="18" HorizontalAlignment="Left" TextWrapping="WrapWholeWords"/>
    </StackPanel>
</Page>
Mainpage.cs is not changed at all.
App.xaml.cs
This is where the magic happens. But it is also disappointingly simple because UWP does the hard work.
I have created a new function that will hook the app to the events sent by the notification hub:
private async void InitNotificationsAsync()
{
    var channel =
     await PushNotificationChannelManager.CreatePushNotificationChannelForApplicationAsync();
    var hub = new NotificationHub("****-notifications-hub",
    "Endpoint=sb://****-notifications-ns.servicebus.windows.net/;
    SharedAccessKeyName=
        DefaultListenSharedAccessSignature;SharedAccessKey=3aqps-secret stuff=");
    var result = await hub.RegisterNativeAsync(channel.Uri);
}
Of course, it would be wise to obtain the connection string from a config file, I didn’t do this for the sake of simplicity.
This function is called from the OnLauched function, and that’s it!
protected override void OnLaunched(LaunchActivatedEventArgs e)
{
InitNotificationsAsync();
Frame rootFrame = Window.Current.Content as Frame;
}
Testing the Application
Run your application (F5 or Ctrl+F5). The main window will appear.
No go to the notification hub and in the overview click on “Test Send”. Set the parameters as in the screenshot and click on Send. If all goes well, you will see a toast appearing on your desktop.
This notification is only sent to 10 users (as it is only used to verify that your app is working properly).
Deploying the App to the Microsoft Store
There are some settings to be verified before deploying your app.
- Right-click your project > Properties to open the properties window.
- Click the “Package Manifest” button. This is where you can set all the information about your app to make it valid for the store. There is some work to be done here, but it is all straightforward.
- Once this is all done, you can deploy your project by Build > Deploy.
- Go back to the application overview in the Windows Dev Center, open Products on the left and click on your application. In the “Application overview tab” you will see the new submission under (you guessed it right) “Submissions.”
- Click on the “Update” button next to it and follow the instructions. You can enter the price, age ratings, … here and start making money!
Sending a Notification from an Application
We can send notifications from any type of application, it doesn’t need to be a UWP app. Here is the Toaster class that will do the work.
internal class Toaster
{
private const string _secret = "hub secret";
private const string _sid = "ms-app://app id";
private const string _uri = "https:// hub uri";
private const string _notificationType =
"wns/toast";
private const string _contentType = "application/xml";
public async Task PostToWns(string xml)
{
var client = NotificationHubClient.CreateClientFromConnectionString
("Endpoint=sb://hdmp-notifications-ns.servicebus.windows.net/;
SharedAccessKeyName=DefaultFullSharedAccessSignature;
SharedAccessKey=ijztkVtbIDtELzAJQKIkcwLy8Ru6d+tM3k7K/33yrA4=",
"hdmp-notifications-hub");
await client.SendWindowsNativeNotificationAsync(xml);
}
}
This will generate a toast message from the XML that is passed. The format of the XML must be correct of course. This format is documented here.
In the store, you can also find a great app, called “Notifications Visualizer”. This app allows you to edit notifications and test them locally. This allows to rapidly compose and test your messages.
References
History
- 9th May, 2020: Initial version
Gaston Verelst is the owner of Faq.be, an IT consultancy company based in Belgium (the land of beer and chocolate!) He went through a variety of projects during his career so far. Starting with Clipper - the Summer '87 edition, he moved on to C and mainly C++ during the first 15 years of his career.
He quickly realized that teaching others is very rewarding. In 1995, he became one of the first MCT's in Belgium. He teaches courses on various topics:
• C, C++, MFC, ATL, VB6, JavaScript
• SQL Server (he is also an MSDBA)
• Object Oriented Analysis and Development
• He created courses on OMT and UML and trained hundreds of students in OO
• C# (from the first beta versions)
• Web development (from ASP, ASP.NET, ASP.NET MVC)
• Windows development (WPF, Windows Forms, WCF, Entity Framework, …)
• Much more
Of course, this is only possible with hands-on experience. Gaston worked on many large scale projects for the biggest banks in Belgium, Automotive, Printing, Government, NGOs. His latest and greatest project is all about extending an IoT gateway built in MS Azure.
"Everything should be as simple as it can be but not simpler!" – Albert Einstein
Gaston applies this in all his projects. Using frameworks in the best ways possible he manages to make code shorter, more stable and much more elegant. Obviously, he refuses to be paid by lines of code!
This led to the blog at https://msdev.pro. The articles of this blog are also available on https://www.codeproject.com/script/Articles/MemberArticles.aspx?amid=4423636, happy reading!
When he is not working or studying, Gaston can be found on the tatami in his dojo. He is the chief instructor of Ju-Jitsu club Zanshin near Antwerp and holds high degrees in many martial arts as well.
Gaston can best be reached via https://www.linkedin.com/in/gverelst/.


 General
  News
News  Suggestion
  Question
  Bug
Bug  Answer
  Joke
Joke  Praise
  Rant
Rant  Admin
Admin 


 But normally you won't have a problem.

 one quick question.