Introduction
“Help” is the most important part of our web applications, as mostly we don’t notice it, but sometimes it plays a very big role for saving our time and work.
Suppose a button has only an image, many times we are not able to understand what it means but when we place the mouse pointer over it, it shows the usage of that as a tooltip, which is a part of web help technique.
Many times, when we read a topic that contains special words, definition then don’t we have to search on the net about it, we just click and a small window opens with the description - this is also a part of “help” for web applications.
So here I'm going to explain some techniques about “How to add help to web applications”.
Displaying ToolTips
ToolTip is a very basic and very important part of the web, as I discussed in the introduction.
"Suppose a button has only an image, many times we are not able to understand what it means but when we place the mouse pointer over it, it shows the usage of that as a tooltip".
About
Tooltip shows at runtime, almost all "server" controls having this (tooltip) property inbuilt.
One important thing about tooltip is that Internet Explorer dosn’t accept the "tooltip" property of ASP.NET controls; it takes this property as "title".
In HTML controls, you have to use the "title" property instead of "tooltip" for controls to show the help.
Server control_
Code
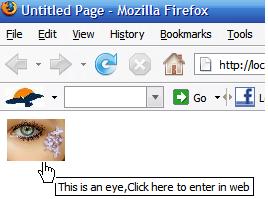
<asp:ImageButton runat="server" ID="imgbutton"

ToolTip="This is an eye,Click here to enter in web" ImageUrl="~/Lilac_by_KinkyPink.jpg"/>
Output
Html control_
Code
<input type="image" title="This is an amazing eye" runat="server"

src="Lilac_by_KinkyPink.jpg" style="height: 46px; width: 64px"/>
Output
The output will look the same as server control.
Displaying Help in a Popup Window
Sometimes while discussing a long term, we use some keywords that include long definitions and it is difficult to understand for a newbie. For this purpose, a popup window can be used for help purposes, it can be an HTML page or an .aspx page-depending on your requirement.
Code
<a href="#" onclick="window.open('procedure.htm','popup','left = 900 height=200,
    width=200,scrollbars=yes');
return(false);"> Procedure </a>are the most important topic of SQL.
Explanation
We have used # in href to give the current page reference and we used an onclick to open a new window "procedure.htm" which we have already created.
"Left = 900" is the pop window position and further are some properties.
Here procedure keyword is a link and the rest are simple chars.
Output
When you click on the "Procedure" keyword, it will open a new window containing the text entered in that page "procedure.htm" by you.
Try it.
HTML Help
If you have HTMLHELP.chm created in your system, then a simple link can be used to pop it up any time.
Download "HTML Help Workshop" for this type of help facility.
You can download it from the following link for free:
Installed.
Now follow these steps to create an HTML help workshop for a project, website, etc.
Starts - All Programs - HTML Help Workshop - HTML Help Workshop
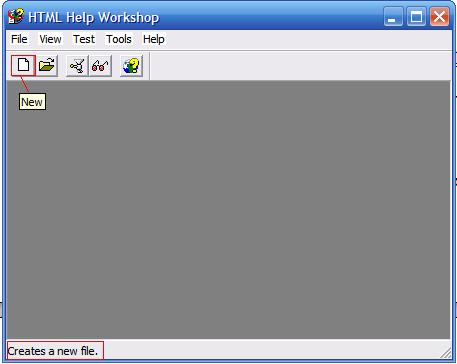
Now click on the "New" toolbar.
A new window will open like this:
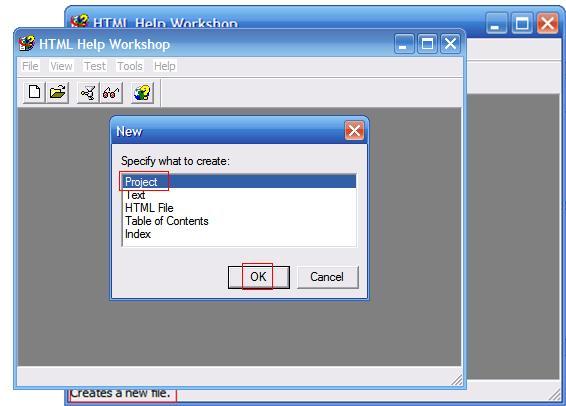
Select Project, then click OK button.
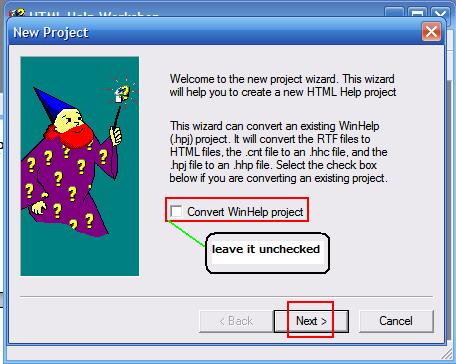
Click on the next button to proceed.
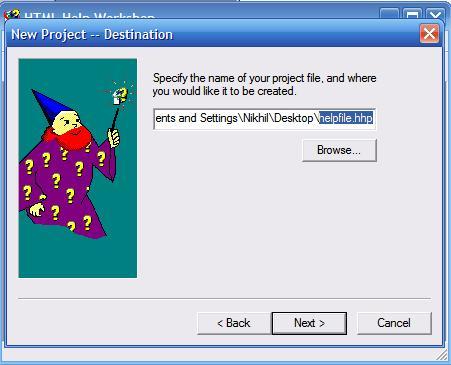
Browse the location where you want to create the file, just give a name and click open.
Click on the next button again.

Don't check any check box if you haven't created any file.
Click on the next button and then click on the finish button, then a new window will appear like this.
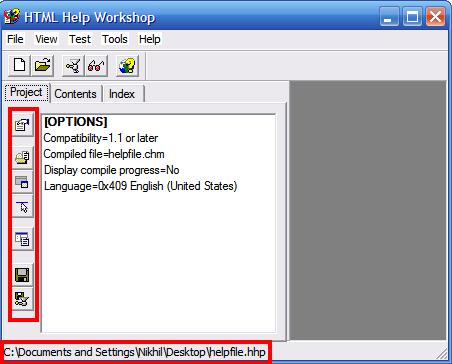
Just use these buttons to make your help project.
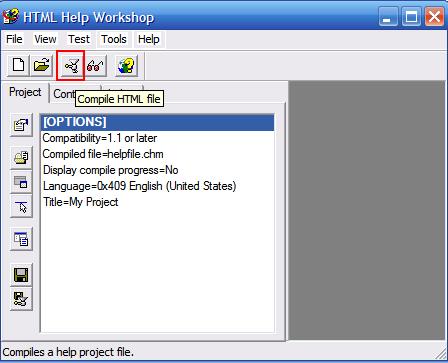
When you have done all the editing for creating help project, click on this "Compile HTML file" button and then give the path of that .hhp file.
Compile the project.
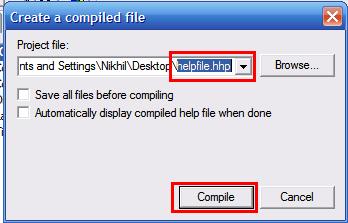
Now see that a helpfile.chm has been created in that location.
Done!!
Conclusion
We learned how to use Help techniques for web applications.
History
- 23rd August, 2010: Initial post
Nikhil is a Microsoft MCTS and MCP.
developed many websites.
interested in web designing and modifying things with
creativity.
-Nikhil


 General
  News
News  Suggestion
  Question
  Bug
Bug  Answer
  Joke
Joke  Praise
  Rant
Rant  Admin
Admin 


