The Microsoft Azure Cloud makes available more data centers than Amazon and Google combined, along with 3X data replication and the most advanced security practices in the industry. Azure’s RemoteApp feature works with nearly any computer or device: OS X, iOS, Android or Windows.
dtSearch uses its own built-in “document filters” to instantly search terabytes of a broad range of data types: “Office” documents, PDFs, emails with multilevel attachments, web data, and other databases. dtSearch offers over 25 different search options, including faceted searching and multiple advanced data classification options, as well as search results display with highlighted hits.
The article brings together the Microsoft Azure Cloud with dtSearch to enable secure hosting of terabytes of a broad spectrum of data types combined with instant dtSearch search access from nearly any computer or device.
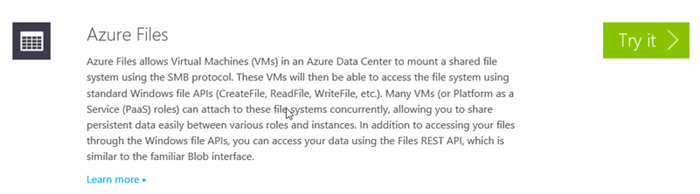
Figure: Azure Preview Portal

Figure: Global Network of Data Centers
Figure: Why Cloud
Global Scale Search: Architecture Overview
The cloud-based search component of our demo application, SearchApp, will use Azure RemoteApp to instantly search cloud content from a computer or handheld device.
The other two components of the demo application are AddContentAndIndexApp which sends content to the Azure server for SearchApp to search, and SocketServer which runs on the Azure server to receive and index incoming content.
Azure Files stores the dtSearch indexes. Azure Files lets you share data across any number of applications through the SMB (Server Message Block) protocol.
The completed Visual Studio solution looks like this:
Figure: The Three Core Projects in Solution
| Project | Function |
| SearchApp | Searches through dtSearch indexes and displays results. |
| AddContentAndIndexApp | Uploads content for indexing. Initiates indexing job. |
| SocketServer | Performs indexing of AddContentAndIndexApp content. |
Figure: Projects and Their Functions
SearchApp
SearchApp lets any end user anywhere in the world securely perform searches without any actual data or application installation on the end user’s machine. SearchApp resides in the cloud, with users connecting to it from almost any computer or device (iOS, OS X, Android or Windows) via RemoteApp.
RemoteApp is a feature of Microsoft Azure’s Remote Desktop Services that works with a remote computer or device as if it were a local desktop application. The end result combines the global scalability of Azure with the ease of use of a desktop application. You can read more about it here.
RemoteApp offers Office365 integration along with many other options which are beyond the scope of this article. For example, Azure supports what is known as the hybrid cloud, which means that you can set up a virtual network between the public cloud and your on-premises infrastructure, supporting the ability to integrate applications between your business and the cloud.
Figure: Supported Clients
AddContentAndIndexApp
AddContentAndIndexApp uploads data for cloud indexing and searching. This article demonstrates AddContentAndIndexApp running on a local system not because it has to, but because the local system typically connects to a local network where the content ordinarily resides before upload to Azure. AddContentAndIndexApp sends content to Blob Storage, and also initiates a socket connection to SocketServer to begin the indexing operation.
The SocketServer
The third application, SocketServer, is a cloud-based application which supports socket connections to communicate back to AddContentAndIndexApp. SocketServer listens for connections from AddContentAndIndexApp, running as a client application. Upon successful connection, SocketServer initiates an indexing operation, also in the cloud.
As this indexing operation executes, SocketServer sends status updates back to the AddContentAndIndexApp client, enabling progress tracking of the indexing operation. SocketServer has to be a socket based application because it provides real-time updates; an ordinary http connection could not provide this functionality.
Figure: High-Level Architecture
Figure: Leverage RemoteApp
Building the Solution
You can download the complete source code for the project from here. The solution relies on Visual Studio 2015, which you will also need. You will also need RemoteApp on client machines. Download RemoteApp here.
With these items in place, this article will take you through the following initial steps:
| Step 1 | Get an Azure subscription. You can get a free trial here. |
| Step 2 | Enable Azure Files from here. This is a key component of this technology which allows you to create an SMB share for your data and indexes, so you can host them in the cloud. |
| Step 3 | Provision a Storage Account. (Learn more here.) Be sure to safely store the account name and access key outside of the Storage Account. |
| Step 4 | Set up a virtual machine running Windows. (Learn more here.) |
| Step 5 | Use PowerShell to create the SMB share. (Learn more here.) See scripting below. |
| Step 6 | Edit the source code to add your Storage Account information. |
Following those steps, you will then be able to upload content to Blob Storage, and use the dtSearch Engine to create indexes in Azure Files.
Then use RemoteApp for searching. Scale up or down on Microsoft Azure as needed.
Step 1. Get an Azure Subscription
You can sign up for a free trial here.
Beyond that, the good news is that you only pay for what you use. The cost of Azure breaks down into a few categories:
(1) the storage costs for your content and indexes;
(2) the computing costs for the machines in the cloud running the Windows application that supports the users performing searches;
(3) bandwidth costs for content leaving the data center;
(4) licensing costs for RemoteApp.
These are all Microsoft fees for using Azure and do not involve dtSearch. You could eliminate the per-client RemoteApp cost of using Azure by implementing SearchApp with a web interface using ASP.NET instead of RemoteApp.
Step 2. Enable Azure Files
You can enable Azure Files from here. Scroll down to where you see "Azure Files" and select "Try it." Once enabled, you will be able to provision this service from your Azure Subscription.
Note that an existing Storage Accounts created before Azure Files will not work. First, enable Azure Files, then create a Storage Account. This link defines the order very clearly: first, sign up for Azure Files; then create a new Storage Account.
Step 3. Provision a Storage Account
Although I've pointed you to a tutorial in previous articles, let's walk through some basic steps. For an overview of storage accounts, please see this link. Also, here is a nice, quick tutorial to jumpstart your knowledge.
Let's assume that you have logged into the subscription and are now able to provision a storage account. Start by navigating to the portal and clicking "New." From there, you will select “Data and Storage,” followed by “Storage Account.”
You need to provide some details about the storage account, such as the name, location, and the storage account type. You can define how you want the data to replicate across different data centers, for example. In addition, you can specify that you want to use premium storage, which provides exponentially better performance by supporting superfast SSD drives.
Figure: Creating a Storage Account
After clicking “Create,” a little tile will appear on the portal page indicating that the provisioning process is underway. This should take no more than a few minutes.
Figure: Portal Icon for Storage Account
You should see the following screen once the provisioning process for your storage account is complete.
Figure: Managing Storage Keys
The access key provides an authentication mechanism, so only applications that have an access key can get access to storage. In Step 6, we will paste the storage account name and access key into the three app.config files in our application.
Step 4. Set up a Virtual Machine
In this next section, you’ll setup a virtual machine in a data center to host the applications. To learn how to provision a virtual machine, see here.
You can combine everything into a single virtual machine, or you can split up SearchApp and SocketServer. It simply depends on performance and scale. Be aware that there are numerous types of virtual machines to choose from. In general, you are better off starting with a small virtual machine and moving to larger ones only if you need to.
Naturally, you can do all the development on your own local machine. You could also provision a Windows 10 virtual machine in Azure and install Visual Studio on it, so you can do all your development work up in the cloud. That’s the way I chose to develop, so I can debug the app as it runs in the data center. The SMB file share, after all, is not available outside the data center.
Step 5. Use PowerShell to Create the SMB Share
At this point you are ready to start provisioning a file share using Azure Files. Azure Files is what makes it possible to work with dtSearch indexes. Azure Files exposes file shares using the standard SMB protocol. Applications running in Azure can then easily share files between virtual machines using standard and familiar file system APIs like CreateFile, ReadFile and WriteFile. You can even map a drive letter to the SMB share, so your applications can work as they always have accessing the file system. As a side note, the files in the SMB share can also be accessed via a REST interface, which opens a variety of hybrid scenarios.
But first, you’ll need to install PowerShell. See this link. Note that it is important to link to your subscription, so when the PowerShell code runs, it will leverage your Storage Account. You will need the Storage Account name and access key to paste into your PowerShell script.
Once you have the above four prerequisites completed, you can begin the PowerShell scripting. Although I mentioned this before, it makes sense to mention it again - be sure to enable Azure Files before provisioning your Storage Account. Your PowerShell script will mysteriously fail if you forget this crucial step.
Now that you've set up the file share, you need to return back to your Visual Studio project and adjust the code that deals with the file system to use this share, instead of the local file system. There are two important points here. First, all searchable content will be stored as ordinary blobs. Second, the application will store the indexes in the SMB file share that we just created with PowerShell.
The code below represents the PowerShell script we need to run in order to create the file share.
# To associate your subscription with PowerShell runtime+
# Add-AzureAccount

# import-module .\AzureStorageFile.psd1
$accesskey = "[access key from the portal]"

# create a context for account and key
$ctx=New-AzureStorageContext "dtsearchstorage" $accesskey

# create a new share
Remove-AzureStorageShare dtsearchshare2  -Context $ctx
$s = New-AzureStorageShare dtsearchshare2 -Context $ctx

# Issue this command if you would like to create the shares so that
# the file share is still available after a reboot takes place
cmdkey /add:dtsearchstorage.file.core.windows.net /user:dtsearchstorage
     /pass:[access key from the portal]

#------------------------------------------------------
# the following commands can be ignored for the purpose of this exercise
# they are here for illustration purposes only

# create a directory in the test share just created
# New-AzureStorageDirectory -Share $s -Path testdir

# upload a local file to the testdir directory just created
# Set-AzureStorageFileContent -Share $s -Source c:\temp\test.txt -Path testdir

# list out the files and subdirectories in a directory
# Get-AzureStorageFile -Share $s -Path testdir

# download files from azure storage file service
# Get-AzureStorageFileContent -Share $s -Path testdir/test.txt -Destination c:\temp

# remove files from azure storage file service
# Remove-AzureStorageFile -Share $s -Path testdir/test.txt

# Drive mapping script if you wanted to use it
# net use z: /delete
# net use z: \\dtsearchstorage.file.core.windows.net\dtsearchshare2 /u:dtsearchstorage "[access key from the portal]"
Figure: PowerShell Script That Sets up the Share
Once the PowerShell script runs, you will have the following share available within your subscription.
\\dtsearchstorage.file.core.windows.net\dtsearchshare2
To an application or a user, this “share” can be treated the same way you would treat an ordinary file system on your local computer. In reality, the share is an attached blob that is securely and triply replicated. This is the silver bullet that enables us to store not just the searchable content in the cloud, but also the indexes that are generated from that content as well. As proof, note the Explorer window below, which shows dtSearch index files in Azure Files.
`
Step 6. Edit the Source Code to Add Your Storage Account Information
App.config and the Three Visual Studio Projects
The table below illustrates how I have modified the three app.config files. Here, the storage account name is the same across all three app.config files.
| Working | app.config |
| AddContentAndIndexApp |
="1.0"="utf-8"
<configuration>
<startup>
<supportedRuntime
version="v4.0"
sku=".NETFramework,Version=v4.5.2"/>
</startup>
<appSettings>
<add
key="StorageAccountName"
value="you get from the portal "/>
<add
key="AccessKey"
value="you get from the portal"/>
<add
key="indexfolder"
value="\\dtsearchstorage.file.core.windows.net\dtsearchshare2"/>
</appSettings>
</configuration>
|
| SearchApp |
="1.0"="utf-8"
<configuration>
<startup>
<supportedRuntime
version="v4.0"
sku=".NETFramework,Version=v4.0"/>
</startup>
<appSettings>
<add
key="StorageAccountName"
value="dtsearchstorage"/>
<add
key="AccessKey"
value="you get from the portal"/>
<add
key="indexfolder"
value="\\dtsearchstorage.file.core.windows.net\dtsearchshare2"/>
<add
key="StorageConnectionString"
value="DefaultEndpointsProtocol=https;AccountName=you get from the portal;AccountKey=you get from the portal"/>
</appSettings>
<runtime>
<assemblyBinding xmlns="urn:schemas-microsoft-com:asm.v1">
<dependentAssembly>
<assemblyIdentity
name="Microsoft.WindowsAzure.Storage"
publicKeyToken="31bf3856ad364e35"
culture="neutral"/>
<bindingRedirect
oldVersion="0.0.0.0-5.0.0.0"
newVersion="5.0.0.0"/>
</dependentAssembly>
</assemblyBinding>
rea
</runtime>
</configuration>
|
| SocketServer |
="1.0"="utf-8"
<configuration>
<appSettings>
<add
key="StorageAccountName"
value="you get from the portal"/>
<add
key="AccessKey"
value="you get from the portal"/>
<add
key="indexfolder"
value="\\dtsearchstorage.file.core.windows.net\dtsearchshare2"/>
<add
key="StorageConnectionString"
value="DefaultEndpointsProtocol=https;AccountName=dtsearchstorage;AccountKey=you get from the portal"/>
</appSettings>
<startup>
<supportedRuntime
version="v4.0"
sku=".NETFramework,Version=v4.5.2"/>
</startup>
<runtime>
<assemblyBinding xmlns="urn:schemas-microsoft-com:asm.v1">
<dependentAssembly>
<assemblyIdentity
name="Microsoft.WindowsAzure.Storage"
publicKeyToken="31bf3856ad364e35"
culture="neutral"/>
<bindingRedirect
oldVersion="0.0.0.0-5.0.0.0"
newVersion="5.0.0.0"/>
</dependentAssembly>
</assemblyBinding>
</runtime>
</configuration>
|
Figure: Azure Configuration
Visual Studio Projects
Below is the Visual Studio solution containing the three projects.
Figure: The Three Projects in the Solution
The following three tables provide a detailed representation of the components that make up the three projects.
SearchApp - This project allows users to search for content.
| app.config | Includes storage related configuration information. |
| BlobDataSource.cs | Provides access to the uploaded content for displaying search results. |
| MainForm.cs | The starting form to search for content |
| ResultsForm.cs | Displays the results of the search. Allows the user to drill down into the search results. |
| SearchForm.cs | Provides the user interface to conduct searches. |
AddContentAndIndexApp - This allows administrators and users to upload content for indexing. It also provides the ability to create or update indexes as content changes through communication with SocketServer.
| app.config | Includes storage related configuration information. |
| MainForm.cs | Contains two buttons. The first button enables uploading content to the cloud. The second button enables indexing of the content by connecting to the indexer running in the cloud. |
| Program.cs | Starts the application by running MainForm. |
| SocketClient.cs | Supports communication to the SocketServer indexer. Updates the user interface based on information which SocketServer returns. |
SocketServer - This is the cloud application for indexing uploaded content.
| app.config | Includes storage related configuration information. |
| BlobDataSource.cs | Provides access to the uploaded content for performing the indexing. |
| Program.cs | Listens on a specific port for information from AddContentAndIndexApp. |
The table below describes where the individual applications run.
| Project | Where to run |
| SearchApp | Runs in two places. Primarily it runs in the cloud on a virtual machine, but through the magic of RemoteApp, it runs on a client computer or device anywhere in the world. |
| AddContentAndIndexApp | Here, this application runs where the searchable content resides, to facilitate uploading that content to the cloud. |
| SocketServer | This application runs in the cloud and should be hosted in the same data center as the content and indexes. After all, its job is to index content, which is cloud-based. |
Figure: Where Projects Run
The Applications as They Execute
The screen snapshots below provide a visual representation of what the applications are capable of doing.
AddContentAndIndexApp - Upload content and perform indexing.
Figure: AddContentAndIndexApp
SearchApp - The core application, which supports the searching of content and the displaying of results.
Figure: SearchApp
Figure: SearchApp
Figure: SearchApp
SocketServer – This background process runs in the cloud and accepts requests from AddContentAndIndexApp. When AddContentAndIndexApp successfully connects to SocketServer, SocketServer begins the indexing operation on the uploaded content.
Figure: SocketServer (Indexer)
The screen below shows the cloud-based indexer in action, displaying files as they are indexed. AddContentAndIndexApp can also display progress as the indexing takes place.
Figure: SocketServer (Indexer)
Supporting Libraries
The three projects require a number of supporting libraries. The first, the Azure SDK, is fairly obvious. The projects further need to run the latest, most up-to-date Azure SDK library. RedDog Storage enables mounting drives based on the SMB file share we set up previously. It also allows us to access the indexes, which is the core technology that dtSearch provides.
The Nuget packages are installed by Visual Studio. See this link for help with Nuget: http://docs.nuget.org/.
And of course dtSearch is needed. dtSearch will be needed in all 3 projects. The dll can be found here: C:\Program Files (x86)\dtSearch Developer\bin\dtSearchNetApi4.dll.
| Project | Required NuGet Packages |
| AddContentAndIndexApp | Azure Storage SDK |
| SearchApp | RedDog.Storage, Azure SDK, Azure Configuration |
| SocketServer | RedDog.Storage, Azure SDK, Azure Configuration |
Figure: Required NuGet packages
Key Source Code Elements
The next few code snippets provide some of the core operations.
As explained previously, SocketServer waits for a connection. Upon successful connection, it begins an indexing job. Notice that it is listening on port 10100. The virtual machine must run two tasks to enable clients to connect to SocketServer: (1) Open up ports on the virtual machine using the Azure portal. (2) Define firewall rules that allow connections on the specified port. Here are two blog posts from Microsoft that can assist with this: link and link.
Also note that the code below mounts a P: drive when the application starts up. Other parts of the code use this P: drive code to build the indexes. As SocketServer indexes each file, the application returns a string to AddContentAndIndexApp, which can then provide progress updates to the user. The code sending progress reports back to the AddContentAndIndexApp client looks something like this:
sw.WriteLine(data + " - " + loopcount.ToString());
public static void Main()
{
SetupMounts();
listener = new TcpListener(10100);
listener.Start();
for (int i = 0; i < LIMIT; i++)
{
Thread t = new Thread(new ThreadStart(Service));
t.Start();
}
}
public static void SetupMounts()
{
foreach (var mappedDrive in FilesMappedDrive.GetMountedShares())
{
if (mappedDrive.DriveLetter == "P:")
{
FilesMappedDrive.Unmount("P:");
}
}
var share =
CloudStorageAccount.Parse(
CloudConfigurationManager.GetSetting("StorageConnectionString"))
.CreateCloudFileClient()
.GetShareReference("dtsearchshare2");
share.Mount("P:");
}
public static void Service()
{
while (true)
{
if (!fReadOnce)
{
fReadOnce = true;
Console.WriteLine("Waiting for client connection");
}
Socket soc = listener.AcceptSocket();
Console.WriteLine("Connected: {0}",
soc.RemoteEndPoint);
try
{
Stream s = new NetworkStream(soc);
StreamReader sr = new StreamReader(s);
StreamWriter sw = new StreamWriter(s);
sw.AutoFlush = true;
SendListIndexedFiles(sw);
sw.WriteLine("<EOF>");
s.Close();
}
catch (Exception e)
{
Console.WriteLine(e.Message);
}
Console.WriteLine("Disconnected: {0}", soc.RemoteEndPoint);
soc.Close();
}
}
private static void ExecuteIndexJob(StreamWriter sw, dtSearch.Engine.IndexJob ij)
{
fIndexing = true;
ij.ExecuteInThread();
Trace.TraceInformation("ExecuteIndexJob - 1");
IndexProgressInfo status = new IndexProgressInfo();
string data = null;
int loopcount = 0;
while (ij.IsThreadDone(50, status) == false)
{
loopcount += 1;
Trace.TraceInformation("ExecuteIndexJob - 1");
Trace.TraceInformation("ExecuteIndexJob - Ste = {0}", status.Step);
switch (status.Step)
{
case IndexingStep.ixStepBegin:
data = "Opening Index";
Console.WriteLine(data);
sw.WriteLine(data + " - " + loopcount.ToString());
break;
case IndexingStep.ixStepCheckingFiles:
data = "Checking Files";
Console.WriteLine(data);
sw.WriteLine(data + " - " + loopcount.ToString());
break;
case IndexingStep.ixStepCompressing:
data = "Compressing Index";
Console.WriteLine(data);
sw.WriteLine(data + " - " + loopcount.ToString());
break;
case IndexingStep.ixStepCreatingIndex:
data = "Creating Index";
Console.WriteLine(data);
sw.WriteLine(data + " - " + loopcount.ToString());
break;
case IndexingStep.ixStepDone:
data = "Indexing Complete";
Console.WriteLine(data);
sw.WriteLine(data + " - " + loopcount.ToString());
break;
case IndexingStep.ixStepMerging:
data = "Merging words into index";
Console.WriteLine(data);
sw.WriteLine(data + " - " + loopcount.ToString());
break;
case IndexingStep.ixStepNone:
data = "Step";
Console.WriteLine(data);
sw.WriteLine(data + " - " + loopcount.ToString());
break;
case IndexingStep.ixStepReadingFiles:
data = (status.File.Name == "" ? "Next file" : status.File.Name);
Console.WriteLine(data);
sw.WriteLine(data + " - " + loopcount.ToString());
break;
case IndexingStep.ixStepStoringWords:
data = "(storing words)";
Console.WriteLine(data);
sw.WriteLine(data + " - " + loopcount.ToString());
break;
default:
data = "Procesing ";
Console.WriteLine(data);
sw.WriteLine(data + " - " + loopcount.ToString());
break;
}
if (fAbortImmediately)
{
ij.AbortThreadImmediate();
}
else if (fStopPressed)
{
ij.AbortThread();
}
}
if (fAbortImmediately)
{
data = "Indexing halted, index not updated";
Console.WriteLine(data);
sw.WriteLine(data);
}
else if (fStopPressed)
{
data = "Indexing halted, index partially updated";
Console.WriteLine(data);
sw.WriteLine(data);
}
else
{
data = "Indexing complete";
Console.WriteLine(data);
sw.WriteLine(data);
}
fIndexing = false;
Trace.TraceInformation("ExecuteIndexJob - 2");
JobErrorInfo err = ij.Errors;
if (err.Count > 0)
{
string errors = null;
for (int i = 0; i < err.Count; i++)
{
errors += " " + err.Message(i);
}
data = errors;
sw.WriteLine(data);
Console.WriteLine(data);
}
}
Figure: SocketServer: Program.cs
The code below represents AddContentAndIndexApp beginning the indexing operation on SocketServer. It calls socket.main() to perform this task.
private void IndexButton_Click(object sender, EventArgs e)
{
    try
    {
        Socket socket = new Socket();
        socket.main(this, "Connecting and indexing");
    }
    catch (Exception ex)
    {
        throw;
    }
    finally
    {
        ShowTitle("Finished indexing..");
        int pauseTime = 2000;
        System.Threading.Thread.Sleep(pauseTime);
        ShowTitle("Search Content Uploader & Indexer");
    }
}
Figure: AddContentAndIndexApp: What Happens When User Clicks the Index Button
As SocketServer performs the indexing operation, it provides update status back to the client by sending strings which represent file names for the files being indexed. The code below receives the strings and displays them on the title bar of the form in order to provide user feedback on what operations are taking place. That is the reasoning behind making a socket connection, instead of a web service call.
internal class Socket
{
public void main(MainForm mainForm, string msg)
{
var client = new TcpClient("dtsearch-f3a0322z.cloudapp.net", 10100);
string result = null;
try
{
Stream s = client.GetStream();
var sr = new StreamReader(s);
var sw = new StreamWriter(s);
sw.AutoFlush = true;
while (true)
{
result = sr.ReadLine();
if (result == null)
continue;
ShowTitle(mainForm, result);
if (result == "<EOF>") break;
}
s.Close();
}
catch(Exception ex)
{
throw ex;
}
finally
{
client.Close();
}
}
private delegate void StringParameterDelegate(MainForm mainForm, string value);
public static void ShowTitle(MainForm mainForm, string msg)
{
if (mainForm.InvokeRequired)
{
mainForm.BeginInvoke(new StringParameterDelegate(ShowTitle),
new object[] { mainForm, msg });
return;
}
mainForm.Text = msg;
}
}
Figure: AddContentAndIndexApp: SocketClient.cs
Summary and Additional Guidelines
More can be done to make these applications even more robust. Error trapping code should be added throughout. Connection strings should be encrypted. The amount of data sent back by SocketServer to the client can be reduced (i.e., not every single file that gets indexed needs to be sent back to the client).
With that said, the solution provides a great starting point for taking advantage of the power and security of Microsoft Azure to store your data, combined with the flexibility of using RemoteApp to make available dtSearch search capabilities from almost any computer or device.
Here are some additional guidelines that can optimize performance.
Limit Search Results to the Client
Enumerating the documents or other items that satisfy a search results tends to be the most time-consuming step when conducting a search. Use the MaxFilesToRetrieve value to limit search results to the most relevant items. For example, if you do a search with a MaxFilesToRetrieveValue of 100 and the search finds 1400 documents, the search results object will contain the best-matching 100 files. At the same time, the search job will indicate that the search actually found a total of 1400 documents.
Even if you reduce the number of files or other retrieved items, you will still get high quality search results because the results will still include the most relevant items. End users generally will not read more than the first dozen or so search results anyway, so providing hundreds of results does not add value, but rather simply compromises performance.
dtSearch further provides the ability to page through results, sending only small batches at a time. Developers can provide a "show all files" button on the user interface should any users really want to see all the possible search results at once.
Scaling dtSearch Through Threading and Scaling Virtual Machines
Because dtSearch is stateless, you can continue to meet any level of demand by leveraging techniques to perform queries in parallel. This includes utilizing threading techniques, as well as horizontally scaling virtual machines running in the cloud to optimize performance.
.NET Optimizations
Applications written in .NET have two ways to execute a search: Execute, or ExecuteInThread. The choice between these two depends on how the calling application will monitor the progress of the search.
The most efficient option for web server usage and the like is to use Execute with the AutoStopLimit, TimeoutSeconds, and MaxFilesToRetrieve properties set before the search.
Cancel Option
Currently, the cloud-based indexer from this article does not support a "cancel indexing operation" command. An easy way to solve that problem is to expose another port on SocketServer that enables the canceling of operations. The included code base does support a number of flags to make this achievable with little work.
A "Cancel" button can halt the search and stop further retrieved files in search results, while displaying the number of files pulled up in search results so far. Two options for implementing the "Cancel" button and tracking the progress of the search are: (1) callback functions implemented through the StatusHandler property of a SearchJob or (2) searching in a separate thread.
When an application uses Execute to start a SearchJob, it can use the StatusHandler callback functions to monitor the progress of the search and search results display and cancel the search if the user hits a "Cancel" button. ExecuteInThread starts the search job in a separate thread and returns immediately, and it provides IsThreadDone and AbortThread methods to enable the calling application to cancel the search.
In an application that implements a "Cancel" button feature, ExecuteInThread is much faster than Execute because it eliminates the need for the callback functions. Callbacks from Visual Basic or other COM-based languages are very time-consuming because each one involves a separate IDispatch invocation. In .NET, callbacks are faster but still potentially time-consuming. Therefore, for applications that need to implement something like a "Cancel" button, ExecuteInThread is preferable to Execute for SearchJobs.
Note: An application that uses ExecuteInThread should not call IsThreadDone() continuously in a loop to check whether the thread is done. Instead, it should call Sleep() between IsThreadDone() calls to give the searching thread time to work.
Other Resources
More on dtSearch
dtSearch.com
A Search Engine in Your Pocket – Introducing dtSearch on Android
Blazing Fast Source Code Search in the Cloud
Using Azure Files, RemoteApp and dtSearch for Secure Instant Search Across Terabytes of A Wide Range of Data Types from Any Computer or Device
Windows Azure SQL Database Development with the dtSearch Engine
Faceted Search with dtSearch – Not Your Average Search Filter
Turbo Charge your Search Experience with dtSearch and Telerik UI for ASP.NET
Put a Search Engine in Your Windows 10 Universal (UWP) Applications
Indexing SharePoint Site Collections Using the dtSearch Engine DataSource API
Working with the dtSearch® ASP.NET Core WebDemo Sample Application
Using dtSearch on Amazon Web Services with EC2 & EBS
Full-Text Search with dtSearch and AWS Aurora
The Smart Choice for Text Retrieval® since 1991, dtSearch enterprise and developer products instantly search terabytes of text. dtSearch’s own document filters support popular file types, emails with multilevel attachments, databases and web data. dtSearch products offer 25+ search options, including federated search, faceted search, advanced forensics-oriented search options, and hit-highlighting in all retrieved data. Developer SDKs cover multiple platforms, with APIs for .NET, Java and C++. Visit dtSearch.com for hundreds of reviews and case studies, and fully-functional evaluations.


