In this article, you will learn what data masking is, how to enable data masking in an existing application, how to give access to different users to the masked data.
Dynamic Data Masking
Data masking is the method of creating a new representation of data with random characters or data that are structurally similar to the original data. It is normally done for the protection of our sensitive data. It is also known as data obfuscation.
Dynamic Data Masking (DDM) is an evolving technology that has objectives at real-time data masking of production data. DDM changes the data stream so that the data requester does not get access to the sensitive data while no physical changes to the original production data occur.
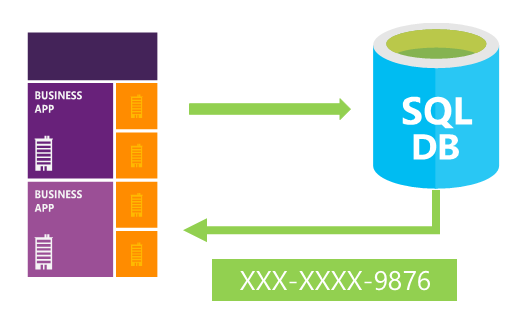
Dynamic data masking bounds sensitive data knowledge by masking it to non-privileged users. Dynamic data masking helps prevent unauthorized access to sensitive data by allowing customers to select how much of the sensitive data to expose with negligible effect on the application layer. It’s a data protection feature that hides the sensitive data in the result set of a query over designated database fields while the data in the database is not changed. Dynamic data masking is easy to use with existing applications since masking rules are applied in the query results. Many applications can mask sensitive data without modifying existing queries.
Why Dynamic Data Masking?
Many applications contain sensitive data stored in the database and it is only available to the user on need to know basis. Only users who have the business needs to see the data should be able to access that data. Many types of users with distinguished access are accessing data concurrently. Application users should only have access to the parts of data they need. Sensitive data fields shouldn’t be exposed to the engineers connecting directly to the production database.
Dynamic Data Masking in SQL Server 2016
Microsoft SQL Server 2016 has a built in security feature called dynamic data masking. It is a new security programmability feature in SQL Server 2016 that limits access to sensitive data by obfuscating query results. You have the ability to protect sensitive data against unauthorized access to end users, using built-in or customizable masking rules. But the privileged user can still see the unmasked data.
A common use case for the motivation of using Dynamic Data Masking is Regulatory Compliance. A strong demand for applications in order to meet privacy standards and regulatory requirements to mask sensitive data. The best thing about Dynamic Data Masking is it is very simple and easy to use.
Data is masked on the fly and underlying data in the database remains intact. Transparent to the application and very simple to apply to the existing production databases where you want to provide an additional layer of security to your sensitive data.
Features
- Provides configurable masking policy using simple T-SQL command with which you are already familiar
- On the fly obfuscation of data in query results
- Database is not changed physically and database operations are not affected
- Flexibility to define a set of privileged SQL users or roles for unmasked access
Types of Masks
There are four types of masks are offered by SQL Server 2016.
1. Default Mask
The default mask masks the full data according to the assigned data type.
- For
string types (char, nchar, varchar, nvarchar, text, ntext), it replaces the data with XXXX or fewer Xs, in case size of field is less than 4. - For numeric datatypes (
bigint, bit, decimal, int, money, numeric, smallint, smallmoney, tinyint, float, real), it uses 0 value. - For binary datatypes (
binary, varbinary, image), it uses a single byte of binary value 0.
2. Email Mask
The email mask especially for the fields that stores emails. It exposes only the first letter of email followed by XXX, followed by @ sign, followed by XXXX and a constant suffix “.com” to form an email. Example: aXXX@XXXX.com
3. Custom Mask
SQL Server 2016 allows you to define your own mask for a specific field. In this method, you can define the prefix and suffix characters to be exposed, and the padding will be shown as it is. “prefix,[padding], suffix”.
4. Random Mask
Random mask can be defined over any of the numeric fields. It exposes a random number within the defined range.
Adding Mask to Fields
I am using SQL Server Management Studio with SQL Server 2016 installed on the system. I am logged in with administrative privileges. I have created a database and a Customer table. I have a custom application that uses the data and accesses it with a custom user account.
I executed a select query on the table and its results are shown below:

When I execute the application, it results in the same.
Now, we will implement masking on the table. Implementation of Dynamic Data masking is quite simple. The syntax of implementing data masking on a specific column is:
Alter table [Table Name] Alter Column [Column Name] _
ADD MASKED WITH (FUNCTION=’[masking function]’)
Default Masking
We will apply the masking just by altering the table with privileged access of admin.
Alter table Customers Alter Column LastName ADD MASKED WITH (FUNCTION=’default()’)
After successful execution of this query, we will check the results. The results will be same in SSMS but will be changed in application. As the data is unmasked in admin privilege, but will be masked in lower privilege service account. Here, you can see that the LastName field is entirely masked. One thing is considerable that I didn’t make any changes to the application.
Email Masking
We have a column email in our customers table. We will apply the email mask to the column by using:
Alter table Customers Alter Column Email ADD MASKED WITH (FUNCTION=’email()’)
Now again, we will refresh our application to see the results. Again, you can see that the email field is masked as described above.
Custom Masking
We have a column Phone in our customers table. We will apply the custom mask to the column to hide the data using:
Alter table Customers Alter Column Phone ADD MASKED WITH (FUNCTION=’partial(2, "X-XXXX-X",2)’)
The partial function will apply the custom mask on Phone field. The 2 in prefix and 2 in suffix defines that starting 2 and ending 2 digits are exposed and padding under the double quote will be displayed as it is (placeholder text). Now again, we will refresh our application to see the results. Again, you can see that the email field is masked as described above.
Random Masking
Random mask will expose a random number within a defined range in a specific column. We will apply the random mask to the CustomerId column by using:
Alter table Customers Alter Column CustomerId ADD MASKED WITH (FUNCTION=’random(10000,99999)’)
The random function requires two parameters, the lower bound and the upper bound. Now again, we will refresh our application to see the results. Again, you can see that the CustomerId field is masked with a random integer between the defined two values in our masking function.
The main thing that you should notice is that, in all the scenarios, we didn’t make any changes in the application. We just applied the mask and it works.
Dropping Mask
Again, it is very easy to remove mask from any column. You just need a simple T-SQL command for dropping mask from column.
Alter table Customers Alter Column CustomerId DROP MASKED
Allowing and Revoking Users to See Unmasked Data
Admin users always see the original unmasked data because they are privileged. You can allow an unprivileged user to see the unmasked data if it is a business need.
Grant Unmask TO DBUser
Simply, you can revoke the unmasked access if you no longer want to see the unmasked data.
Revoke Unmask TO DBUser
Tracking the Masked Columns
If you want to keep track of columns on which you have used the mask function, a new system view called masked_columns has been defined.
SELECT c.name, tbl.name as table_name, c.is_masked, c.masking_function
FROM sys.masked_columns AS c
JOIN sys.tables AS tbl
    ON c.[object_id] = tbl.[object_id]
WHERE is_masked = 1;
Conclusion
This article was about data masking. In this article, you learnt what data masking is, how to enable data masking in an existing application, and how to give access to different users to the masked data. The main thing was how it is easy to implement data masking. The main advantage of data masking is that we don’t need to make any changes in our application. We just have to implement it in the database.
History
- 11th March, 2016: Initial version
I am passionate about programming, playing with data is all time my favorite hobby. Making things, processes intelligent and convenient is my ultimate goal. Love to work with real-time systems. Cloud is my life.


 General
  News
News  Suggestion
  Question
  Bug
Bug  Answer
  Joke
Joke  Praise
  Rant
Rant  Admin
Admin 


