Introduction
Page loading: all of us have experienced it. All web surfers know what a pain it can be specially if the website is slow. we should reload the website pages individually which can be a huge waste of time and bandwidth by loading entire webpages to navigate pages each time. However, these days, mobile users are getting used to working with websites which have mobile app functionality. This could help to increase our website visitors. Nevertheless, page loading remains a big issue among users. In order to deal with this problem, AngularJS introduces Routing, so you can load different pages on a single parent page without loading the entire web page like a mobile App.
In this article, I am going to show you how to create a single page application using AngularJS ui-router and web API 2. This web app is going to provide a dashboard panel for users who can do CRUD (create, read, update, delete) actions on Web API.
Using the Code
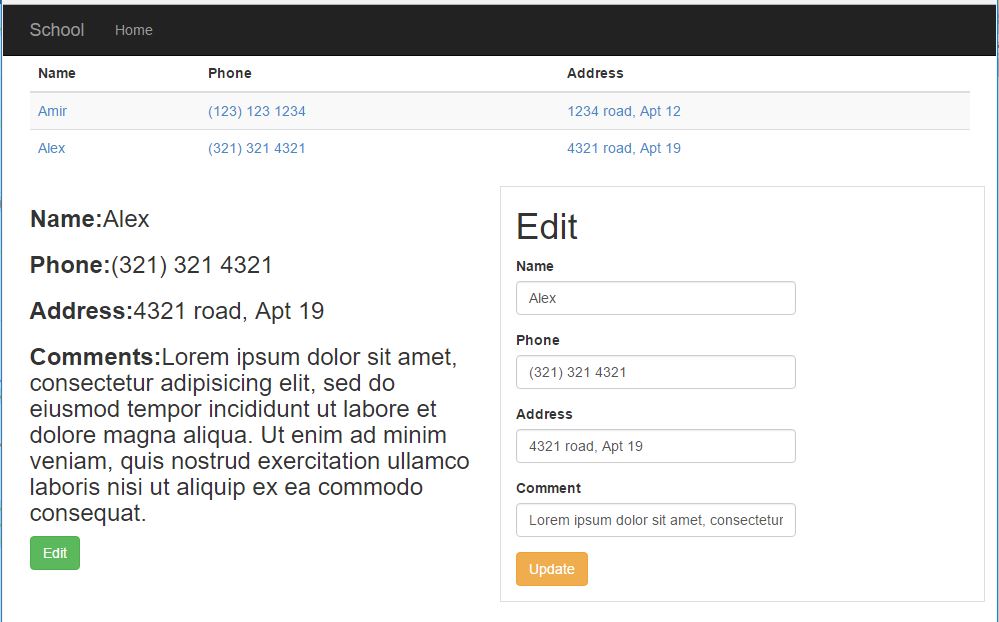
This app is going to show a list of students in the table and then by clicking on each row, details will be shown with Editing and updating ability. All these interactions are happening on a single page without having to refresh the entire page.
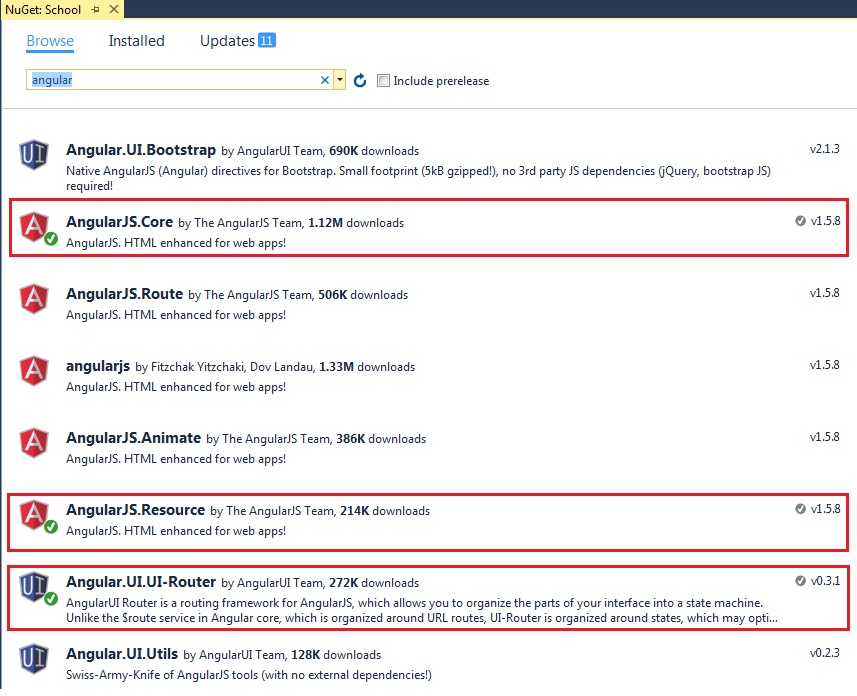
Before starting, we need to download the libraries below through NuGet Package.
AngularJS.Core: This library contains main Angular files.Angular.UI.UI-Router: This library is related to routing framework which is used to create single application.AngularJS.Resource: This library is used to easily perform CRUD actions (create, read, update, delete) on server-side data (Web API 2)
In order to download the above mentioned libraries, go to Project > NuGet Package Manger in Visual Studio and install them as shown below. All files will be downloaded in Scripts folder.
Beforehand, we need to know what page should be our single page. In this project, I have chosen a page on below path in an MVC project. This page is the only page that is loaded in browser, the rest of views (pages) are loaded in <ng-view> directive as the placeholder.
view\home\Index.cshtml
@{
    ViewBag.Title = "School";
}

<ui-view></ui-view>

@section scripts {

    @Scripts.Render("~/Scripts/angular.js")
    @Scripts.Render("~/Scripts/angular-resource.js")
    @Scripts.Render("~/Scripts/angular-ui-router.js")

    @Scripts.Render("~/Scripts/App/controller.js")
}
This page is inherited from _Layout.cshtml which is shown below and it uses Bootstrap framework as its layout. Moreover, all downloaded angular libraries should be added at the end of this page. We also need to add controller.js which contains our codes.
Views\Shared\_Layout.cshtml
.
.
<div class="container body-content" ng-app="MyApp">
@RenderBody()
<hr />
<footer>
<p>© @DateTime.Now.Year</p>
</footer>
</div>
.
.
ng-app="MyApp" is used to auto-bootstrap an AngularJS application.
Let’s start! First create an App\Controller.js in Script folder and add the line below on top of the file.
var app = angular.module("MyApp", ["ngResource", "ui.router"]);
In AngularJS, module defines an application. As you can see above, we added two dependencies in the app module: ui.router is necessary to route and ngResource provides $resource that will be explained later.
app.config is the most important part of Single Page Application. Through app.config, you can configure states for an application or module. Each State has its own Name and URL and it is also associated with a templateUrl and controller which are shown below.
Scripts\App\Controller.js
.
.
app.config(function ($stateProvider, $urlRouterProvider) {
$stateProvider
.state("list", {
url: "/list",
templateUrl: "/ngView/list.html",
controller: "listCtrl"
})
.state("list.detail", {
url: "/detail/{id}",
templateUrl: "/ngView/detail.html",
controller: "detailCtrl"
})
.state("list.detail.form", {
url: "/form",
templateUrl: "/ngView/form.html",
controller: "formCtrl"
});
$urlRouterProvider.otherwise("/list");
});
.
.
As shown above, there are three States and $urlRouterProvider.otherwise which is used to redirect unmatched URL to state /list.
url: state is navigated by url and populated with any parameters that were passed.
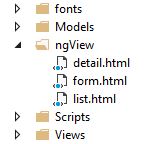
templateUrl: A String URL path to template file. Here, Template files are in ngView folder which will be loaded into the viewport (<ui-view>) based on State.
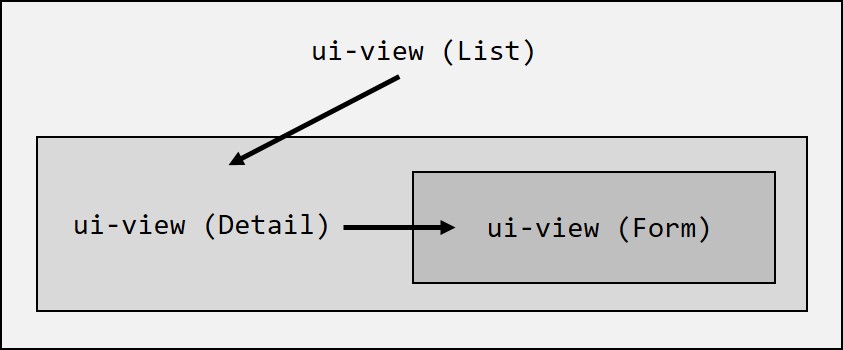
controller: A Controller is associated with a view. In this project, we have three states that can be nested within each other as the following diagram illustrates. Each state is explained below.
1) List
This State is responsible to populate a list of users in an html table. This state is associated with a control (listCtrl) and list.html and a url path.
listCtrl is executed when it is called by state in stateProvider. This is responsible to get data from a Service (APIService, which will be explained later). It also binds data to HTML Table in List.html and has another function to populate data in Form to edit and update.
.
.
app.controller("listCtrl", function ($scope, APIservice) {

    APIservice.query(function (Data) {
        $scope.dataList = Data;
    });

    $scope.edit = function (id) {

       $location.path("/form/" + (id));
    }
})
.
.
ngView\list.html
<div class="row">
    <div class="col-md-12" ng-controller="listCtrl">
        <table class="table table-hover table-striped">
            <thead class="header">
                <tr>
                    <th>Name</th>
                    <th>Phone</th>
                    <th>Address</th>
                </tr>
            </thead>
            <tbody>
                <tr ng-repeat="row in dataList">
                    <td><a ui-sref=".detail({id:row.StudentId})">{{row.Name}}</a></td>
                    <td><a ui-sref=".detail({id:row.StudentId})">{{row.Phone}}</a></td>
                    <td><a ui-sref=".detail({id:row.StudentId})">{{row.Address}}</a></td>
                </tr>
            </tbody>
        </table>
    </div>
    <ui-view></ui-view>
</div>
This file is a templateUrl for the state list and contains an HTML table with ng-repeat directive. At the end of the file, there is a placeholder <ui-view> which is a place to load another view or HTML file (child).
There is also a directive ui-sref which is responsible to navigate to states, in this project we are going to pass parameters to detail state to show the detail of the row in place holder.
ui-sref=".detail({id:row.StudentId})"
2) list.detail
This State shows user detail in List’s placeholder (ui-view). Please remember to create a parent/child state using a dot. In this State, List is parent and Detail is child.
.
.
app.controller("detailCtrl", function ($scope, $stateParams, APIservice) {

    $scope.dataDetail = APIservice.get({ id: $stateParams.id });

});
.
.
This Controller is responsible to show a row’s detail which is retrieved by row $stateParams.id.
What is $routeParams? It allows you to retrieve the current set of route parameters.$routeParams.id helps to get Id which is passed from URL.
ngView\detail.html
<div class="col-md-6">
    <h3>
        <b>Name:</b>{{dataDetail.Name}}
    </h3>
    <h3>
        <b>Phone:</b>{{dataDetail.Phone}}
    </h3>
    <h3>
        <b>Address:</b>{{dataDetail.Address}}
    </h3>
    <h3>
        <b>Comments:</b>{{dataDetail.Comment}}
    </h3>
    <button type="button" class="btn btn-success"
    title="Edit" ui-sref=".form"><span></span>Edit</button>
</div>
<div class="col-md-6" style="border: 1px solid #ddd;">
    <ui-view></ui-view>
</div>
This file is responsible for populating a User detail and it has an edit button to call another State (Form) in its own placeholder.
3) list.detail.form
This state is responsible to show the Form and populate data to edit.
Form controller has two parts. First part is capturing parameter “id”, passing it to Service, returning data and populating it in Form to edit. Second part is the function of updating Form.
.
.
app.controller("formCtrl", function ($scope, $state, $stateParams, APIservice) {

    if ($stateParams.id)

        $scope.user = APIservice.get({ id: $stateParams.id });


    $scope.submit = function (user) {

        APIservice.update({ id: $stateParams.id }, user, function () {
            $state.go("list", {}, { reload: true });
        });
    }

});
.
.
ngView\form.html
<h1>Edit</h1>


<form role="form" ng-submit="submit(user)">

    <div class="form-group">

        <label for="name">Name</label>

        <input type="text" ng-model="user.Name" class="form-control">

    </div>

    <div class="form-group">

        <label for="phone">Phone</label>

        <input type="text" ng-model="user.Phone" class="form-control">

    </div>

    <div class="form-group">

        <label for="address">Address</label>

        <input type="text" ng-model="user.Address" class="form-control">

    </div>

    <div class="form-group">

        <label for="address">Comment</label>

        <input type="text" ng-model="user.Comment" class="form-control">

    </div>

    <div class="form-group">

        <button type="submit" class="btn btn-default">Submit</button>

    </div>

</form>
This file contains an HTML Form with a User model which is defined in ng-model directive. Through this directive, you can bind the value of an input field to a usable variable in AngularJS. This Form also sends value of HTML controls (input) to formCtrl controller by ng-submit="submit(user).
Using $resource
Through $resource, your application interacts with data sources. This allows you to easily perform CRUD operations (create, read, update, delete) on server-side data (Web API).
In this project, in order to share $resource between Controllers, we need to add it to the following mentioned Service and call it APIService.
.
.
app.service("APIservice", function ($resource) {

    return $resource("/api/Students/:id", null, { "update": { method: "PUT" } });

});
.
.
Conclusion
In this project, you learnt how to create a single page application with AngularJs ui-router and a data resource (Web API 2). You also learned how to implement $resource to perform interaction with Web API. You can also download the source files for a clearer picture.
My Name is Amir Shahinkar. I'm a computer software engineer.


 General
  News
News  Suggestion
  Question
  Bug
Bug  Answer
  Joke
Joke  Praise
  Rant
Rant  Admin
Admin 


