Introduction
Three days ago I decided to write a class and to insert in it something to simply manage the class generated errors. So I started to write an error class to do that and I wanted this class implement an easy Message Table access to let formatting of error messages, and because of the facility of using this special kind of "string table" with GetLastError, I could use SetLastError with my class. But the problem was... Microsoft development products don't give importance to the message tables and don't implement any kind of easy access to them even if they include the message table compiler (mc.exe) in the tools directory. So I searched MSDN for "mc.exe" and after giving a look at the command line parameters I selected the compiler in the Properties window of my .mc file with the right flags. The message compiler creates a .h and a .rc files, the first containing #define directives for the messages, and the second a resource include of one (one for each language) .bin file containing the message strings. And now? I have to include the .h and .rc files in the project, and insert a #include directive in each file I want to use the message symbols.. oh my, should I do this in every project I want to use Message Tables? Oh no, just make a wizard! :)
Installing the setup
The setup will install the wizard template in a click without doing annoying copy-and-paste in the Visual Studio directory.
To install the setup, simply unrar the rar file and run the application. Now you have to select the right Visual Studio C++ directory. This directory in VS.NET 2003 is "[installation dir]\Vc7" while in VS.NET 2005 it is "[installation dir]\Vc". The path that you find already inserted is the default path for VS.NET 2003. To check that it's the right directory for you, click the Browse button, if the directory which appears is not empty this means it is already okay and you do not have to modify it. If you have VS.NET 2005, you must click the Browse button and find the "Vc" directory inside the installation program directory. Simply click Next and the application will install the files.
Using the wizard
Now that the template wizard is installed, to use it, simply right-click the project and select Add -> Add New Item. On the left, select "Resource" in the tree. Now you should see something like this:

The "Message table (.mc)" item should now appear in the list. Select it, and in the Name field, choose and write a base name for the .mc file. Don't worry about putting a non-existing file. Simply select a base file name and the wizard automatically will add a number at the end of the base name to create a unique file name. For example, if you put "MessageTable" in the Name field and that file already exists then the wizard will change it to "MessageTable1" and if "MessageTable1" already exists it will change to "MessageTable2" and so on. Because of this, remember that when you delete the .mc file from the directory you must also delete the .h and .rc associated files. If you don't and if you create a new .mc file with the same name as the deleted one, the message compiler will create files with .mc base name but the wizard will include the .h and .rc files different from the .mc because the .h and .rc files with the new .mc base name already exist.
Important: keep your attention to the description just above the Name field. There is a thing to keep in memory: "Don't insert spaces in the Name field!". This is important to avoid errors at compile time because of an "error" of the message compiler: that is it doesn't put the .bin file name in the .rc file between double quotes. Anyway you can insert spaces in the file name and then manually modify the .rc file.
Now you can click "Open" button and the wizard will appear and will ask you some personalization. I will explain now their meanings:
- Make unique binary files
Setting this option should create unique .bin files including the base source file name in the .bin file name. This option simply adds the -b flag to the mc (message compiler) line command.
- Binary output type (ANSI | Unicode)
Setting ANSI will create ANSI encoded binary files. Setting Unicode instead will create Unicode encoded binary files. These options simply add the -A flag (for ANSI) or -U flag (for Unicode) to the mc line command.
- Force Application bit to ON
Setting this option will force the Application (also called customer) bit flag to ON (1) in all messages. These options simply add the -c flag to the mc line command. IMHO you should leave this option to ON because the application bit means that this message is an application defined message and this will avoid conflicts with system defined messages which have all the application bit to OFF.
After selecting the options, you can click the "Finish" button and the wizard will create the files and will add them to the project. For example, if you chose "MessageTable" as the base file name for the .mc file and files with the same base name don't exist, the resulting wizard actions will be similar to this:
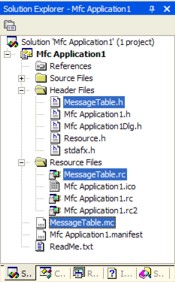
The wizard will create the .mc, .h and .rc files and will insert them in the project.
Adding Messages
If you open the .mc file you'll see some line of code already written. Here I'll explain only how to add messages. It is not in the scope of this article to explain the structure and meanings of the .mc file format. I've added a link at the bottom of the page to the MSDN Message Table topic and you can find information there. Or also in the tools directory of the Visual Studio, where the mc.exe is localized, there's a Help file named mc.hlp. In the file, just give a look only at the SeverityNames, FacilityNames and LanguageNames blocks which assign labels to constants, labels used in the message definition. Scroll some lines in the file and you'll see this line:
; // The following are message definitions.
So after this comment, you can add all messages you want to. The message definition has a particular syntax and even there's an example in the .mc file template. I'll say what definition fields mean, creating a message step by step:
First of all, we put the message ID. This is a word value. If you have selected the "Force Application bit to ON" option, you can start messages from 1 because you know that there won't be conflicts with system messages (if there are no other message tables in your application).
MessageId=0x1
Remember the SeverityNames block named some lines ago? Now you have to specify the severity "label" as said before:
Severity=Error
Then the facility label taken from FacilityNames list:
Facility=Runtime
And now the symbolic name that is the constant through which you can access the dword error data.
SymbolicName=MSG_BAD_COMMAND
After these definitions come language definitions, each followed by the message text, a separated "." (dot) without quotes in a new line, and a new line. An example:
Language=English
0x%1!X! Messages Table.
.

Language=German
0x%1!X! Nachrichttisch.
.
The "%1!X!" is an example of a simple format string that means: convert to hexadecimal using upper case letters the first argument in the arguments list and put it *here*. You have simply to call the FormatMessage function to obtain the formatted string having the error code. This is what my error class does for me. In this way I need only two lines of code to set the error that will be automatically outputted on the window and on the file. Perhaps I'll publish that class also on CodeProject if people are interested.
The mc, using the message definition, will build the dword error data based on this structure (as explained in the .h file):
So, that's all, I think. I hope you'll find it useful, bye!
Links
For more information about message tables, and all linked resources, follow this link.


 General
  News
News  Suggestion
  Question
  Bug
Bug  Answer
  Joke
Joke  Praise
  Rant
Rant  Admin
Admin 


