A picture is worth a thousand words

Whom this article is for?
Hey Buddy! Are you a beginner in web development this article is for you.
Content comes in web as many forms: text, image, video or audio. Images is one of the way we can easily describe a content effectively and they adds a lot of value to a website. A website without images is just boring!
In this article I'll teach you how to use images in web and the things you should keep in your mind while using them.
Let's start right!
The <img> element
It's one of the most frequently used and lovely element by the web designers. It is the first media element in HTML, while the other two: video and audio are already on the way! Like some of the elements <img> is an empty element, that is the element cannot hold any child elements :(
<img src="images/beautifullady.jpg" alt="Beautiful Lady" />
Above you see two attributes: src & alt. An <img> element should know what is the image it has to show, by the src attribute it can know that. You can specify an absolute or relative path in this attribute.
What is absolute path?
Well! absolute path is the complete URL. Sometimes you have to show images in a different domain at that time you should use the absolute path.
<img src="http://otherserver.com/users/knowallguy.jpg" alt="Know all guy" />
What is relative path?
If you are showing images in the same domain use the relative path.
<img src="../images/small/logo.png" alt="Logo" />
You can even use absolute path in the above case, but that's not a good idea! Why? If you are using a lot of images exists in the same domain using the absolute paths and one point of time you got to change the domain name to some other then you have to scan all the pages and change the src values. So use only relative paths.
"alt" is important
I missed one important attribute in the <img> element, it is the alt thing. What is that alt? It's the alternative text that will be displayed if the image is not there.
<img src="images/beautifulgirl.jpg" alt="Beautiful Girl" />
In online any thing can go wrong due to network failures or failure of reading images. So if the browser can't able to get the image from the server it display a broken image as below,
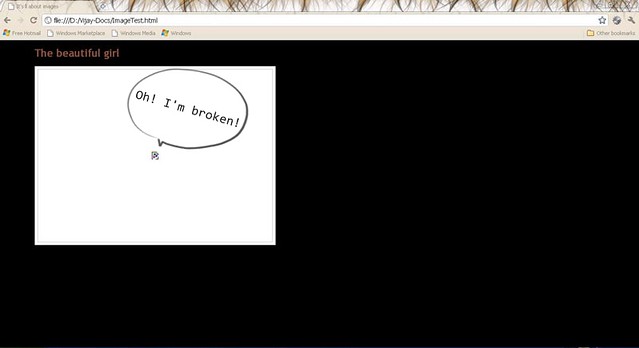
Fig.a. A broken image
If you provide an alternative text then the browser displays that text if it can't able to read the image.
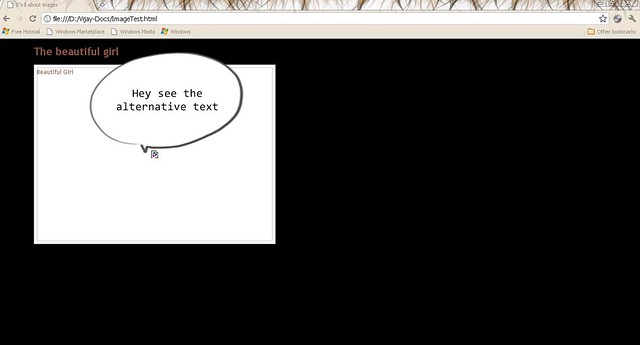
Fig.b. A broken image with alternative text
I see a lot of people forget to use it, in old days I too! By adding a little text what you are gaining is helping a lot of screen readers to read the alternative text for broken images for visually impaired people. So never forget the "alt" thing.
width & height
As you guessed these two attributes controls the size of the image to be displayed in the browser.
<img src="images/beer.jpg" width="800" height="600" alt="Beer" />
Note you don't need to specify the "px" in the width & height attributes. As a best practice these two values should be equal to the real width & height of the image. Why? I have a bigger size image say 800 x 600 and I would like to show it as 400 x 300, what's the problem in that? There is no problem at all!
By specifying an image of size 800 x 600 into 400 x 300 you are not getting much benefit, since the same amount of data is going to come from the server whatever the size you specify in the browser. So my good advice is resize the image into 400 x 300 using any image editing tool like Photoshop and use it, that really benefits you!
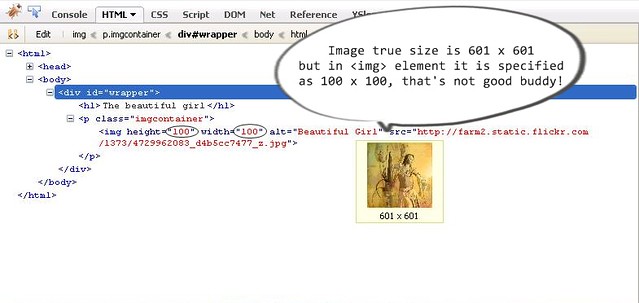
Fig.c. An <img> element with different size than the real image
Borders
Image without borders really not looks so good!
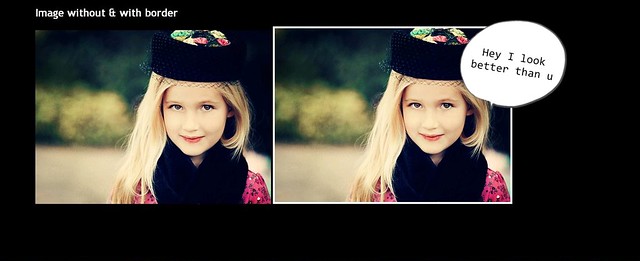
Fig.d. Images with and without border
How to add borders? There is an attribute helps you to do that! It's name is called border.
<img src="images/cute.jpg" width="500" height="368" alt="cute" border="4" />
Above we have specified a border of value 4px. Does the second image looks cool? but what you have to know is the border attribute is announced as deprecated by W3C guys. So why take risk, surround the <img> element with a <p> or <div> element and decorate them through CSS to add border as below.
<p class="imageborder">
	<img src="images/cute.jpg" width="500" height="368" alt="cute"/>
</p>

p.imageborder
{
	width: 500px;
	height: 368px;
	padding: 4px;
	background-color: #fff;
	border: solid 1px #eee;
}
Thumbnails are awesome
Many times we have to display a collection of images in a web page.
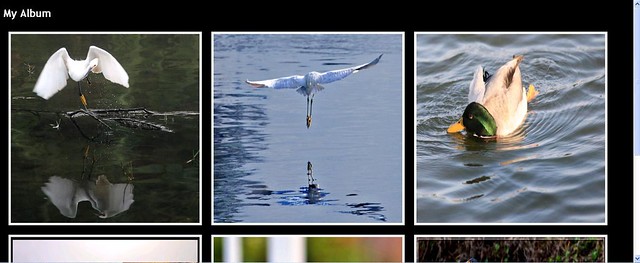
Fig.e. An album of birds
What is the problem with the above images? It looks cool! Yes. but if we see the time taken by the images to come from the server that's something got to think.

Fig.f. The time taken by using larger images
If you want to display a lot of images in a web page then instead of displaying them just like above you have to think about alternate ways. What about displaying small images (thumb-nail size) they definitely won't take that much time to come from the server.
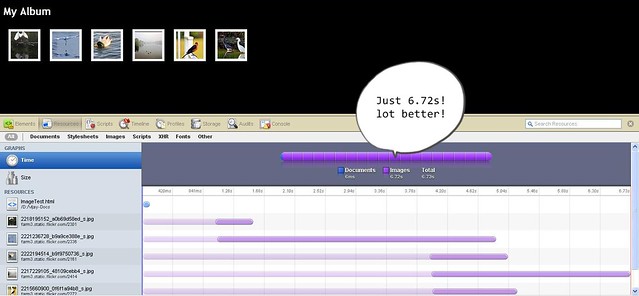
Fig.g. The time taken by using thumbnail images.
But how the user can see the big image? don't worry! by surrounding the <img> elements with <a> elements you can do that.
<p class="imageborder">
	<a href="images/crane_big.jpg" title="Crane" target="_blank">
		<img src="images/crane_small.jpg" width="58" height="58" alt="Beautiful Girl"/>
	</a>
</p>
So the strategy is provide two versions of images in the server: one is the real big size image and the other is the small thumbnail image. On displaying collection of images use thumbnails and show the big image only when the user wants to see it like on click as in the above example or using nice jQuery plugins.
Let's sum up
So the summary is,
- Use relative paths on referencing images in the same domain.
- Specify
alt attribute for all images. - Specify the true size in the width and height attributes of image.
- Add border to images.
- Use thumbnails on displaying collection of images.
If you think the article benefits you don't forget to give your comments and vote.
I'm a software developer from south tip of India. I spent most of the time in learning new technologies. I've a keen interest in client-side technologies especially JavaScript and admire it is the most beautiful language ever seen.
I like sharing my knowledge and written some non-popular articles. I believe in quality and standards but blames myself for lagging them.
I believe in small things and they makes me happy!


 General
  News
News  Suggestion
  Question
  Bug
Bug  Answer
  Joke
Joke  Praise
  Rant
Rant  Admin
Admin 


