Introduction
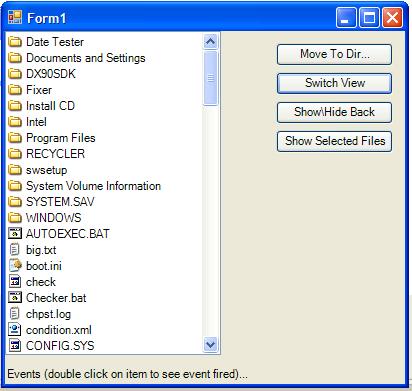
One of the things that is really missing in the VS controls is a file browser control, like the Explorer control in Windows, to navigate through folders and files, to select files, etc. in a modeless way. The OpenFileDialog , SaveFileDialog, and the FolderBrowserDialog are good for selecting files in a dialog, but what if I need a form that has a file browser on the left side, and some control that handles file selection when they occurred, on the right side? Let's say, some FTP application? Well, it doesn't help... So, I've decided to create a simple control so anyone can just copy this class to his\her project and use it.
Quick Start (for the ones that don’t have time)
- Copy the class
FilesListBox to your project.
- It will appear in your tool box, so drag it to your form.
- Set the
SelectedPath to the startup folder.
- That's it; you have a file browser control on your form…
Getting started
In order to create our control, we will need a ListBox extension. The ListBox control already contains most of the features we need from the file browser, so all we have to do is to extend it a little bit. Deriving from controls is usually the best practice in cases like this, why reinvent the wheel if we can just tweak it a bit?
First Step - Creating the control
Create a new class, derived from ListBox, and set the initial properties in the ctor.
public class FilesListBox : ListBox
{
...
...
public FilesListBox()
{
SelectionMode = System.Windows.Forms.SelectionMode.MultiExtended;
DrawMode = DrawMode.OwnerDrawFixed;
}
....
....
}
The default SelectionMode for the control is multi selection, but can be changed to whatever you want. We use DrawMode.OwnerDrawFixed to draw our list items ourselves, this will be discussed later on in the article.
Second Step - The Events
public event FileSelectedEventHandler FileSelected;
The FileSelected event occurs when an item is double clicked. The event delegate contains the FileSelectedEventArgs object that contains the file name that was selected. Note that when a directory is selected, the event will not be fired, but will go to the selected directory instead.
Third Step - The properties
public string DirectoryName { get; set; }
public bool ShowDirectories { get; set; }
public bool ShowBackIcon { get; set; }
[Browsable(false)]
public string[] SelectedFiles { get; set; }
[Browsable(false)]
public string SelectedFile { get; set; }
/ Gets or sets the icon size, this value also sets the item heigth
public IconSize FileIconSize { get; set; }
The properties are pretty self explanatory and you can add lots of properties such as SelectedDirectoy, etc. We want a simple class, so we will stay with only these properties for now.
Fourth Step - Populating the ListBox with files
The PopulatingItems() method is called after setting the DirectoryName property or after double clicking on a directory item in the list box itself.
private void PopulatingItems()
{
if (DesignMode)
return;
this.Items.Clear();
if (_showBackIcon && _directoryName.Length > 3)
{
Items.Add("..");
}
try
{
if (_showDirectories)
{
string[] dirNames = Directory.GetDirectories(_directoryName);
foreach (string dir in dirNames)
{
string realDir = Path.GetFileName(dir);
Items.Add(realDir);
}
}
string[] fileNames = Directory.GetFiles(_directoryName);
foreach (string file in fileNames)
{
string fileName = Path.GetFileName(file);
Items.Add(fileName);
}
}
catch
{
}
Refresh();
}
First of all, we check that we are not in DesignMode, in this case, we ignore the populate method.
The next step is to add the 'back' directory (..) if specified, and all directories in the DirectoryName. I used the static method Directory.GetDirectories(string path) for that.
Note that I only take the folder name for the display and not the full path using Path.GetFileName(string path).
The next step required is to add all the files in the DirectoryName in a similar manner to the directories adding step. When done populating, I refresh the control so it will repaint again with the new values.
Fifth Step - Painting file icons and names
As mentioned above, we handle the listbox drawing in OwnerDrawFixed. This means that the control should draw each listbox item by itself and not the OS, as default. To do this, we override the OnDrawItem(DrawItemEventArgs e) method and paint the object:
protected override void OnDrawItem(DrawItemEventArgs e)
{
e.DrawBackground();
e.DrawFocusRectangle();
Rectangle bounds = e.Bounds;
if (e.Index > -1 && e.Index < Items.Count)
{
Size imageSize;
string fileNameOnly = Items[e.Index].ToString();
string fullFileName = GetFullName(fileNameOnly);
Icon fileIcon = null;
Rectangle imageRectangle = new Rectangle( bounds.Left + 1,
bounds.Top +1 , ItemHeight - 2,ItemHeight - 2);
if (fileNameOnly.Equals(".."))
{
fileIcon =
IconExtractor.GetFileIcon(Application.StartupPath, _fileIconSize);
e.Graphics.DrawIcon(fileIcon,imageRectangle);
}
else
{
fileIcon =
IconExtractor.GetFileIcon(fullFileName, _fileIconSize);
e.Graphics.DrawIcon(fileIcon,imageRectangle);
}
imageSize = imageRectangle.Size;
fileIcon.Dispose();
Rectangle fileNameRec = new Rectangle(bounds.Left +
imageSize.Width + 3, bounds.Top,
bounds.Width - imageSize.Width - 3, bounds.Height);
StringFormat format = new StringFormat();
format.LineAlignment = StringAlignment.Center;
e.Graphics.DrawString(fileNameOnly, e.Font, new SolidBrush(e.ForeColor),
fileNameRec, format);
}
base.OnDrawItem(e);
}
- Using the OS, we draw the focus and the background for the item.
- Finds out the full file name for the drawing item by contacting the
DirectoryName property.
- Draws the icon using the included
IconExtractor utility class. This class extracts the icon from a file/directory/logical driver.
- When the item is the 'back' directory, we draw a directory icon by calling the
IconExtractor with the application start up folder.
- Draws the file name itself.
Remark: In .NET 2.0, you can extract a file icon by using the method:
Icon.ExtractAssociatedIcon(string filePath);
But this method knows to extract only file icons. The extractor uses API calls, but I will not go there, you can use it 'as-is' or learn more on a related article on that class on the CodeProject.
Sixth Step - Handling File/Directory selection
File/Directory selection occurs when an item is double-clicked. This is obtained by overriding the MouseDoubleClick event of the ListBox control:
protected override void OnMouseDoubleClick(System.Windows.Forms.MouseEventArgs e)
{
string selectedFile = _directoryName + SelectedItem.ToString();
if (selectedFile.EndsWith(".."))
{
if (_directoryName.EndsWith("\\"))
_directoryName = _directoryName.Remove(_directoryName.Length - 1, 1);
_directoryName = Directory.GetParent(_directoryName).FullName;
PopulatingItems();
}
else if (Directory.Exists(selectedFile))
{
_directoryName = selectedFile + "\\";
PopulatingItems();
}
else
{
OnFileSelected(new FileSelectEventArgs(selectedFile));
}
base.OnMouseDoubleClick(e);
}
- When the selected file is the 'back' directory - get the parent directory of the current folder and populate the list with that folder's files.
- Else, check whether a directory is selected by checking if such a directory exists, and if so, populate that directory's files to the listbox.
- Else, a file has been selected, so raise the
FileSelected event for the control owner to handle if it wishes to.
Conclusion
The control described here is just a start, you can add features to it such as - deleting the file when clicking on the Del key, applying context menu commands such as create new folder; the sky is the limit.
The class is light and simple for the purpose - for you to dive in quickly to the code and customize it to your exact needs.
Use it well…
This member has not yet provided a Biography. Assume it's interesting and varied, and probably something to do with programming.


 General
  News
News  Suggestion
  Question
  Bug
Bug  Answer
  Joke
Joke  Praise
  Rant
Rant  Admin
Admin 


