Introduction
This tutorial will help you to understand the SENS component. You will develop an application that counts your connection time during navigation in the web. The tutorial is divided in to three parts. In this first part, we will look into the uses of the SENS component for the detection of your network connection. In the second part, we will learn how to gain access to your application using the systray. And finally, we will close the tutorial with information on how to save/store data and the statistics.
Part I
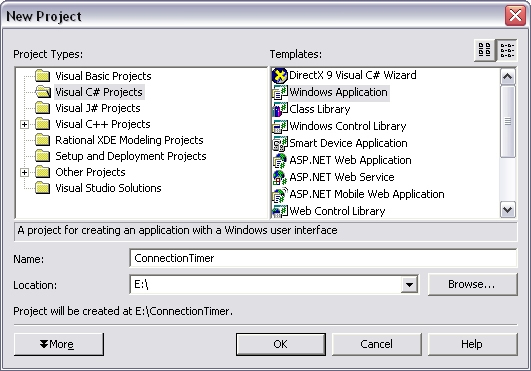
Well, start creating a Windows application project by the name ConnectionTimer.
All right, now we must add a reference to the "SENS Events Type Library" component, but this is not enough to benefit of the services that SENS can offer. SENS (System Event Notification Services) detects the events in your network connection, but when we use the event notification of a COM component, we must subscribe to it to be able to use it. Therefore, we must also add the component "COM+ 1.0 Admin Type Library" for the subscription. (To add the references, right click in the Solution Explorer on the References node and select "Add References...".)

Visual Studio automatically imports the interface class needed for the use of the component; give it a glance:
At this point, we can use the ISensNetwork interface. To do this, we must subscribe, for each event notification, to service required for our specific application. To do this, we will use the COMAdmin component. The subscription happens for each event that we want to use. Look therefore how to subscribe to the event, and create a function to do this!
using COMAdmin;
...
COMAdminCatalogClass comAdmin = new COMAdminCatalogClass();
ICatalogCollection subCollection;
...
private void SubscribeToEvent(ICatalogCollection
subCollection, string methodName)
{
ICatalogObject catalogObject =
(ICatalogObject) subCollection.Add();
catalogObject.set_Value("EventCLSID",
"{D5978620-5B9F-11D1-8DD2-00AA004ABD5E}");
catalogObject.set_Value("Name",
"Subscription to " + methodName + " event");
catalogObject.set_Value("MethodName", methodName);
catalogObject.set_Value("SubscriberInterface", this);
catalogObject.set_Value("Enabled", true);
catalogObject.set_Value("PerUser", true);
subCollection.SaveChanges();
}
Now, we must use the ISensNetwork interface. It is an interface, therefore we must extend our class, from the Form class, and implement the ISensNetwork interface and all its methods!
public sealed class Form1 : System.Windows.Forms.Form,
SensEvents.ISensNetwork
...
public Form1()
{
InitializeComponent();
subCollection = (ICatalogCollection)
comAdmin.GetCollection("TransientSubscriptions");
SubscribeToEvent(subCollection, "ConnectionMade");
SubscribeToEvent(subCollection, "ConnectionLost");
SubscribeToEvent(subCollection, "ConnectionMadeNoQOCInfo");
SubscribeToEvent(subCollection, "DestinationReachable");
SubscribeToEvent(subCollection, "DestinationReachableNoQOCInfo");
}
...
public void ConnectionLost(string s, uint u)
{
MessageBox.Show("ConnectionLost");
}
public void ConnectionMade(string s, uint u,
ref SensEvents.SENS_QOCINFO info)
{
MessageBox.Show("ConnectionMade");
}
public void ConnectionMadeNoQOCInfo(string s, uint u)
{
MessageBox.Show("ConnectionMadeNoQOCInfo");
}
public void DestinationReachable(string s0, string s,
uint u, ref SensEvents.SENS_QOCINFO info)
{
MessageBox.Show("DestinationReachable");
}
public void DestinationReachableNoQOCInfo(string s0,
string s, uint u)
{
MessageBox.Show("DestinationReachableNoQOCInfo");
}
Well, our program is ready to start and detect network connections!
Part II
We now pass on to how to give our application a better interface. For example, it'd be interesting to send the application to the systray of Windows and change the icon when a connection is made or lost (better than the classic MessageBox). But first, add a ContextMenu (as in the image) for accessing the application when it is hidden in the systray.
Well, the better class to do this is the NotifyIcon. Add it graphically, and set its parameters:
Text = "Connection Timer - not Connected"
ContextMenu = contextMenu1
Icon = App.ico
In the code view, add the following code:
this.WindowState = FormWindowState.Minimized;
this.Visible = false;
this.ShowInTaskbar = false;
The icon application shows that the connection is not present. For the connected icon, I copy the app.ico and rename it to Disconnected.ico and fill it with red colour. We must now write the code to change the icon at runtime, but first remember to embed the icons in the application project. Select the icons, go to Properties, and set "Build Action" to "Embedded Resource". Now, change the previous code to:
public void ConnectionLost(string s, uint u)
{
this.notifyIcon1.Text = "Connection Timer - not Connected";
this.notifyIcon1.Icon = new Icon(GetType(), "App.ico");
}
public void ConnectionMade(string s, uint u,
ref SensEvents.SENS_QOCINFO info)
{
this.notifyIcon1.Text = "Connection Timer - Connected";
this.notifyIcon1.Icon = new Icon(GetType(), "Disconnected.ico");
}
I suggest to comment the other method if you don't use it. All right, now we must insert code in the menu events... double click on each event option of the menu item and edit the code in the function.
private void restoreStat_Click(object sender, System.EventArgs e)
{
this.WindowState = FormWindowState.Normal;
this.ShowInTaskbar = true;
}
private void exitMenu_Click(object sender, System.EventArgs e)
{
this.Close();
}
Well... if you want to try the application, you can see it in the systray with a new icon.
Part III
Well, the last part of this tutorial is regarding how data is saved and restored, and doing a simple statistics of our connection related information. I chose to use an XML file to save the data. The information that we save is the date and time of connection and disconnection. To begin with, create (if it does not exist) the XML file for the registration of the record that represents our connection. Create a function and launch it in the Form1 constructor.
using System.IO;
...
System.Data.DataSet dts;
...
public Form1()
{
InitializeComponent();
subCollection = (ICatalogCollection)
comAdmin.GetCollection("TransientSubscriptions");
SubscribeToEvent(subCollection, "ConnectionMade");
SubscribeToEvent(subCollection, "ConnectionLost");
CheckFile();
}
...
public void CheckFile()
{
FileInfo TheFile = new FileInfo(@"fileData.xml");
dts = new DataSet();
if (!TheFile.Exists)
{
System.Data.DataTable dtt = dts.Tables.Add();
dtt.Columns.Add("fromDate", System.Type.GetType("System.DateTime"));
dtt.Columns.Add("toDate", System.Type.GetType("System.DateTime"));
dts.WriteXml(@"fileData.xml", System.Data.XmlWriteMode.WriteSchema);
}
else
{
dts.ReadXml(@"fileData.xml");
}
}
Now, add the code to generate the new rows of the DataTable in the DataSet when the connection is made and when it is lost:
public void ConnectionLost(string s, uint u)
{
this.notifyIcon1.Text = "Connection Timer - not Connected";
this.notifyIcon1.Icon = new Icon(GetType(), "App.ico");
dts.Tables[0].Rows[dts.Tables[0].Rows.Count-1]["toDate"] = System.DateTime.Now;
dts.WriteXml(@"fileData.xml", System.Data.XmlWriteMode.WriteSchema);
}
public void ConnectionMade(string s, uint u, ref SensEvents.SENS_QOCINFO info)
{
this.notifyIcon1.Text = "Connection Timer - Connected";
this.notifyIcon1.Icon = new Icon(GetType(), "Disconnected.ico");
System.Data.DataRow dtr = dts.Tables[0].NewRow();
dtr["fromDate"] = System.DateTime.Now;
dts.Tables[0].Rows.Add(dtr);
dts.WriteXml(@"fileData.xml", System.Data.XmlWriteMode.WriteSchema);
}
Well, at this point, we must only add some control to elaborate the data and generate some simple statistics on the connection record in the XML. I leave that to you to enjoy doing it on your own.
Conclusion
This is my first tutorial. I follow this site regularly, and I find it very useful to be able to count on the help of many developers like me when we are in difficulties. I hope to be of help to someone by writing this tutorial. I want to emphasize that the application has not been developed error-proof, and the code could be written in sturdier and linear way, but what I wanted from this tutorial was the particularity of the subscription to components with events, something thing that I found difficult to do myself! This code doesn't consider more than one connection network at the same time; the xml file can work better with more information, it can be saved in other ways and more securely. The NotifyIcon class has more functionally in the 2.0 version of the framework, it can use a balloon message to communicate with the user. However... I still hope you find the article interesting! Special thanks to my American friend who corrected my elementary English and grants to me a new chess game always!
Thanks for your interest!
This member has not yet provided a Biography. Assume it's interesting and varied, and probably something to do with programming.


 General
  News
News  Suggestion
  Question
  Bug
Bug  Answer
  Joke
Joke  Praise
  Rant
Rant  Admin
Admin 


