Under heavy Confederate fire, wounded, surrounded, with one third of his men lost, Union General John Corse is holding the fort on the top of the hill in the US Civil War battle of Altoona. Peering into the distance, he sees a white signal flag waving. It is a message from General Sherman; "Hold the fort, for we are coming!" Greatly strengthened by the thought of salvation and the enemy weakened by the thought of a large attack, General Corse and his men rebuff the Confederate attackers. (See this link to learn more about the battle.)
Mature, feature-rich, market-leading software applications too can be ‘under attack.' Attacks come from new applications entering the marketplace which although, less feature rich and functional, have modern attractive UIs and are industry buzz word compliant.
Steve Krug aptly summed up the UI experience in the four word title of his now classic book on web UI design, "Don't Make Me Think!" Recently TactusMD (www.tactusmd.com) engaged me and my eLearnIT team for a project to restyle their richly functional and award winning PowerBuilder Classic application. TactusMD EHR is based on a workflow designed by doctors, for doctors. Through its innovative touch entry interface, TactusMD reduces data entry, and frees doctors to focus on their patients, instead of chart entry. Given the inherent challenges in migrating sophisticated and complex applications to PowerBuilder .NET, we had to create a solution to refresh the UI within the PB Classic framework. This facelift will satisfy user demands for a fresh UI, while developers plan for and execute their PB .NET WPF/Silverlight migration. The TactusMD application is both sophisticated and complex. It was apparent that the facelift would require a delicate refactoring approach in order to change the UI layer without disturbing underlying, intermingled UI and business logic embedded in event handlers and functions. Read on learn how we did it.
The UI was designed to operate on a touch screen. All navigation, selection and most data entry is accomplished on large Touch screen. Very little, if any, keyboard input is required. The user touches 3D raised detail band description items in DataWindows to make selections or Window Control static texts or command buttons to display pick lists or specially styled numeric or alpha keypads for data entry. Figure 1 shows a screenshot of the app's original look.
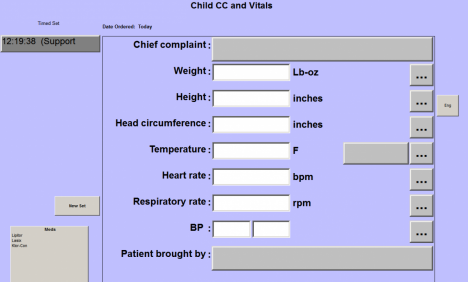
Figure 1
Figure 2 shows the proposed look as rendered by a graphic designer. In addition to the readily apparent color changes, please note several unique characteristics: (1) the pick list items (on the left) are rounded (2) the buttons (3D raised static texts) are rounded (3) All the buttons have a vertical gradient effect.

Figure 2
Styling Window Controls
Had the application already been migrated to .NET and WPF, it would have been possible to write an elegant XAML template / style sheet (aka, skin) and applied it to the application to obtain the desired effects. Unfortunately, project timelines and resources did not allow for a .NET migration. As is well known, dynamic styling and control templating technology does not exist in legacy Win32. Any solution would have to be object based and would have to involve some sort of ancestor class that could replace existing controls.
Classic PowerBuilder presents these limitations that would have to be worked around. (1) Controls in both DataWindows and Windows are rectangular. (2) Even though DataWindow Objects support color gradients, Windows and Window controls don't support gradients. (3) Only DataWindow Object controls support transparent background color.
It is well known that an Object Oriented approach requires the least amount of coding. In this case the ancestor control would need to support varying text strings and colors, background color and size. In general the replacement control would need to behave like a standard PowerBuilder window control.
My quest for a solution led me to a blog by Paul Horan titled "Round Buttons in PowerBuilder? "http://blogs.sybase.com/phoran/?p=67. In the blog, Paul illustrated how to use image files with transparent backgrounds to simulate rounded buttons in PowerBuilder Classic. One of the techniques Paul illustrated was using a png file inside an external DataWindow object. In my case picture controls could not replace static texts and command buttons, because each control would have unique text, color and other characteristics. But the idea fell to my head, why not use an External DataSource DataWindow, containing a rounded rectangle with an overlaid text object to replace the 3d static texts and command buttons?
Figure 3 shows the DataWindow Object, designed according to the graphic designer specified color pallet.
Figure 3
Next I built a DWControl ancestor, uo_rounded_edge_button, to host the DataWindow object. Figure 4 shows the control and it's API. The uo_rounded_edge_button type would be substituted for StaticText and CommandButton controls via the source code editor. The runtime would automatically create the new button type at create time. The goal here was keep all existing event and function code in place and just change the GUI.
Figure 4
Figures 5 and 6 show, for each control, the two places where the type declaration had to be changed.
Figure 5
Figure 6
Here I ran into a snafu. (Did you know that snafu is an acronym for Situation Normally All Fouled Up?) There were code references to static text control properties that were not members of a DataWindow control. To work around those I added an instance variable to the DataWindow control with the same name as the property I was replacing. But - changing a contrived property such as Text does not cause the same automatic GUI behavior as when a system defined property is changed.
To prepare you to understand the challenge, please note that Classic PowerScript does not support defining and using .NET like properties. A .NET property is a basically a private instance variable that is wrapped with Get and Set methods. The syntactic sugar is that the coder only needs to code an assignment statement. If the property is assigned to, the Set method is automatically called. If the property is queried, the get method is automatically invoked. The developer is free to code anything necessary in the Set and Get methods. (Incidentally, PowerScript in PowerBuilder 12 .NET allows defining and using properties.)
Now, let's go back to the snafu arising from assignment statements that dynamically affect visual changes, e.g., Text= ‘Customer'. Since I needed to reflect the visual change inside the DWO hosted in a DataWindow control using an expression to change the property value, I came up with the idea of replacing assignment statements with function calls. For example, to change the text on a button, I wrote a Text( ) function on the DataWindow control that sets the instance variable and then modifies the text property on the overlay text object. Figure 7 shows that code.
Figure 7
To complete the change all the property assignment statements had to be refactored into function calls by changing = signs to ( ) like this:
st_assessment_type.text ( assessment_type_description )
Resizing Windows Controls
Note that this technique will cause the DataWindow control to be sized and positioned the same as the windows control it replaced because the windows instantiation code sets the control properties x, y, height and width which exist and behave the same on DataWindow controls. However, the controls inside the DataWindow object are not automatically resized. To handle this we need to add logic to the constructor of the DataWindow object which knows about the dataobject's controls. For the initial window instantiation we can accomplish this by adding code the DataWindow object constructor like this:
This.object.rr_button.width = this.width - 30
This.object.rr_button.height = this.height - 30
You can also include the logic here to size and position the statictext control t_label, but following the principle of minimizing the information needed at each level, you can embed desired the statictext behavior inside expressions set for the Width and Y properties. This way the outer control need only know about and change the rounded rectangle; the controls inside the DataWindow object will size and position themselves with respect to the rounded rectangle. For example, you could set this as the expression for the Y property of t_label:
long(describe("rr_button.y")) + ((long(describe(
    "rr_button.height")) - long(describe("t_label.height"))) / 2)
This is the expression for the Width property:
long(describe("rr_button.width")) - 60
Besides encapsulating functionality, another advantage of this technique is that the dependent controls will automatically adjust themselves no matter how or when the rounded rectangle is resized or repositioned. That is, it works whether the rr_button is resized in the painter, by a property expression, or by PowerScript at runtime.
If the DataWindow control might be resized at runtime then you need to add the code above to DataWindow control's resize event. This might cause the code to be run twice if the parent window resizes the DataWindow control in the open event, but if the window doesn't resize the control then the control won't receive a resize event. Running twice won't hurt anything so to cover the most cases the code should be in the constructor and the resize events.
Styling Pick Lists
As mentioned above, much of the application's data entry is driven by DataWindow based pick lists. Because of the DataWindow's advanced visual capabilities re-styling them was pretty straight forward. Figure 8 shows a typical pick list DataWindow object from the original system. Although the result set description may contain many columns, the GUI sports a single item named "Description" in the detail band.
Figure 8
After working out color and gradient appearance, three custom colors were defined that were used to set the background and gradient colors. First DataWindow background color was set. Then the description object background color was set transparent and the text color was set to conform to the specification. Next a Rounded Rectangle object was placed in the background and sized. Lastly the gradient colors were set on the Rounded Rectangle and a property expression was written to synchronize the rounded rectangle size with the description size as the window was resized. Figure 9 shows a pick list DataWindow after modification.
Figure 9
Figure 10 shows the final look achieved by replacing window controls with DataWindow Controls and styling DataWindow pick lists. (Note: The icons have yet to be updated.)
Figure 10
Conclusion
Although PowerBuilder.NET provides a solid technology migration path for existing PowerBuilder applications, the effort and planning needed to move a large application can leave one asking "How can I leverage the new features of PowerBuilder DataWindows to modernize the look and feel of my application?" For applications with a lot of displays already driven by DataWindows, the answer is relatively straightforward. However, for applications which use a lot of classic buttons and static text boxes, an indirect approach can be to replace the buttons and static text boxes with smart DataWindow controls that emulate control functionality while providing new visual features. With some careful consideration, the DataWindow control can be constructed to minimize the conversion effort and impact on the application logic.
When competition is attacking and you must rapidly respond to their offensive, look for that white flag waving in the distance. Thinking creatively about PowerBuilder Classic features can often provide you with a viable solution to strengthen and enhance your current position.
Yakov Werde is a passionate Certified Sybase Developer and Instructor, Sybase MVP and member of TeamSybase who has been guiding new and experienced PowerBuilder developers to develop the skills they need to succeed on their projects for 15 years. Yakov has been in the forefront of PowerBuilder .NET migration, having worked with, written about and built projects with PowerBuilder .NET since it's earliest release. Yakov's current passions include PowerBuilder .NET with WPF and mobile and cloud computing.
His company eLearnIT LLC helps corporations extend the life of their PowerBuilder applications by providing migration assistance, developer training and project consulting.


