Introduction
The other day, I finished a small Pocket PC clock application to use when I am working in another city (it is boring to wake up in the morning hearing the Windows music). The application came out OK, and a friend said to me, "Why not localize the application and sell it?" The localization was not easy for me, because despite the simple methods that the framework implements, a bug in the CABWiz.exe application makes the work complicated.
Here, I present the condensed information, that I found from different sources, about a methodology to implement resources localization under the .NET Compact Framework 2.0 using Visual Studio 2005.
Background
Visual Studio 2005 comes with a very practical feature to localize resources. In particular, you can localize the strings in forms to individual languages, and you can localize internal strings in individual resource files.
In this article, I will describe how to localize the example project form in three languages, how to localize an internal string, and how to do a workaround to deploy the application CAB file to the target device to avoid the CABWiz bug.
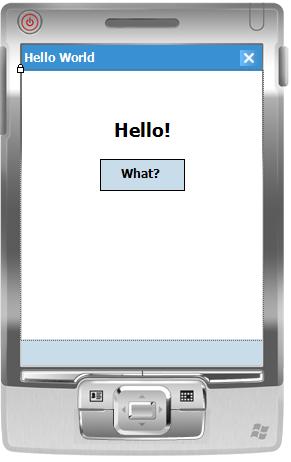
We use a simple application as an example, which is, of course, the "ineffable" Hello World. We localize the application in English (default), German, and Spanish. The application shows a Hello label and a button to open a dialog with the word "World" in the localized language.
To test the application, you should change the localization of the emulator to the correct language.
Step 1: Create a test project HelloWorld:
Create a simple Windows CE Pocket PC Project with the controls that you see in Figure 1. The application will show the strings localized in the selected language in the control panel.
Step 2: Localize the control's form for Spanish, English, and German
This is the simplest step, Visual Studio does everything for us. To localize the form, you should modify two properties in the Form Properties window.
Language= Select your desired language

Localizable = true;
In the Language option, when you select an item different from "default", a new resource file is created, and you can modify all the controls strings directly in the form. In the example, I have localized the form in English, German, and Spanish.
Caution: Do not use the localized form to move or modify the control properties. Use only the "default" form, unless you want a specific behaviour for a form’s controls. You can see the created resources files in the Solution Explorer below Form1.cs.
We don’t need to create the English resources because we use it as the “default” language.
The .NET Framework looks for possible language resource files, and when it does not find any that matches, uses the default resource embedded in the assembly.
Build and run the project. You can see the form localized in the language of your Pocket PC (the value of Regional Setting in Setting/Region). You need to reset the emulator to take the new setting.
See Figure 2 about the created resources in the form, and the compiled satellite assembly with the resources in Figure 3.
Step 3: Localize internal string messages as strong type resources
Now, we incorporate the function of showing a message box form with the word "World" when the button is clicked. The dialog box contains a string that should be localized.
To localize the string, we need to create a resource file for each language. Visual Studio sets the default resource file below the properties directory. Open the Properties directory in your project and see the file Resources.resx. Double click the file, and you can see the resource editor. Because we defined English as the default language, we enter the English resource directly in this file. Enter in the editor a string resource with the following value:
Name = MessageText
Value= World!
To enter the localized resources, click and copy the file Resources.resx, and then create a copy of this file in the same directory. Rename the created files to Resources.de.resx and Resources.es.resx. Open those two files and enter the resource string as follows:
Resources.de.resx
Name = MessageText
Value= Welt!

Resources.es.resx
Name = MessageText
Value= Mundo!
For the resources files that were added, you should clear the property CustomTool. Only maintain the ResXFileCodeGenerator value for the default Resources.resx file.
Rebuild the system; your Solution Explorer should look as shown in the following figure:

Double click on the button to create a Click_Event and enter the following simple code:
private void button1_Click(object sender, EventArgs e)
{
MessageBox.Show(Properties.Resources.MessageText);
}
You can see in the example how to programmatically use the resource. The ResXFileCodeGenerator utility automatically generates a Properties.Resources class to access the resource. The framework automatically detects the Regional Setting for the Pocket PC and takes the correct localized resource. In the situation that the Regional Setting does not coincide with the existing resources, the .NET framework takes the resource language declared in the default resource file.
For more information, take a look at the Resorce.Designer.cs file in the demo project with the code for the generated class. Now, build the application and test for different regional settings of the the translated values.
Step 4: Life is not easy: CabWiz bug workaround
The deployment part of the application normally should not have to deal with the localization process, but because the CabWiz.exe application that comes with VS 2005 has a bug, we need to do extra steps to finish the process.
There exists a well know bug in the Cabwiz.exe program for Visual Studio 2005, and I am afraid (not sure) that it also exists in Visual Studio 2008 [1]. Take a look at the HelloWorldCABSetup project in the example. If you deploy the resulting CAB, you will find that the localized resources do not work correctly. To test this, set your Pocket PC language to Spanish in the Control Panel and install the CAB file. You can see that the Form strings are still in English. That means that the resources are not correctly loaded.
The bug occurs because the names of the resource DLL files are all the same. When the CABWiz reads the INF file, it use the same resource.dll file for all operations and ignores the fact that they are in different directories and are different files. See the example code in the project HelloWorldCABSetup.
In the reference [1], there exists two workarounds to resolve this problem. Here is a solution based on those:
To correct the bug, we should do the following steps:
- In the HelloWorld project, define a post-build action to make a copy of the resources files with another name.
You can make a copy of the DLL using a command in the post-build event of the project. The following is the required code:
copy "$(TargetDir)de\HelloWorld.resources.dll"¬
"$(TargetDir)de\DE_HelloWorld.resources.dll"
copy "$(TargetDir)es\HelloWorld.resources.dll"¬
"$(TargetDir)es\ES_HelloWorld.resources.dll"
If all is OK, you can see the copied resources in the resource directories after a successful build. (See example.)
- Create a second deployment project.
You can use the first deployment project, but for demonstration purposes, I made the change in another deployment project. I named it HelloWorldCABPatch. Configure it like the first deployment project, but assign the following renamed resource DLLs to the newly created project, instead of the original names.
DE_HelloWorld.resources.dll
ES_HelloWorld.resources.dll
Build the project, and you can see the names of the renamed DLLs in the INF file:
[Files.Common1]
"DE_HelloWorld.resources.dll","DE_HelloWorld.resources.dll",,0

[Files.Common2]
"ES_HelloWorld.resources.dll","ES_HelloWorld.resources.dll",,0
Obviously, we can not use those names in our application, and then we should rename them and run the CABWiz.exe file again.
You can simple rename it in the INF file and re-run the CABwiz.exe utility, manually but that is not practical. We need to do this process automatically.
To do it, we created a small program to patch the INF file and to run CABMWiz.exe.
- Create a console program to patch the INF file.
See the code under CABWizPatch that simple "patches" the INF file to generate the correct filenames. (Yes, yes I know, the method that I use is a bit of a brute force, but works perfectly for the example.) If you run the program, you can see that the [Files.Commonx] entries are modified to instruct CABWiz.exe to copy the resources files with the original names. You can see the modification in the following code:
[Files.Common1]
"HelloWorld.resources.dll","DE_HelloWorld.resources.dll",,0

[Files.Common2]
"HelloWorld.resources.dll","ES_HelloWorld.resources.dll",,0
- Process automation
You can easily automate the process by creating a dummy project and using the pre-build event to execute the console patch application and the post-build event to call CABWiz.exe.
The code to do so is:
//Pre-build Event

"$(SolutionDir)CABWizPatch\bin\Debug\CABWizPatch.exe"¬
"$(SolutionDir)HelloWorldCABPatch\Debug\HelloWorldCABPatch.inf"

//Post-Build Event

"C:\Program Files\Microsoft Visual Studio 8\SmartDevices\SDK¬
\SDKTools\cabwiz.exe" "$(SolutionDir)HelloWorldCABPatch¬
\Debug\HelloWorldCABPatch.inf"
In the following image, you can see the command in the pre and post build events in the DummyClass project:
Note: Be sure that your dummy class project is built at the end of the build process.
Use the CAB (under the HelloWorldCABPath/bin/DEBUG directory), and you will see that your application now uses the correct resource values.
If you want to use an MSI installer, you can run the patch component in the pre and post build events of the MSI installer project. Now, when you deploy the application, you will see that your resources are correctly displayed in your Pocket PC.
Code
Download and compile the code attached to the article with the DEBUG option.
The code and the explanation in the article refers to the Debug compilation. You should adjust the code for the Release code build.
Project identification (in order)
- CABWizPatch: Console application to patch the resultant INF file.
- DummyClass: Class project, without output. It is used to run the console CABWizPatch in the pre-build event and to call the CABWiz.exe application in the post-built event.
- HelloWorld: Windows CE project, the application to deploy.
- HelloWorldCABPath: Replica of the HelloWorldCABSetup to demonstrate how to change the deployment project to get the correct resource DLLs.
- HelloWorldCABSetup: Original setup to demonstrate the CabWiz bug. In the real world, you only use 4.
See the code carefully, maybe you should modify the path of the CABWiz application in your particular computer.
Points of interest
The process of localizing resources in Visual Studio 2005 is simple and should not give headaches to developers. Unfortunately, a bug in CABwiz can give us a terrible confusion, because the result of our job when we do the deployment under VS2005 and when we install the application with the generated CAB is completely different from the localization resource point of view.
This article tries to condense the information about the resources in one place. I hope that it helps.
Bibliography
- Microsoft Connect. Smart Device CAB project includes wrong localized resources.
History
- 30.07.2008 - Initial release.
Jose A. Garcia Guirado, Electronic Engineer, graduated in Havana/Cuba 1982, MCTS, MCSD.NET, MCAD.NET, MCSE. Worked in the Institute for Cybernetics and Mathematics of Academy of Science of Cuba for 8 years; since 1995 working as free software architect, developer and adviser, first in Argentina and from 2003 to 2010, in Germany as External consultant in DWS Luxembourg, AIXTRON AG and Shell Deutschland GmbH and from 2010 to 2012 in Mexico working for Twenty Century Fox, and Mexico Stock Exchange (BMV). From 2013 to now in USA, Florida, First in FAME Inc. and now as Senior Software Engineer in Spirit Airlines.


 General
  News
News  Suggestion
  Question
  Bug
Bug  Answer
  Joke
Joke  Praise
  Rant
Rant  Admin
Admin 


 many greetinx from austria !
 Thanks again...