Introduction
There are several transparent dialogs on CodeProject; however, none of them provide a generic dialog that allows you to paint on the transparent region. The reason for this is because Windows doesn’t effectively support transparent CWnd objects in the first place.
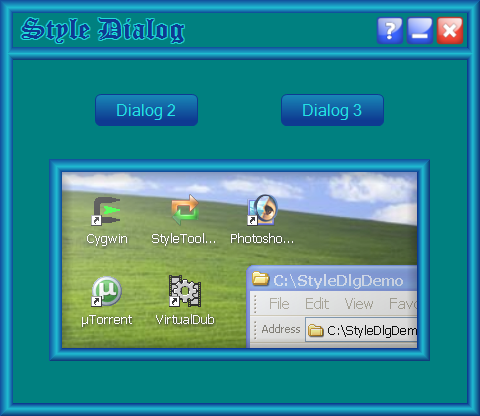
The image above shows StyleDialog being used with Style Toolkit[^] version 1.1. However, StyleDialog may be used with or without the toolkit, and with or without transparency.
Issues in Creating a Transparent Dialog
The key feature I needed for StyleDialog is the ability to use the transparent region. That means, you can draw on it, paint on it, and add controls to it.
Here are some of the typical methods used, and the associated drawbacks:
- Return a
HOLLOW_BRUSH in OnCtlColor – This works okay for controls, since the application controls the background. It also works for a dialog box as long as you don’t move it, which makes it relatively useless. It also causes child controls to stop receiving their OnCtlColor messages. - Use a Region – This solution works fairly well; however, you can’t use the transparent regions. Also, since you can’t anti-alias the border, the edges look a bit ragged.
- Layered Windows – This is the only method that creates a true transparent window. This works fine for creating a fade effect, but since the transparency applies to the entire
CWnd, you can’t have some things transparent and others opaque. - Layered
CWnds – These solutions look and behave the best, but they aren’t generic, and you also can’t paint on the transparent regions.
StyleDialog Design Considerations
Other issues that are difficult to overcome are jitter when dragging the window, and maintaining the correct background when the application is not the active one.
To overcome these issues, StyleDialog imposes the following design rules:
- Display an alternate background when not the active application. This overcomes the problem of the background changing underneath the application when it is visible but not active.
- Display an alternate background when dragging the application. Actually, StyleDialog could display the correct background while dragging, but there is a jitter associated with layered windows that is undesirable.
StyleDialog achieves transparency by using an opaque layered window and taking advantage of the fact that it is maintained in an off-screen bitmap.
Using StyleDialog
Step 1 - Configure Usage in StyleDialog.h
#define USE_STYLE_TOOLKIT
#define USE_LAYERED_WINDOWS
Step 2 – Derive a Dialog from StyleDialog
Create a dialog based application with the wizard as usual. Replace all the instances of CDialog with StyleDialog. Note: Skip past CAboutDlg when doing the replace, unless you want it to also be a StyleDialog.
For child dialogs, just declare them as StyleDialog. See the demo program for examples.
Step 3 – Configure StyleDialog
Do the following before calling OnInitDialog or DoModal.
SetTransparent(TRUE);
SetControls(ALL_CONTROLS);
SetTitle(_T("Style Dialog Demo"));
SetTransparent enables transparency. It defaults to disabled since it will just waste bandwidth if it is not used.SetControls tells StyleDialog which controls to use when there is a custom frame. This is described in more detail below. The default is no controls.SetTitle is the title that will be displayed in the taskbar when a custom frame is used. The default is an empty string.
Step 4 – Add a style to the dialog [optional]
Load a style into the dialog with AddBackGroundStyle(style).
Minimal Implementation of StyleDialog
The image and code below is from the Dialog 3 button of the demo program.

StyleDialog dlg(IDD_DIALOG3);
dlg.SetTransparent(TRUE);
dlg.SetTitle(_T("Standard Frame"));
dlg.DoModal();
This example uses the standard frame, and does not use the Style Toolkit. It is actually not necessary to set the title, but it will just say “Dialog” if you don’t.
Controlling the Alternate Background
If transparency is enabled, StyleDialog will display an alternate background when it is not the active application or when the window is being moved. The alternate background will be underneath anything that may have been painted on the transparent region.
By default, the alternate background will be a solid fill of the desktop background color. This can be overridden with one of the following:
SetOpaqueColor(clr) – Change the solid fill to another color.AddOpaqueStyle(style) – Change the fill to a style.
The Dialog 2 button demonstrates the use of styles for the background.
This example uses a custom frame without controls, and a background style with a semi-transparent PNG image.
This shows the inactive state. It uses a fully opaque version of the same image for the opaque style.
Creating a Custom Frame
StyleDialog needs to know what the client rectangle’s size should be when creating a custom frame. This is needed for hit testing the title bar area, and for supporting the overridden function GetClientRect().
StyleDialog maintains an outer frame that can be retrieved with GetFrameRect and a client frame that can be retrieved with GetClientRect. Note that Windows does not perceive this as the client rectangle. There are cases when painting or erasing that you should use GetFrameRect or CDialog::GetClientRect to get the Windows definition of the client rectangle.
Method 1 – Use SetClientRect
Call GetFrameRect() to get the outer frame rect, adjust it for border and title bar sizes, then call SetClientRect().
Method 2 – Use the Resource Editor
Use the resource editor and create the client rectangle with a static control. This has the advantage of being able to adjust the title and border sizes as you design the dialog box. Use the static picture control, since it doesn’t have any offsets.
Set the ID of the control to one of SytleDialog’s keyword IDs – IDC_SC_CLIENT. When StyleDialog detects this ID in the resource.h file, it will automatically create the client rectangle.
There are also keyword IDs for the controls as seen in the image below.
If StyleDialog sees any of the control IDs, it will create StyleButtons for them and load them with the associated image. It will also create the expected functionality for each button.
Other Considerations
StyleDialog does not support maximize; in fact, it disables it. In principle, this could be supported, but I don’t have any intention of adding this feature in the future.
I didn’t really plan on supporting a transparent dialog with transparent child dialogs; however, it appears to work okay, and the demo program actually does this.
In order to not have a burn through effect when opening a child dialog, the transparency of the parent can be disabled, then re-enabled. However, there may be timing issues associated with turning on and off layered windows, so use this feature with caution.
Issues
- Minimize and Restore when using a custom frame – If you click on the taskbar icon, StyleDialog will go to the proper active or inactive state, but it will not minimize and restore. I think this relates to the fact that the system menu does not have this functionality, and I hope to fix this in a future release.
- VC6 users – StyleDialog will work as is if you comment out the layered window functionality. Layered windows will work on Win2K SP3 and newer, but you need to get newer versions of winuser.h, user32.lib, and user32.dll.
Revision History
- Version 1.0 – August 3, 2008
Initial release.
I am currently working as a consultant in Southern California.
I have worked as a Hardware Engineer, Firmware Engineer, Software Engineer and Applications Engineer.
I spent 13 years in the Disk Drive industry and the last 7 working in GPS.


 General
  News
News  Suggestion
  Question
  Bug
Bug  Answer
  Joke
Joke  Praise
  Rant
Rant  Admin
Admin 


![Rose | [Rose]](https://codeproject.freetls.fastly.net/script/Forums/Images/rose.gif)