
This series of articles focuses on a 2D game development with C++ and OpenGL for Windows platform. The target is to provide a game that is similar to a classic block puzzle game by the end of the series. We will not only focus on OpenGL but also talk about the designs that are commonly used in game programming with a full object oriented approach. You should already be familiar with the C++ language in order to get the maximum out of this series. There is a message board at the bottom of the article that you can use if you have questions, remarks or suggestions.
The series is divided into three articles:
- Part 1 : covers the window creation and the setting-up of OpenGL.
- Part 2 : covers resources handling and displaying simple animations.
- Part 3: groups everything together and talk about the game logic.
This is the last article in the series, we already saw how to create the main window and display images and animations on it. We will now see how we can use that on a concrete example. Before we do so, we will first look at how we can draw text using OpenGL and how to manage the different states of a game (main menu, play state, high-scores, ...).
For a lot of games, displaying images loaded from files is not enough: Sometimes you would like to display some text which is not known when you design your game. For example, the player name used in the high-scores, the current player score, etc. You can draw text with OpenGL by making use of display lists. A display list is a list of OpenGL commands that are stored together and which can be executed later as often as you need. Suppose that you have a very complex object for which you have a lot of OpenGL calls (e.g. an object made of a lot of textures) that you would like to draw often. Instead of each time repeating the same OpenGL commands, you can 'execute' the commands once and store them in a display list. You can then call your display list later whenever you want to display the objects instead of calling all the OpenGL functions. When the list is invoked, all the commands in the list are executed in the order in which they were issued. The major advantage of using display lists is optimization: The OpenGL commands are already evaluated and might be stored in a format that is more suitable for your graphic card. For example, a rotation transformation requires quite a lot of calculations because a rotation matrix has to be generated from this command. If you use a display list, the final rotation matrix will be saved, which avoids redoing the complex calculation each time.
So, for what will those display list be useful to draw text? Well, when you create your font (with a specific typeface, height and weight), all the characters that need to be reused later can be drawn in a display list (one list for each character). You can then easily display text later by calling the different display lists of the characters you want to draw. Let's look at the header of the CGameFont class, which is used to draw the text:
class CGameFont
{
public:
CGameFont();
~CGameFont();
void CreateFont(const std::string& strTypeface ,
int iFontHeight,
int iFontWeight);
void DrawText(const std::string& strText, int XPos,
int YPos, GLfloat fRed, GLfloat fGreen,
GLfloat fBlue);
TRectanglei GetTextSize(const std::string& strText);
static void SetDeviceContext(HDC hDevContext)
{ m_hDeviceContext = hDevContext; }
private:
static HDC m_hDeviceContext;
GLuint m_uiListBase;
HFONT m_hFont;
};
The CreateFont function is used to create the font for the specified typeface (e.g. "Arial", "Times New Roman",...), with a specific height and weight (the weight specifies the thickness of the font). Once the font has been created successfully, you can call DrawText to draw the text contained in strText on the screen at the position specified by XPos and YPos, with the specified RGB color (fRed, fGreen and fBlue). The DrawText function should not be called before CreateFont, otherwise an exception will be thrown. In order to be able to create the font, a device context should be supplied. This can be done once through a static function (SetDeviceContext): You can call that function once at the start of your program by calling CGameFont::SetDeviceContext(hDC). The GetTextSize function is a utility function that can be used to retrieve the size of the text prior to draw it on the scree in order to place it correctly. The class also contains the index of the base of the display lists: several display lists can already be created, and those lists are identified by an Id. When you generate several consecutive display lists for your font, the Id of the first one is saved in the m_uiListBase member.
Let's now look at the implementation of CreateFont:
void CGameFont::CreateFont(const std::string& strTypeface,
int iFontHeight,
int iFontWeight)
{
if (!m_hDeviceContext)
{
string strError = "Impossible to create the font: ";
strError += strTypeface;
throw CException(strError);
return;
}
m_uiListBase = glGenLists(255);
if (m_uiListBase == 0)
{
string strError = "Impossible to create the font: ";
strError += strTypeface;
throw CException(strError);
return;
}
m_hFont = ::CreateFont(-iFontHeight,
0,
0,
0,
iFontWeight,
FALSE,
FALSE,
FALSE,
ANSI_CHARSET,
OUT_TT_PRECIS,
CLIP_DEFAULT_PRECIS,
ANTIALIASED_QUALITY,
FF_DONTCARE|DEFAULT_PITCH,
strTypeface.c_str());
if (m_hFont == NULL)
{
m_uiListBase = 0;
string strError = "Impossible to create the font: ";
strError += strTypeface;
throw CException(strError);
return;
}
HFONT hOldFont = (HFONT)SelectObject(m_hDeviceContext, m_hFont);
wglUseFontBitmaps(m_hDeviceContext, 0, 255, m_uiListBase);
SelectObject(m_hDeviceContext, hOldFont);
}
The first thing we do there is to verify if a device context has been supplied. If that's not the case, we can't create a font so we throw an exception. We then ask OpenGL to generate a continuous set of 255 diplay lists that will be used for 255 characters. The function returns the Id of the first display list, that is saved in the m_uiListBase member. If the function returns, it means that OpenGL couldn't allocate 255 display lists, so we throw an exception. We then create the font by calling CreateFont (which is a Windows function). I won't list all the parameters of the function but the ones in which we are interested is the font height (the first one), the font weight (the fifth one) and the typeface (the last one). If you are interested, you can have a look at the MSDN documentation here. Note that we supply the font height as a negative number. This is done so that Windows will try to find a matching font using the character height instead of the cell height. If the font creation was successfull, it is returned, otherwise NULL is returned (in which case we throw an exception). We then select this font as the active one in the device context and store the old font in order to set it back when we are done. We then call wglUseFontBitmaps that will generate the display lists for each of the characters based on the selected font in the device context. The second argument is the index of the first character for which we want to generate a display list and the third one is the number of characters (starting from this one) that we would like to generate a display list for. In our case, we would like to generate a display list for all 255 characters. If you look at an ASCII table, you can see that not all characters are usable: The first usable character start at 32 (the space character) and the last one is 127 (the delete character). So, we could have reduced our display lists to 96 lists instead of 255, but this has not be done here to keep things simple. Once all the display lists have been generated, we select the old font again in the device context.
Once the font has been created, we are able to draw text on the screen by calling DrawText:
void CGameFont::DrawText(const std::string& strText,
int XPos, int YPos,
GLfloat fRed,
GLfloat fGreen,
GLfloat fBlue)
{
if (m_uiListBase == 0)
{
throw CException("Impossible to diplay the text.");
return;
}
glDisable(GL_TEXTURE_2D);
glColor3f(fRed, fGreen, fBlue);
glRasterPos2i(XPos, YPos);
glPushAttrib (GL_LIST_BIT);
glListBase(m_uiListBase);
glCallLists((GLsizei)strText.size(), GL_UNSIGNED_BYTE,
(GLubyte *)strText.c_str());
glPopAttrib ();
glEnable(GL_TEXTURE_2D);
}
The first thing we do here is to verify if we have a valid list base (which is generated when the font is created). If that's not the case, we throw an exception. After that, we disable 2D texturing because it interferes with the text and the text color will be affected by the last texture that was applied. We then specify the text color by setting the current color, and then the position of the text by calling glRasterPos2i which sets the current raster position (the position which is used to draw pixels and bitmaps). We then push the 'list bit' in order to save the current list base in OpenGL. This is done so that you won't interfere with other display lists that migh have saved the list base. We then set this list base value by calling glListBase, this tells OpenGL that m_uiListBase is the new base for the display lists. Suppose that when we generated our font, the first available display list was at Id 500. The glListBase command specifies that 500 is the new base for the display list, so that if you call glCallLists, an offset of 500 will be added to the Id we supply to glCallLists. You'll see at the next line of code why we do so. Finally, we draw the text by calling glCallLists: The first argument is the number of display lists to be executed, we need to execute one for each letter we want to draw (thus the number of display lists is the number of characters in the string). The second argument is the type of the values which are passed in the third argument. We pass single byte characters, so the type is GL_UNSIGNED_BYTE. The third argument is the Id's of the list we want to call. Suppose that the first character is an 'A', which correspond to an ASCII code of 65, we will then call the list with Id 565 (because of the offset of the previous example), which correspond to the Id of the list for the letter 'A'. And we do the same for each of the character in the string. Each call to the display list will modify the current raster position and move it to the right of the character that was drawn. That's why the characters do not pile up on each other. We then reset the list base to its previous value (by calling glPopAttrib) and we re-enable 2D texturing.
The display lists should also be destroyed once you don't need them anymore. This is done in the class destructor:
CGameFont::~CGameFont()
{
  if (m_uiListBase)
    glDeleteLists(m_uiListBase,255);
  DeleteObject(m_hFont);
}
If the font was properly initialized (m_uiListBase different than 0), we delete 255 lists starting at index m_uiListBase, which were the lists that were generated for this font. We also delete the Win32 font.
So, displaying text becomes quite easy when using this little class:
CGameFont::SetDeviceContext(hDC);
...
...
CGameFont newFont;
newFont.CreateFont("Arial", 30, FW_BOLD);
newFont.DrawText("Test",300,150,1.0,1.0,1.0);
In almost every game, you will encounter different 'states': Usually you have a main menu (which allows the user to start a new game, set some options, view the highscores), the main play state, the highscore state, etc. It quickly becomes a mess in your code if you have to manage everything in the same class: The update and draw functions becomes a gigantic switch in which you have to take care of all the possible states, all the variables are mixed together which makes the code hard to maintain, and so on. Luckily, there's an easy design pattern that elegantly solves the problem: The state pattern. The principle is quite simple: Each state of your game has its own separate class which inherits from a common 'state' class. So, in our example we have a class for the menu, a class for the play state, a class for the highscores, and so on. A state manager class keeps track of the current state of the game and redirect every call to this active state (draw, update, key down, ...). When you have to switch to another state, you simply inform the state manager of the new state. You can find quite a lot of nice articles about this pattern on the net, so I won't enter into much details here. Take a look at the first link in the references if you want to go more in details about this design pattern.
In the sources, you will find a CStateManager class which looks like:
class CStateManager
{
public:
CStateManager();
~CStateManager();
void ChangeState(CGameState* pNewState)
{
if (m_pActiveState)
m_pActiveState->LeaveState();
m_pActiveState = pNewState;
m_pActiveState->EnterState();
}
CGameState* GetActiveState() { return m_pActiveState; }
void OnKeyDown(WPARAM wKey);
void OnKeyUp(WPARAM wKey);
void Update(DWORD dwCurrentTime);
void Draw();
private:
CGameState* m_pActiveState;
};
This class manages the current state of the game and redirects all 'events' call to it: If you look at the implementation of OnKeyDown, OnKeyUp, Update and Draw, you will see that they simply call the same function on the m_pActiveState instance. When switching to another state, the state manager calls the LeaveState of the current state and the EnterState of the new state. States can implement those functions to do special initialization or clean up when the state becomes active or inactive.
The CGameState is very easy too:
class CGameState
{
public:
CGameState(CStateManager* pManager);
virtual ~CGameState();
virtual void OnKeyDown(WPARAM ) { }
virtual void OnKeyUp(WPARAM ) { }
virtual void OnChar(WPARAM ) { }
virtual void Update(DWORD ) { }
virtual void Draw() { }
virtual void EnterState() { }
virtual void ExitState() { }
protected:
void ChangeState(CGameState* pNewState);
CStateManager* m_pStateManager;
};
The different classes that will manage the states of the game inherit from this class. These child classes can then implement the 'event' functions in which they are interested. The ChangeState function is there only as a helper function: It simply call ChangeState of the CStateManager.
We have now covered everything that we need in order to create our game. This section explains important parts of the code but doesn't go into all the details here: There's a bit too much code to explain every single line of code in this article. However, the source code is fairly well commented so do not hesitate to take a deeper look.
The game is divided in three states: the menu state, the play state and the high-score state. As explained earlier, each of these states are handled in their own classes, which inherit from the CGameState class. Each of these classes are implemented as singletons.
There is a little addition in this game that is not available in its typical predecessors: A combo multiplier. Each time one (or several) line(s) is (are) completed, the player has a certain time to complete another line to multiply the score of the new completed line (or lines). The multiplier increases each time a new line has been completed before the combo time runs out. If the time runs out, the current muliplier is decreased by one and a new timer starts. Of course, the higher the multiplier is, the faster the time decrases.
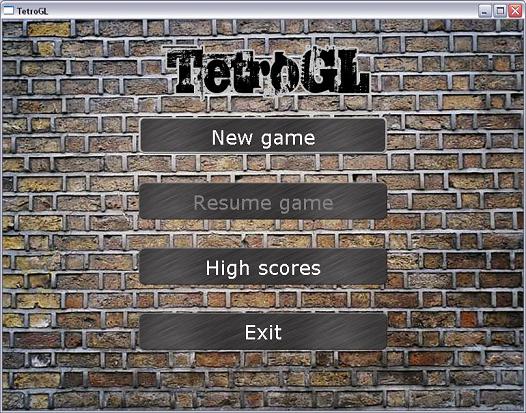
This state displays the main menu with the following options: new game, resume game (if there is currently an active game), high scores and exit the game. The header file is:
class CMenuState : public CGameState
{
public:
~CMenuState();
void OnKeyDown(WPARAM wKey);
void Draw();
void EnterState();
static CMenuState* GetInstance(CStateManager* pManager);
protected:
CMenuState(CStateManager* pManager);
private:
void SelectionUp();
void SelectionDown();
void SelectionChosen();
CGameFont* m_pFont;
int m_iCurrentSelection;
CPlayState* m_pCurrentGame;
TImagePtr m_pBackgroundImg;
TImagePtr m_pTitleImg;
TImagePtr m_pItemBckgndNormal;
TImagePtr m_pItemBckgndSelected;
CTextControl* m_pNewGameText;
CTextControl* m_pResumeGameText;
CTextControl* m_pScoresText;
CTextControl* m_pExitText;
};
SelectionUp, SelectionDown or SelectionChosen functions are called when the up, down or enter key is pressed. The selection up and down functions simply change the m_iCurrentSelection index and the SelectionChosen function switches to another state or exit the game depending of the selected menu item.
The CTextControl is a simple utility class that displays text in a rectangle region with a certain alignment (left, center or right).
This state is the most complicated one, because it is there that all the game logic is handled. The play state delegates most of the logic to the CBlocksMatrix class, which is responsible of the management of the playing area. There are 7 different shapes (also called tetrads), which are named by a letter depending on their shape: I, O, Z, S, T, L and J. Each of these tetrads has a specific class to handle it. It is done so because there is no generic way to handle all the different tetrads. For instance, rotations are not always done in the same way: The I tetrad (the line) has only two different position (vertical and horizontal), you don't simply rotate all the cells around a point. So, for this reason, each tetrad has to be handled separately. They all inherits from the CTetrad class, which looks like:
class CTetrad
{
public:
CTetrad(CBlocksMatrix* pParent, EBlockColor blockColor)
: m_pParentMatrix(pParent), m_iXPos(4), m_iYPos(0),
m_Orientation(Rotation0), m_pBlockImg(NULL), m_BlockColor(blockColor)
{
switch (blockColor)
{
case bcCyan:
m_pBlockImg = CImage::CreateImage("Block.PNG",
TRectanglei(0,BLOCK_HEIGHT,0,BLOCK_WIDTH));
break;
case bcBlue:
m_pBlockImg = CImage::CreateImage("Block.PNG",
TRectanglei(0,BLOCK_HEIGHT,BLOCK_WIDTH,2*BLOCK_WIDTH));
break;
case bcOrange:
m_pBlockImg = CImage::CreateImage("Block.PNG",
TRectanglei(0,BLOCK_HEIGHT,2*BLOCK_WIDTH,3*BLOCK_WIDTH));
break;
case bcYellow:
m_pBlockImg = CImage::CreateImage("Block.PNG",
TRectanglei(0,BLOCK_HEIGHT,3*BLOCK_WIDTH,4*BLOCK_WIDTH));
break;
case bcGreen:
m_pBlockImg = CImage::CreateImage("Block.PNG",
TRectanglei(0,BLOCK_HEIGHT,4*BLOCK_WIDTH,5*BLOCK_WIDTH));
break;
case bcPurple:
m_pBlockImg = CImage::CreateImage("Block.PNG",
TRectanglei(BLOCK_HEIGHT,2*BLOCK_HEIGHT,0,BLOCK_WIDTH));
break;
case bcRed:
m_pBlockImg = CImage::CreateImage("Block.PNG",
TRectanglei(BLOCK_HEIGHT,2*BLOCK_HEIGHT,BLOCK_WIDTH,2*BLOCK_WIDTH));
break;
}
}
virtual ~CTetrad() { }
virtual bool Rotate() = 0;
virtual bool MoveLeft() = 0;
virtual bool MoveRight() = 0;
virtual bool MoveDown() = 0;
virtual void FillMatrix() = 0;
virtual bool IsValid() = 0;
virtual void Draw() = 0;
virtual void DrawOnScreen(const TRectanglei& rect) = 0;
protected:
CBlocksMatrix* m_pParentMatrix;
int m_iXPos;
int m_iYPos;
enum EOrientation
{
Rotation0,
Rotation90,
Rotation180,
Rotation270,
};
EOrientation m_Orientation;
TImagePtr m_pBlockImg;
EBlockColor m_BlockColor;
};
The child classes implement those virtual methods. They interract with the CBlocksMatrix class to check if some cells are free or not. Here is an example of the rotation function for the Z tetrad:
bool CTetrad_Z::Rotate()
{
  bool bSuccess = false;
  switch (m_Orientation)
  {
  case Rotation0:
  case Rotation180:
    if (m_pParentMatrix->IsCellFree(m_iXPos,m_iYPos-1) &&

      m_pParentMatrix->IsCellFree(m_iXPos-1,m_iYPos+1) )
    {
      m_Orientation = Rotation90;
      bSuccess = true;
    }
    break;

  case Rotation90:
  case Rotation270:
    if (m_pParentMatrix->IsCellFree(m_iXPos,m_iYPos+1) &&
      m_pParentMatrix->IsCellFree(m_iXPos+1,m_iYPos+1))
    {
      m_Orientation = Rotation0;
      bSuccess = true;
    }
    break;
  }
  return bSuccess;
}
Depending of the current rotation of the tetrad, it will check if the cells that will be occupied after the rotation are free or not. If they are free, the m_Orientation member is updated and the function returns true. The other move or rotate functions of all the tetrads are similar, so I won't put here the code for all of them. The Draw function is not very difficult neither:
void CTetrad_Z::Draw()
{
  int screenX=0, screenY=0;

  switch (m_Orientation)
  {
  case Rotation0:
  case Rotation180:
    m_pParentMatrix->GetScreenPosFromCell(m_iXPos-1,m_iYPos,screenX,screenY);
    m_pBlockImg->BlitImage(screenX,screenY);
    m_pParentMatrix->GetScreenPosFromCell(m_iXPos  ,m_iYPos,screenX,screenY);
    m_pBlockImg->BlitImage(screenX,screenY);
    m_pParentMatrix->GetScreenPosFromCell(m_iXPos  ,m_iYPos+1,screenX,screenY);
    m_pBlockImg->BlitImage(screenX,screenY);
    m_pParentMatrix->GetScreenPosFromCell(m_iXPos+1,m_iYPos+1,screenX,screenY);
    m_pBlockImg->BlitImage(screenX,screenY);
    break;

  case Rotation90:
  case Rotation270:
    m_pParentMatrix->GetScreenPosFromCell(m_iXPos  ,m_iYPos-1,screenX,screenY);
    m_pBlockImg->BlitImage(screenX,screenY);
    m_pParentMatrix->GetScreenPosFromCell(m_iXPos  ,m_iYPos  ,screenX,screenY);
    m_pBlockImg->BlitImage(screenX,screenY);
    m_pParentMatrix->GetScreenPosFromCell(m_iXPos-1,m_iYPos  ,screenX,screenY);
    m_pBlockImg->BlitImage(screenX,screenY);
    m_pParentMatrix->GetScreenPosFromCell(m_iXPos-1,m_iYPos+1,screenX,screenY);
    m_pBlockImg->BlitImage(screenX,screenY);
    break;
  }
}
The screen position of a cell can be retrieved from the CBlocksMatrix class (remember that the m_iXPos and m_iYPos members are the position in the matrix and are not screen positions).
The CBlocksMatrix is responsible to handle all the logic related to checking filled lines and removing them. Let's first look at the class header, we will look at the implementation of some functions later:
class CBlocksMatrix
{
public:
CBlocksMatrix(CMatrixEventsListener* pListener, int xPos, int yPos);
~CBlocksMatrix();
void Draw();
void Update(DWORD dwCurrentTime);
void Reset();
void ShapeLeft();
void ShapeRight();
void ShapeDown();
void ShapeRotate();
bool IsCellFree(int XPos, int YPos);
void FillCell(int XPos, int YPos, EBlockColor BlockColor);
void GetScreenPosFromCell(int cellXPos, int cellYPos,
int& screenXPos, int& screenYPos);
CTetrad* GetNextShape() const { return m_pNextShape; }
void SetTetradUpdate(int iNewUpdate) { m_iTetradUpdate = iNewUpdate; }
int GetTetradUpdate() const { return m_iTetradUpdate; }
private:
bool CheckMatrix();
bool IsLineRemoved(int iRow);
void RemoveLines();
void NewShape();
int m_iXPos;
int m_iYPos;
int m_pBlocksMatrix[MATRIX_WIDTH][MATRIX_HEIGHT];
TImagePtr m_pBlockImg[7];
CTetradFactory m_TetradFactory;
CTetrad* m_pTetrad;
CTetrad* m_pNextShape;
DWORD m_dwLastShapeDown;
bool m_bRemovingLine;
int m_iLineBlinkCount;
bool m_bLineBlinkOn;
std::vector<int> m_vecLinesRemoved;
CMatrixEventsListener* m_pListener;
int m_iTetradUpdate;
bool m_bGameOver;
};
The ShapeLeft, ShapeRight, ShapeRotate and ShapeDown functions are simply redirected to the current tetrad (m_pTetrad). The ShapeDown function does a bit more, because if a tetrad cannot move down, some special checks need to be done:
void CBlocksMatrix::ShapeDown()
{
if (m_pTetrad && !m_pTetrad->MoveDown())
{
m_pTetrad->FillMatrix();
delete m_pTetrad;
m_pTetrad = NULL;
if (!CheckMatrix())
NewShape();
}
m_dwLastShapeDown = GetCurrentTime();
}
If the shape cannot be moved down (the MoveDown function returns false), we first ask it to fill the cells of the matrix where it is located, then delete it. We then check if at least one line of the matrix is complete: The CheckMatrix function returns true if at least one line is completed and if that is the case, it will push the line numbers of the ones that are filled in the m_vecLinesRemoved vector and set m_bRemovingLine to true. If no lines were completed, we try to create a new shape by calling NewShape. If the shape cannot be created (because the matrix is full), the m_bGameOver flag will be set to true.
The Update function only checks if the current shape should be moved down:
void CBlocksMatrix::Update(DWORD dwCurrentTime)
{
if (!m_bGameOver)
{
if (dwCurrentTime > m_dwLastShapeDown+m_iTetradUpdate)
ShapeDown();
}
}
The m_iTetradUpdate variable specifies the maximum time between two moves down of the current shape. This decreases with the level (the higher the level, the faster the shape will go down). Don't forget that the m_dwLastShapeDown variable is set to the current time in the ShapeDown function (so if the shape is moved manually, this is also set).
Finally, the Draw function takes care of drawing the current state on the screen:
void CBlocksMatrix::Draw()
{
int iBlockX=0, iBlockY=0;
if (m_bRemovingLine)
{
for (int j=0; j<MATRIX_HEIGHT;j++)
{
if (IsLineRemoved(j) && !m_bLineBlinkOn)
continue;
for (int i=0; i<MATRIX_WIDTH;i++)
{
if (m_pBlocksMatrix[i][j])
{
int color = m_pBlocksMatrix[i][j]-1;
GetScreenPosFromCell(i, j, iBlockX, iBlockY);
m_pBlockImg[color]->BlitImage(iBlockX, iBlockY);
}
}
}
if (m_bLineBlinkOn)
m_bLineBlinkOn = false;
else
m_bLineBlinkOn = true;
m_iLineBlinkCount++;
if (m_iLineBlinkCount == 10)
{
RemoveLines();
m_bRemovingLine = false;
m_bLineBlinkOn = false;
m_iLineBlinkCount = 0;
NewShape();
}
}
else
{
for (int j=0; j<MATRIX_HEIGHT;j)
{
for (int i=0; i<MATRIX_WIDTH;i++)
{
if (m_pBlocksMatrix[i][j])
{
int color = m_pBlocksMatrix[i][j]-1;
GetScreenPosFromCell(i, j, iBlockX, iBlockY);
m_pBlockImg[color]->BlitImage(iBlockX, iBlockY);
}
}
}
if (!m_bGameOver)
m_pTetrad->Draw();
}
}
The first part of the function (if m_bRemovingLine is true) is only executed when we are removing lines (the lines which are complete will blink before being removed). Remember that in order to display 'animations', the state should be saved in some way for the next frame to be displayed. That's the reason why we have to remember if the lines are currently visible or not (m_bLineBlinkOn) and the number of times they have already blinked (m_iLineBlinkCount). The IsLineRemoved function returns true if the line passed in argument is being removed. When the blinking is finished, the RemoveLines function is called which will remove the lines from the matrix and clean everything (blocks above a removed line will be moved down). The second part of the function gets executed the rest of the time (when no lines are being removed). It simply draws all the filled blocks and the current shape.
As you probably saw, there is also a CMatrixEventsListener class. In fact, this is just an interface that should be implemented by another class in order to be notified about some events that occurs in the blocks matrix (starting to remove lines, lines removed, game over). The CPlayState class implements this interface (and its address is passed to the CBlocksMatrix when constructing it). This technique is used in order to reduce coupling between those classes: The CBlocksMatrix class becomes independant of the class which is using it and which should be notified about the events. The CPlayState looks like:
class CPlayState : public CGameState,
public CMatrixEventsListener
{
public:
~CPlayState();
void OnKeyDown(WPARAM wKey);
void Update(DWORD dwCurrentTime);
void Draw();
void OnStartRemoveLines();
void OnLinesRemoved(int iLinesCount);
void OnMatrixFull();
void Reset();
bool IsGameOver() { return m_bGameOver; }
static CPlayState* GetInstance(CStateManager* pManager);
protected:
CPlayState(CStateManager* pManager);
private:
CBlocksMatrix* m_pMatrix;
CGameFont* m_pFont;
CComboControl* m_pComboControl;
CTextControl* m_pScoreControl;
CTextControl* m_pLevelControl;
CTextControl* m_pLinesControl;
int m_iTotalLines;
int m_iCurrentLevel;
int m_iCurrentScore;
bool m_bGameOver;
TImagePtr m_pBackgroundImg;
};
The main role of this class is to coordinate the different elements: The game matrix and the combo control and to manage the score and current lines completed. The implementation of the class is fairly trivial, so I won't describe it here. The CComboControl class handles the combo control: This control shows a decreasing time bar when a line has been completed. If a new line is completed before time is over, a multiplier is applied to the points gained for the line(s) completed. The higher the multiplier, the fastest time will decrease.
When the game is over, a semi-transparent black rectangle will be displayed over the full screen with some text on it. This is done with the help of blending: support for blending has been added in the CMainWindow::InitGL function:
glBlendFunc(GL_SRC_ALPHA, GL_ONE_MINUS_SRC_ALPHA);
glEnable(GL_BLEND);
The glEnable(GL_BLEND) simply enables the blending, but you also have to specify a blending function. The blending function tells OpenGL how to blend the incoming pixels with the pixels present in the frame buffer. Specifying this is done through the glBlendFunc: The first argument specifies the factor to apply to the RGB components of the source pixels (the incoming pixels) and the second argument specifies the factor to apply to the destination pixels (the pixels which are already in the frame buffer). The final pixel will be the addition of the resulting values (for each components). The code we use to make the semi-transparent black screen is:
if (m_bGameOver)
{
glColor4f(0.0,0.0,0.0,0.5);
glDisable(GL_TEXTURE_2D);
glBegin(GL_QUADS);
glVertex3i(0,0,0);
glVertex3i(0,600,0);
glVertex3i(800,600,0);
glVertex3i(800,0,0);
glEnd();
glEnable(GL_TEXTURE_2D);
m_pFont->DrawText("GAME OVER",340,200);
m_pFont->DrawText("Press Enter to continue",285,300);
}
This means that we first select a black color with an alpha channel of 0.5 and then we draw our rectangle over the complete screen. We have to disable texturing when drawing our rectangle, because we want a non textured black rectangle.
This state is responsible to display the high-scores which are saved from previous games. The information is saved in a file for persistency ("HighScores.txt"). The file is not protected, so anybody can edit this file and change the high-scores. This is of course not very nice but describing ways to protect this data is outside the scope of the article. As usual, I'll first show the class declaration before going into some details:
class CHighScoreState : public CGameState
{
public:
~CHighScoreState();
void SetNewHighScore(ULONG ulNewHighScore)
{ m_ulNewHighScore = ulNewHighScore; }
void OnKeyDown(WPARAM wKey);
void OnChar(WPARAM wChar);
void Draw();
void EnterState();
static CHighScoreState* GetInstance(CStateManager* pManager);
protected:
CHighScoreState(CStateManager* pManager);
private:
void SaveScores();
void AddNewScore(const std::string& strName, ULONG ulScore);
struct HighScoreData
{
std::string strPlayer;
ULONG ulScore;
bool operator< (const HighScoreData& other)
{
if (this->ulScore > other.ulScore)
return true;
return false;
}
};
ULONG m_ulNewHighScore;
bool m_bEnterName;
char m_pCurrentName[26];
int m_iNameIndex;
CGameFont* m_pFont;
typedef std::vector<HighScoreData> THighScoreTable;
THighScoreTable m_vecHighScores;
TImagePtr m_pBackgroundImg;
TImagePtr m_pTitleImg;
TImagePtr m_pEntriesBckgndImg;
TImagePtr m_pEnterNameImg;
TImagePtr m_pEnterNameBackImg;
};
The class overrides the EnterState function, it is used to read the high-scores from the file and check if a new high-score should be added in the table:
void CHighScoreState::EnterState()
{
m_vecHighScores.clear();
ifstream inputFile("HighScores.txt");
if (inputFile.fail())
{
if (m_ulNewHighScore)
m_bEnterName = true;
return;
}
while (!inputFile.eof())
{
HighScoreData newScore;
inputFile >> newScore.strPlayer >> newScore.ulScore;
m_vecHighScores.push_back(newScore);
}
sort(m_vecHighScores.begin(), m_vecHighScores.end());
ULONG lastScore = 0;
if (m_vecHighScores.size())
lastScore = m_vecHighScores[m_vecHighScores.size()-1].ulScore;
if (m_ulNewHighScore && m_ulNewHighScore>lastScore)
m_bEnterName = true;
}
When reading the file, we sort the high-scores using the std::sort function. For that purpose, we should provide an operator< for our structure. The std::sort function sorts the elements in ascending order, that's the reason our operator returns the opposite of what is excepted (so that all elements are ordered in the opposite order). When characters are inserted by the user, the OnChar function is called. If the m_bEnterName flag is true, characters will be added to the m_pCurrentName array, until the user presses enter. In that case, the AddNewScore function is called:
void CHighScoreState::AddNewScore(const std::string& strName, ULONG ulScore)
{
HighScoreData newData;
newData.strPlayer = strName;
newData.ulScore = ulScore;
m_vecHighScores.push_back(newData);
sort(m_vecHighScores.begin(), m_vecHighScores.end());
while (m_vecHighScores.size() > 10)
m_vecHighScores.pop_back();
SaveScores();
}
The SaveScores is called at the end to save the new high scores in the file:
void CHighScoreState::SaveScores()
{
ofstream outputFile("HighScores.txt");
if (outputFile.fail())
return;
THighScoreTable::iterator iter = m_vecHighScores.begin();
for (iter; iter != m_vecHighScores.end(); iter++)
{
outputFile << iter->strPlayer << " " << iter->ulScore;
}
}
In normal mode (when the name is not entered), the user can exit the high-score state and return to the main menu by pressing enter or escape.
This was the last article in the series in which we saw how to draw text on the screen and how to manage the different states of a game. Everything we saw during these three tutorials was then used for a concrete example on a classic block game.
Of course, this example is fairly simple because there is no sound, no advanced user interface and no network access. In a more advanced game, you'll probably want to do something like that. Take a look at the references where I have put some links to libraries that supports that.
I hope you enjoyed the series. Don't hesitate to give your impressions through the message board at the bottom of the article or by rating it. Thanks.
[1]
State pattern: a good article about the state pattern design pattern.
[2]
SFML library: Simple and Fast Multimedia Library. A free multimedia C++ API that provides you low and high level access to graphics, input, audio, etc.
[3]
FMOD library: a music and sound effect library which is free for non-commercial distributions.
[4]
RakNet: a cross-platform C++ game networking engine.
[5]
CEGUI: a free library providing windowing and widgets for graphics APIs.
[6]
dafont: a website providing some nice free fonts (the "01 digitall" font used for the game is downloaded from there).
I would like to thanks Daniel Metien and Andrew Vos for their very nice work on the graphics. The game wouldn't be very enjoyable without their work :). Thanks also to Jeff (aka El Corazon) for his patience and advices related to OpenGL.


 General
  News
News  Suggestion
  Question
  Bug
Bug  Answer
  Joke
Joke  Praise
  Rant
Rant  Admin
Admin 


 . And to answer your question, no I don't work as a freelancer and I don't do such things.