Introduction
Joomla is a free open source Content Management System developed on PHP.
Operating System: Windows Server 2003.
Download and Install WampServer (http://www.wampserver.com/).
Download Joomla 1.5.10 version from Joomla.com site (http://www.joomla.org/).
Unzip it and rename to Joomla.
Copy that folder into [wampserver installation drive]/wamp/www/.
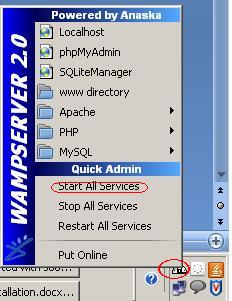
Now from Start->Programs->WAMPServer-> Start WAMPServer.
A small icon appears. Left click and select “Start All Services”.
Now browse the following URL: http://localhost/joomla/installation/index.php.

After selecting the language dropdown and clicking on next button, I got this error.
“Cookies do not appear to be enabled on your browser client. You will not be able to install the application with this feature disabled. Alternatively, there could also be a problem with the server's session.save_path. If this is the case, please consult your hosting provider if you don't know how to check or fix this yourself.”
The following link solves the above problem: http://forum.joomla.org/viewtopic.php?t=224420.
I got the same error. I opened the same link in FireFox. Then the problem was resolved.
Click on Next and License screen and click on Next.
Database Configuration screen comes.
- Database Type: MySql (right now i1.5 supports only MySql. Next version 2.0 supports Oracle).
- Host Name: localhost
- Username: root
- Password: empty
- Database Name: JoomlaDB (let’s say)
Then click Next and FTP configuration screen can be skipped. For Windows machines, it is not required.
Then Click on Next. “Main Configuration” screen comes.
Give Sitename, email, admin password and select ‘install default sample data’.
Click Next. Finish screen comes.
Note
PLEASE REMEMBER TO COMPLETELY REMOVE THE INSTALLATION DIRECTORY.
You will not be able to proceed beyond this point until the installation directory has been removed. This is a security feature of Joomla!.
Without deleting this installation folder, one cannot proceed, i.e. Site, Admin links won't work.
Go to [wampserver installation drive]\Wamp\www\joomla\.
Here one can find the Installation folder.
Delete the installation folder.
Now click on Site / Admin links at the top.
Now Admin and Site links work.
Click on Admin.
For Admin, this is the URL: http://localhost/joomla/administrator/index.php
Admin login Screen:
Admin Home page:
Joomla supports internationalization.
Joomla 1.0, 1.5 (current one), 2.0 (yet to be released)
References
History
- 20th May, 2009: Initial version
Links to Other CMS Installations
I am Sreedhar Ambati working as a developer. I am having 6+ yrs of experience in Microsoft technologies like ASP,VB,ASP.Net, Vb.Net, C#.Net, Microsoft Dynamics CRM and Sharepoint Server 2007.
I used to blog at: http://ambatisreedharworks.wordpress.com and http://ambatisreedhar.spaces.live.com


 General
  News
News  Suggestion
  Question
  Bug
Bug  Answer
  Joke
Joke  Praise
  Rant
Rant  Admin
Admin 


