Introduction
Sometime when we develop our WF custom activity we'd like to have a "property design time" support to make the properties setting up process quicker. if you define a property on a custom activity, you can provide a custom user interface, or type editor, to edit the value of that property using a property browser. You can build a class called a designer that can manage a variety of aspects of a component or control's appearance and behavior at design time.
Using the Code
In this case, we are going to create a not very useful custom activity just to show how the property design time support works. To start, we are going to create a sequential workflow console application. We'll use this project to test our custom activity.Then we have to add a WorkFlow library project that contains our custom activity.
- Navigate to Start | All Programs | Microsoft Visual Studio 2005 | Microsoft Visual Studio 2005.
- Select the File | New | Project menu command.
- Visual Studio displays the New Project dialog box.
- Select the Visual C# | Workflow project type.
- Select Sequential workflow console application.
- Right click on the solution.
- Select add new Project.
- Click on WorkFlow | WorkFlow Library.
At this point, we should have something like that:
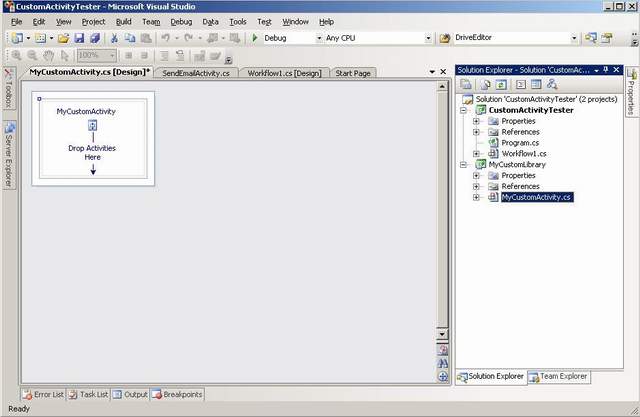
The first step is to set up the base class of the custom activity. In this example, we create a simple custom activity so we have to set up System.Workflow.ComponentModel.Activity as the base class for the activity. To do that, just click on the activity property window then on base class property. A pop up will be shown, then select Activity as Type Name:

At this point, the aspect of the activity should look like the image below:
Now we are ready to start adding the code to the activity. In this example, we create an activity that prints the file path property on the screen. It's a completely useless activity but it's a good example to show how the design support for the property works. To start, we have to add the properties to our activity. In this case, we create just one property that contains the file path of the file. On the code view of the activity, add the code below:
using System.ComponentModel;
using System;
using System.ComponentModel;
using System.ComponentModel.Design;
using System.Collections;
using System.Drawing;
using System.Linq;
using System.Workflow.ComponentModel;
using System.Workflow.ComponentModel.Design;
using System.Workflow.ComponentModel.Compiler;
using System.Workflow.ComponentModel.Serialization;
using System.Workflow.Runtime;
using System.Workflow.Activities;
using System.Workflow.Activities.Rules;

namespace CustomActivityTester
{
    public partial class MyCustomActivity : System.Workflow.ComponentModel.Activity
    {
        public MyCustomActivity()
        {
            InitializeComponent();
        }
        public static DependencyProperty FilePathProperty =
		System.Workflow.ComponentModel.DependencyProperty.Register(
        "FilePath", typeof(string), typeof(MyCustomActivity));
        [Description("FilePath")]
        [Category("MyCustomActivity")]
        [Browsable(true)]

        [DefaultValueAttribute("False")]

        [DesignerSerializationVisibility(DesignerSerializationVisibility.Visible)]
        public string FilePath
        {
            get
            {
                return ((string)base.GetValue(MyCustomActivity.FilePathProperty));
            }
            set
            {

                    base.SetValue(MyCustomActivity.FilePathProperty, value);
              }
        }
    }
}
Now we could add our custom activity to the Visual Studio Tool Box. We have not finished developing it, but like that we can see how it works step by step.
- Right click on the toolbox.
- Select "Choose Item".
- Click on the browse tab.
- Select myCustomLibrary.dll from the custom activity project folder.
At this point, our activity should appear on the tool box:
Now drag and drop the activity on the workflow:
Select the activity and click on the property window. We can see the filePath property we have created. Visual Studio provides the standard way to set up the property. We can set it up by code or we can create either a property or a field to bind the property and then we can set it up through the code again:
this.myCustomActivity1.FilePath = @"c:\MyFile.txt";
OR
Now if we want make this task quicker we can add the design support for the FilePath property. Maybe in this case, it is not really necessary because we have to set up just a path of the file but this is just an example to show how this process works. The UI of the property setting is based on a simple Winform so as the first step we have to create a Winform where we design the interface and where we add the code to set up our property. To do it, right click on the MyCustomLibrary project and add a new window form to the project called "FilePathDesignSupport".
Now to avoid the user close the winform and resize, meantime setting up the FilePath property, we have to set up a couple of form's properties.
- Set up
ControlBox=false. - Set up
FormBorderStyle="FixedSingle".
Now we can start designing the window form adding the controls we need to set up the property:
- Add a button called
btnCancel - Add a button called
btnOk - Add a button called
btnBrowse - Add a label called
lblFileName - Add a label called
lblFileSelected
Add this code to the form's code:
using System;
using System.Collections.Generic;
using System.ComponentModel;
using System.Data;
using System.Drawing;
using System.Linq;
using System.Text;
using System.Windows.Forms;

namespace MyCustomLibrary
{
    public partial class FilePathDesignSupport: Form
    {
        public FilePathDesignSupport()
        {
            InitializeComponent();
        }
        private string _fileName = string.Empty;
        public string FileName
        {
            get
            {
                return _fileName;

            }
        }

        private void btnCancel_Click(object sender, EventArgs e)
        {
            this.lblFileSelected.Text = string.Empty;
            this._fileName = string.Empty;
            this.Close();
        }

        private void btnOk_Click(object sender, EventArgs e)
        {
            this.Close();
        }

        private void btnBrowse_Click(object sender, EventArgs e)
        {
            this.openFileDialog1.ShowDialog();
        }

        private void openFileDialog1_FileOk(object sender, CancelEventArgs e)
        {
            if (string.IsNullOrEmpty(this.openFileDialog1.FileName) == false)
            {
                this.lblFileSelected.Text = this.openFileDialog1.FileName;
                this._fileName = this.lblFileSelected.Text;

            }
            else
            {
                this.lblFileSelected.Text = string.Empty;
                this._fileName = string.Empty;
            }
        }
    }
}
Now the UI to set up the FilePath property is ready. The next step is to create a class that "manages" the visualization of the UI we created before then we have to add an attribute to tell the Visual Studio designer which is the control to show when the user wants to set up the property. The "UI Manager" is represented by a class that inherits from "UITypeEditor".
Shown below is how to implement that class:
using System.ComponentModel;
using System;
using System.ComponentModel.Design;
using System.Collections;
using System.Drawing;
using System.Linq;
using System.Workflow.ComponentModel;
using System.Workflow.ComponentModel.Design;
using System.Workflow.ComponentModel.Compiler;
using System.Workflow.ComponentModel.Serialization;
using System.Workflow.Runtime;
using System.Workflow.Activities;
using System.Workflow.Activities.Rules;
using System.Drawing.Design;
using MyCustomLibrary;
namespace CustomActivityTester
{
public partial class MyCustomActivity : System.Workflow.ComponentModel.Activity
{
public MyCustomActivity()
{
InitializeComponent();
}
public static DependencyProperty FilePathProperty =
System.Workflow.ComponentModel.DependencyProperty.Register(
"FilePath", typeof(string), typeof(MyCustomActivity));
[Description("FilePath")]
[Category("MyCustomActivity")]
[Browsable(true)]
[DefaultValueAttribute("False")]
[DesignerSerializationVisibility(DesignerSerializationVisibility.Visible)]
[Editor(typeof(DriveEditor), typeof(UITypeEditor))]
public string FilePath
{
get
{
return ((string)base.GetValue(MyCustomActivity.FilePathProperty));
}
set
{
base.SetValue(MyCustomActivity.FilePathProperty, value);
}
}
protected override ActivityExecutionStatus Execute
(ActivityExecutionContext executionContext)
{
Console.WriteLine(string.Concat("The File path is: ",this.FilePath));
return ActivityExecutionStatus.Closed;
}
}
public class DriveEditor : UITypeEditor
{
public override System.Drawing.Design.UITypeEditorEditStyle
GetEditStyle(System.ComponentModel.ITypeDescriptorContext context)
{
return UITypeEditorEditStyle.Modal;
}
public override object EditValue(
System.ComponentModel.ITypeDescriptorContext context,
System.IServiceProvider provider, object value)
{
FilePathDesignSupport frm = new FilePathDesignSupport();
frm.ShowDialog();
return frm.FileName;
}
public override bool GetPaintValueSupported(
System.ComponentModel.ITypeDescriptorContext context)
{
return false;
}
}
}
The most important method of the UITypeEditor class is the EditValue method. It tells Visual Studio what to do when the user clicks on the property window to set up the property. In this case, we create an instance of the FilePathDesignSupport form then we just show it. This method has to return an object that represents the value of the property we were setting up. In this case, we return the file path of the file selected. After that, we have to "Bind" the property "FilePath" with the class that represents the UI to show. To do it, we have to just add this attribute in the FilePath property [Editor(typeof(DriveEditor), typeof(UITypeEditor))]. At this point, everything is done. If we click on the custom activity on the workflow, then on the FilePath property the FilePath form will be shown to set up the property. At the end, we can override the Execute method of the Activity class. This is the method that contains the code to implement the behavior of the activity.The runtime will call this method meantime the activity is executed on the workflow. In this case, we just print on the screen the value of the FilePath property.
As we see in this article, it's quite easy to add design support for the custom activity properties. We can use this way every time we want to make the property setting up process quicker or maybe we want to help the user to set up the properties.
I have been fascinated by software development since I was 10 years old. I'm proud of learned the first programming language with an Olivetti PC 128S based on Microsoft BASIC. I'm a Software Architect/Senior Developer with a strong background of all the developing Microsoft's technologies.


 General
  News
News  Suggestion
  Question
  Bug
Bug  Answer
  Joke
Joke  Praise
  Rant
Rant  Admin
Admin 


