The Series
This is part of a series of articles on Apex and MVVM:
- Apex Part 1: Create Your First MVVM Application
- Apex Part 2: Adding Commands to an MVVM Application
Introduction
Apex is a framework for rapidly building MVVM applications for WPF, Silverlight or Windows Phone 7. In Part 1 of this series, we looked at how to create your first MVVM application. In this article, we'll take that first basic application and add some functionality via the Commanding mechanism.
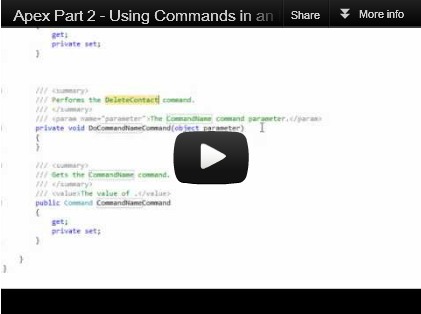
Video Article
You can follow the article in detail by watching the ten minute video below - it takes only ten minutes to add this functionality to our sample application, but in the video I also describe the concepts that are going on and show some tips and tricks for using Apex.
Direct link: http://www.youtube.com/watch?v=wt7nncMNRG8
Before You Begin
This article actually builds upon a very simple application that was written in Part 1. If you are familiar with the basics of MVVM, then you can probably skip it. There is also a ten minute video for it if you just want to get up to speed. If you haven't done so already, you will need to download the Apex SDK to add this sort of functionality to your own applications:
The Apex SDK: http://apex.codeplex.com
The Apex SDK is just the Apex Binaries for WPF, Silverlight and Windows Phone 7, as well as extensions for Visual Studio (such as Item Templates for Views and ViewModels).
The Starting Point
At the end of the last article, we had created a basic Contacts application that looks something like the below:

We have a ViewModel for a Contact and a View for a Contact. We also have the main View and ViewModel. However, we've got no functionality - all we are doing is displaying data. What we're going to do is add Commands to our view models to allow us to start implementing business logic.
Commands - the Core Concept
What do we mean by commands? Think of it like this:
In traditional UI development, if we want to provide some functionality on (for example) a button being clicked, we subscribe to a 'clicked' event of a button (it may be an event in Windows Forms, or a Windows Message in Win32 or something similar). The code in the event handler performs the logic. But the logic is tightly bound to the UI. This means it's hard to test it with an automated tool unless the tool is physically pressing buttons.
With MVVM, we bind a command to a button (or other element). When the button is pressed, the framework attempts to call the command. This means that in general, the command code is stored in the ViewModel and is not bound tightly to the UI. Because the command is just code in a plain old C# class, we can write unit tests against it, reuse it with other views and so on.
This may seem a bit of an unnecessary separation of concerns, but as we go through this series, we're going to do some very smart things that would be much more difficult without this separation.
As a bit of a refresher (and to be aligned with the video), we're going to start by actually adding another notifying property to the Contact ViewModel - one for an email address. Why? Well, mostly to cement the learning episode and to remind you to use apexnp! If you've got the SDK type in apexnp and press tab twice - it'll write out your notifying property for you!
In the ContactViewModel key in apexnp and name the property 'EmailAddress' and set the type as 'string'. You should get something that looks like the below:
private NotifyingProperty EmailAddressProperty =
new NotifyingProperty("EmailAddress", typeof(string), default(string));
public string EmailAddress
{
get { return (string)GetValue(EmailAddressProperty); }
set { SetValue(EmailAddressProperty, value); }
}
This is Apex specific - a NotifyingProperty is designed to look very similar to a DependencyProperty and automatically handles updating the UI via INotifyPropertyChanged.
We can now open the ContactView XAML and add the email address to our grid of controls. The changed section is in bold:
<apexControls:PaddedGrid Rows="Auto,Auto,Auto" Columns="*,2*" Padding="4">
<Label Grid.Row="0" Grid.Column="0" Content="Name" />
<TextBox x:Name="textBoxName" Grid.Row="0" Grid.Column="1" Text="{Binding Name}" />
<Label Grid.Row="1" Grid.Column="0" Content="Birthday" />
<TextBox Grid.Row="1" Grid.Column="1" Text="{Binding Birthday}" />
<Label Grid.Row="2" Grid.Column="0" Content="Email Address" />
<TextBox Grid.Row="2" Grid.Column="1" Text="{Binding EmailAddress}" />
</apexControls:PaddedGrid>
This is a nice refresher of how Notifying Properties work. They're owned by the ViewModel - and the View just binds to them. We're going to move onto Commands now - and they operate analogously, they are owned and implemented by the ViewModel and the View just binds to them.
Updating the UI
First, we'll update the MainView.xaml to have a stack panel to hold some buttons and some buttons themselves. The new code is in bold:
<ListBox Grid.Column="0" ItemsSource="{Binding Contacts}" DisplayMemberPath="Name"
SelectedItem="{Binding SelectedContact}" />
<local:ContactView x:Name="contactView"
Grid.Column="1" DataContext="{Binding SelectedContact}" />
<StackPanel Grid.Row="1" Grid.ColumnSpan="2"
Orientation="Horizontal" HorizontalAlignment="Right">
<Button Width="120" Margin="4" Content="Add New Contact" />
<Button Width="120" Margin="4" Content="Delete Contact" />
</StackPanel>
Running the applications, we have the buttons in place but they don't do anything. First, we'll have to create the actual Commands that they'll bind to.
Creating the Add Contact Command
Navigate to the MainViewModel and at the bottom of the class, key in apexvmc, then press tab twice. This is the code snippet for an Apex ViewModelCommand. All you need to provide for the snippet is the name, which in this case is 'AddContact'. Keying in the name and pressing enter will give you the below:
private void DoAddContactCommand(object parameter)
{
}
public Command AddContactCommand
{
get;
private set;
}
What we have now is a Command object as a property, named AddContactCommand and a function. The View is going to bind to the property - but until we actually create an instance of the object, it won't do anything. So the key step here to connect these two entities is to add the following bold line to the constructor:
public MainViewModel()
{
AddContactCommand = new Command(DoAddContactCommand);
}
In this case, we have created the Command object - and provided it with the function to perform when the command is invoked. This function can be an Action or an Action<object> if you'd like to also be able to take a parameter. Now that we have a property of the view model, we can update the definition of the button in the XAML to actually bind to that command - here's how it'll look:
<Button Width="120" Margin="4" Content="Add New Contact"
Command="{Binding AddContactCommand}" />
So we have bound the 'Command' dependency property of the button to the 'AddContactCommand' object of our view model. This means that when the button is pressed, the function DoAddContactCommand will be invoked. Now let's add the functionality - here's what the 'AddContact' command should do:
private void DoAddContactCommand(object parameter)
{
ContactViewModel newContact = new ContactViewModel()
{
Name = "New Contact"
};
Contacts.Add(newContact);
SelectedContact = newContact;
}
Run the application and feel happy - it all works!
What's key here? The business logic is totally separate from the UI. At no point in the code above do we add an item to a listbox, or select it in a listbox, or update textbox text values. We manipulate the ViewModel properties and the View decides how to present them. Our command contains pure business logic - and this can be bound to by another view in the future - or a view from a different platform (Silverlight, e.g.). We can also unit test this functionality. Typically, unit tests are easy to write for low level code, but if there is a user interface, it is very hard to automate the testing of that - but we can actually test the ViewModel directly and verify it works as we expect.
Creating the Delete Contact Command
Now that you know how the commanding mechanism works, it takes only a few seconds to add the delete contact command. First, we use apexvmc and add the name 'DeleteContact', then create the command instance in the constructor:
public MainViewModel()
{
AddContactCommand = new Command(DoAddContactCommand);
DeleteContactCommand = new Command(DoDeleteContactCommand, false);
}
private void DoDeleteContactCommand(object parameter)
{
Contacts.Remove(SelectedContact);
SelectedContact = null;
}
public Command DeleteContactCommand
{
get;
private set;
}
Delete is even easier! Notice one difference - we have passed in the value 'false' to the constructor of the command as the second parameter. The second parameter is optional, and determines whether the command can be executed. The default is true. If the command cannot be executed, the user interface will display it as greyed out.
Why disable the delete command? Well, it only makes sense if there is actually a selected contact. So what we can do is initially have it disabled, and then update the SelectedContact property in the MainViewModel with the code in bold below:
public ContactViewModel SelectedContact
{
get { return (ContactViewModel)GetValue(SelectedContactProperty); }
set
{
SetValue(SelectedContactProperty, value);
DeleteContactCommand.CanExecute = value != null;
}
}
'CanExecute' is a property of Command. As soon as we change it, the user interface immediately updates to enable or disable the UI element. So again, we have business logic here that is totally separated from the UI. We've got very basic code for our commands that just does the job - we leave it to the View to decide how to present it.
Manipulating the View from the Command
Let's say we want to manipulate the View from the Command - for example, when the Add New Contact Command is invoked, we want to focus on the Contact Name textbox. How do we do this?
We don't! The ViewModel should never know about the view - because the view can be anything (or even in the case of a unit test, nothing). But in reality, of course, we must handle cases like this. Fortunately, there is a solid and sensible way of doing this. In the constructor of the main view, we add a handler for the Executed event of the command:
public MainView()
{
InitializeComponent();
viewModel.AddContactCommand.Executed += new CommandEventHandler(AddContactCommand_Executed);
}
void AddContactCommand_Executed(object sender, CommandEventArgs args)
{
contactView.FocusContactName();
}
'FocusContactName' is just a one-line function of the ContactView that focuses on the appropriate text box. So there we have it - the view can respond to commands being executed. We can even involve the view BEFORE a command executes - look at the code below:
public MainView()
{
InitializeComponent();
viewModel.AddContactCommand.Executed +=
new CommandEventHandler(AddContactCommand_Executed);
viewModel.DeleteContactCommand.Executing +=
new CancelCommandEventHandler(DeleteContactCommand_Executing);
}
void DeleteContactCommand_Executing(object sender, CancelCommandEventArgs args)
{
args.Cancel = MessageBox.Show
("Are you sure?", "Sure?", MessageBoxButton.YesNoCancel) != MessageBoxResult.Yes;
}
The Executing event actually provides a CancelCommandEventArgs that allows the command to be cancelled. In this case, we show a message box asking the user if they are sure they want to continue.
Conclusion
We've now got the View, ViewModel, NotifyingProperty and Command concepts under our belt and are well on the way to becoming MVVM gurus! Please add any comments or questions below - as well as suggestions for the next part of the article (which so far I believe will be adding a Model).


 General
  News
News  Suggestion
  Question
  Bug
Bug  Answer
  Joke
Joke  Praise
  Rant
Rant  Admin
Admin 


