Introduction
Microsoft Build Engine (MSBuild) is the build platform for Microsoft and Visual Studio. The best part of MSBuild is its transparency as to how it processes the builds software which enables the developers to orchestrate the scripts as per the requirements.
Why do I need MSBuild?
Build during development and one time integration can easily be accomplished through IDE. And there is no better way of achieving it. But when it comes to automated build and continuous integration there needs to be a process in place that will replicate a specified number of tests and generate the output as per the requirements and standards set and then MS Build is the answer.
Getting to know the MSBuild
MS Build is an XML based file that is written in scripting language. The file in itself hosts a list of properties and functionalities that can be accessed via command line and a particular task can be automatically initiated without any manual intervention.
MS Build Structure Overview
For first those who are working with MS Build for the first time they will need to install MSBuild Tasks and Extension Packs. The software could be downloaded from –
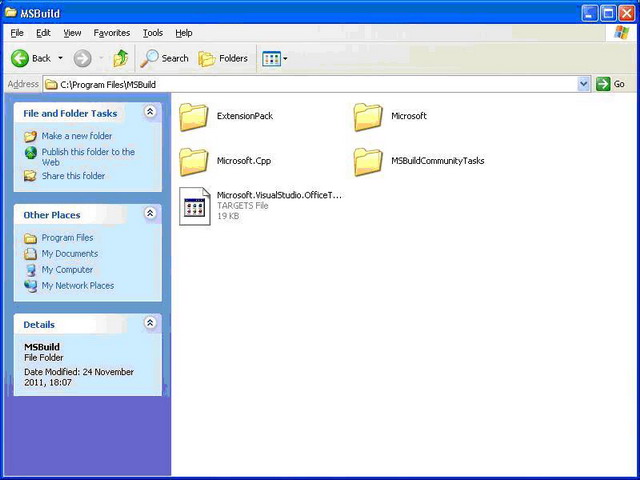
The installation process is simple. Just download and run the installer. Once the installation is over, if the installation location has not been changed then at C:\ProgramFiles a new folder will be created with sub folders given as below:
Once the installation is done we can start creating our first MSBuild file.
A simple MSBuild file can be viewed without even writing a single line of code. Just follow the simple steps given below:
- Open any existing visual studio solution.
- Right click on any one of the projects under the solution (given in the image below)

- <formulas /></formulas />
- Select unload project.
- Once the project is unloaded, right click on the project and select the edit project option like the image given below:
- A simple MSBuild files open for the particular project.
Once we go through the MSBuild file we may confidently conclude that a project file is nothing other than an MSBuild file that has set of instructions written in it.
The next thing is - How to read an MSBuild file?
Well what follows is the walkthrough of the various parts of the MSBuild file.
Our first glance through the file gives us some insight into what kind of file its is and our conclusions are as follows:
- It’s a type of XML file
- Each node is either a declaration or a property or an action.
Now let’s look deeper into the nodes.
- First Node - The namespace declaration. The first line is a node of any MSBuild file looks something like the line given below.
<Project xmlns="http://schemas.microsoft.com/developer/msbuild/2003"
    DefaultTargets="Test" ToolsVersion="4.0">

</Project>
In the above line there is couple of things that are new and few things that we have already used before. Let’s understand the attributes 1 by 1.
- Project node – This represents the starting/root node in the file. This is a mandatory node. All the functionalities w.r.t a particular MSBuild task need to go within the project node. Also the references to all external resources to be used also need to go with in this node.
- Xmlns attribute - This represents the XML namespace that will be referred to. In order to run MSBuild scripts we need to refer the particular namespace defined as "http://schemas.microsoft.com/developer/msbuild/2003"
- DefaultTargets attribute – This attribute refers to particular task that will run by default when no value is specified for the "/target:" switch from command line.
- ToolsVersion attribute – This refers to the version of the Extension Pack Tools that we are using/is installed.
- Declaration Nodes -Next within the "Project" node we declare the following:
<PropertyGroup>

<TPath>$(MSBuildExtensionsPath)\ExtensionPack\4.0\MSBuild.ExtensionPack.tasks</TPath>

<TPath Condition="Exists('$(MSBuildExtensionsPath)\ExtensionPack\MSBuild.ExtensionPack.tasks')">

$(MSBuildExtensionsPath)\ExtensionPack\4.0\MSBuild.ExtensionPack.tasks

</TPath>

</PropertyGroup>

<Import Project="$(TPath)"/>

<Import Project="$(MSBuildExtensionsPath)\MSBuildCommunityTasks\MSBuild.Community.Tasks.Targets"/>
The property group node encapsulates the various key value pairs that will be declared and used across the script for different targets. While the "PropertyGroup" node in itself is a system defined node the child nodes within it are user defined and is declared as per user requirement and has the following features:
- The name of the child nodes could be any string with alphanumeric characters.
- The key declared in the child nodes are valid as long as they are not repetitive, is a system defined keyword or has any special characters.
- The values of the child nodes could be accessed via
$(<childnode_name>) syntax. - In the above example there is a single "key" declared via child nodes within the "
PropertyGroup" node. The child node in the example above has the following features - The declared key is "TPath"
- Its value is -$(MSBuildExtensionsPath)\ExtensionPack\4.0\MSBuild.ExtensionPack.tasks
- The "Condition" attribute to "TPath" checks whether the requisite files are available at the specified location/path.
- Item Group node – This node contains a set of user-defined Item elements. Every item used in a MSBuild project must be specified as a child of an ItemGroup element. The item group can lists items of many types. Few common ones are -
- Reference
- Content
- Compile
- None
- Imports node – This declares that the contents of another project file should inserted at the particular location where the imports node is found. A single MSBuild file may have multiple imports node.
- Projects Extensions node – This is an optional section that is used by MSBuild hosts and may contain arbitrary XML content.
- Target node – This is actually the node that encapsulates tasks for MSBuild to run sequentially. The common attributes of Target node are -
- Name – This is the name of the target and is mandatory
- DependsOnTarget – It’s optional and lists the targets that must be executed before a target can be executed or top-level dependency analysis can occur. Multiple targets are separated by semicolons.
- Inputs - The item inputs for this target. Items in this attribute are used as the inputs in the top-level dependency analysis.
- Outputs - The expected outputs of this target. You can apply transforms to the input items to generate the output items. For more information about transforms
Now since we are acquainted with structure of the MSBuild file, let’s try out few examples –
- Lets declare a section like the one given below in an MSBuild file–
<PropertyGroup>

<TPath>

$(MSBuildExtensionsPath)\ExtensionPack\4.0\MSBuild.ExtensionPack.tasks

</TPath>

<TPath Condition="Exists('$(MSBuildExtensionsPath)\ExtensionPack\MSBuild.ExtensionPack.tasks')">$(MSBuildExtensionsPath)\ExtensionPack\4.0\MSBuild.ExtensionPack.tasks

</TPath>

</PropertyGroup>

<Import Project="$(TPath)"/>

<Import Project="$(MSBuildExtensionsPath)\MSBuildCommunityTasks\MSBuild.Community.Tasks.Targets"/>

<Target Name="WriteAMessage">

<Message Text="This is the test run"/>

<Message Text="Hello World"/>

</Target>

</Project>
- To run the above target follow the steps given below:
- Click Start, then click All Programs. Locate and click the Visual Studio Command Prompt in the Visual Studio Tools folder.
- From the command window, navigate to the folder containing the MSBuild file, in this case, D:\BuildApp\BuildApp.
- Run msbuild with the command switch /t: WriteAMessage. This selects and builds the WriteAMessage target with command like this –
msbuild helloworld.msbuild /t: WriteAMessage
That was simple...we will continue with the other MSBuild functions in Part 2(can be found here).
This member has not yet provided a Biography. Assume it's interesting and varied, and probably something to do with programming.


 General
  News
News  Suggestion
  Question
  Bug
Bug  Answer
  Joke
Joke  Praise
  Rant
Rant  Admin
Admin 


