Introduction
Windows Communications Foundation (WCF) is an extension of Microsoft .NET Framework and has proven to be an excellent tool for building distributed enterprise applications. It is an outcome of an ever-evolving technology of distributed computing. WCF is a unified framework that combines such technologies as MSMQ, .NET Remoting, and web services. Using WCF Framework, you can build loosely-coupled application modules on a service-oriented architecture or you can build an internal application server that implements the business logic for your application.
In this article, I am going to show you the simplest way of creating a WCF project structure using Visual Studio 2008. The steps mentioned here are equally applicable to Visual Studio 2010 (Beta).
Background
One of the major questions a developer faces while working with WCF is this: what is the ideal project structure of a WCF solution? A WCF solution contains at least 2 projects; one for defining and implementing the services, called a server, and the other for utilizing those services, called a client. The developer has to work on both projects simultaneously for the simple reason that a significant debugging effort is required on both sides of boundary. There is a flood of information on the internet about WCF and its related technologies. However, after spending a good amount of time on internet searching, I could not find any straight-forward explanation about how to create a basic project framework for a WCF solution. May be I am not a good searcher on internet or may be my eyes have become weak enough to skip something I am looking for. But in any case, I needed to explain to my overseas project team about the best way of wiring projects in a WCF solution. So, I decided to write one and publish it for the benefit of every concerned developer.
Goal
Visual Studio 2008 ships with a project template called WCF Service Library that can be used with .NET Framework 3.0/3.5. When you select a project of this type, Visual Studio does a lot of plumbing for you and automates many manual WCF tasks. It also wires the project to utilize the pre-built programs wcfSvcHost.exe and wcfTestClient.exe. It is a great way to jump start a WCF application. However, there are many side effects of using this template. The most notable problems are:
- It does not facilitate debugging on both sides. To debug the actual client and the server, both at the same time requires a lot of manual work and calls for restructuring the entire solution.
- It runs the test client with project execution. A good facility. However, stopping the debugger does not terminate the test client. As such, over time, your desktop becomes littered with orphaned clients.
- It creates a web.config file in the project, assuming that you are building the services that you are going to host in IIS. It is true in most cases. However, there are numerous other scenarios of building and hosting the services. For example, if you are going to build an application server that is to be hosted by Windows service application and that uses the TCP bindings, you need to make a lot of changes in the project structure.
In this article, our goal is to create a project structure that reverses all of the shortcomings mentioned above. It does require some manual work, however, but it ultimately results in a project structure that facilitates easy coding, debugging, testing, and deployment. Enough talk, now time for switching our minds to real-action gear.
Project Structure
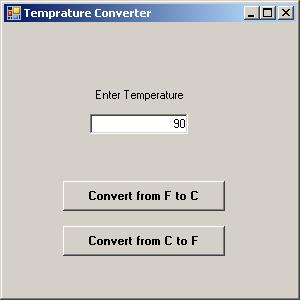
For illustration purposes, we will build a WCF service that provides methods for converting the temperatures. The service exposes two methods; one for converting the temperature from Fahrenheit to Celsius, and the other for converting it from Celsius to Fahrenheit.
Anyone who has worked with WCF in at least one project understands that there are 3 stages of building a WCF application: create contracts (define interfaces), implement services (build classes), and utilize those services (create client application). For the same reason, we will split our solution on 3 projects:
- A contract definition project (contracts project): This project will store all interfaces and the contract definitions. It will produce an assembly file which is nothing but a DLL containing the interface specifications and the contract definitions. This proxy assembly will ultimately provide the metadata to the client. This project is optional if you are strictly building the service for use on internet only. However, I am using the example that is more like a .NET remoting type application. So, creation of this project is very helpful.
- A service implementation project (services project): The actual implementation code of all the services is going to be placed in this project.
- The client project: The client project will create the proxy object and use the services by calling methods on it.
The following steps are involved:
1. Open Visual Studio 2008 and create a blank solution
Create a blank solution in Visual Studio as shown in the image below, and name it TConvertApp.

2. Add a contract storage project
Create a project of class library type and name it as TConvertAS.Contracts. The suffix AS is used to indicate that the project is part of the Application Server.
3. Add a service implementation project
In the previous step, we created a project to store contract definitions. We also need a project to store the implementation code of those interfaces.
So, create a project of class library type and name it as TConvertAS.Services. This project will provide the service implementation to the host.
4. Add a client project
We also need a client project that utilizes the services exposed by the host. The usual trend is to create a console application for testing and debugging. However, for better illustration, we will create a Windows Forms application. So, create a project of type Windows Forms application with the name TConvertClient.
Now, we have three projects added to our solution; two projects of type class library and a Windows Forms application project.
5. Add WCF assembly references to all projects
In all three projects, add references of the following assemblies:
System.ServiceModel;
System.Runtime.Serialization;
6. Add references of contract project
Since the interfaces belonging to the contracts project are going to be used by both the implementation project and the client project, we need to add the references of contracts project in those two projects.
7. Remove default classes from proxy and services projects
When the contracts and services projects were created, Visual Studio had automatically added class1.cs file with default class name in each project. Delete those files from both the projects. We will add our own classes.
8. Add interface for the service
In the contracts project, add an interface class file with the name ITempConverter.cs and insert the following code:
namespace TConvertAS.Contracts
{
public interface ITempConverter
{
int ConvertFtoC(int Tf);
int ConvertCtoF(int Tc);
}
}
9. Add namespace and attributes
At this point, we need to add the WCF attributes in the interface. But, before we add these attributes, add the following namespaces in the file:
using System.ServiceModel;
using System.Runtime.Serialization;
The updated interface, after the WCF attributes are added, looks as follows:
namespace TConvertAS.Contracts
{
[ServiceContract]
public interface ITempConverter
{
[OperationContract]
int ConvertFtoC(int Tf);
[OperationContract]
int ConvertCtoF(int Tc);
}
}
10. Write service implementation code
The methods specified in the service contract interface are implemented in the services project. The actual code goes as follows:
namespace TConvertAS.Services
{
    public class TempConverter : ITempConverter
    {
          public int ConvertFtoC(int Tf)
        {
                int Tc = (int)((5.0 / 9.0) * (Tf - 32));
                return Tc;
        }

          public int ConvertCtoF(int Tc)
        {
                int Tf = (int)((9.0 / 5.0) * (Tc + 32));
                return Tf;
        }
    }
}
11. Add application configuration files and set startup projects
In distributed computing, a client program calls methods on the server. In WCF terminology, this is called exchanging message with the service. In order to facilitate the message exchange, we need to add code for hosting the service, creating the end points, and creating a channel in client program that will be used to connect to the service. We can add all of this functionality programmatically. However, the better idea is to specify these details in configuration files so that we can change the parameters dynamically at run time. For this reason, add configuration files in services project and the client project.
We also need to specify the startup project. As we are going to run and debug two projects at the same time, we need to specify multiple startup projects. Right-click on solution name and choose the Properties option. In Startup Project options, choose multiple startup projects and specify the settings shown in the image below:
12. Set host reference for debugging of services project
Visual Studio 2008 (and also Visual Studio 2010) ships with a general purpose, ready-made service host named wcfSvcHost.exe. It is a great tool that can be used for debugging our service code. It is located under C:\Program Files\Microsoft Visual Studio 9.0\Common7\IDE folder. Microsoft provides this program as a simple command-line utility that accepts two parameters: the service class assembly name, and the application configuration file name.
WcfSvcHost.exe /service:MyService.dll /config:App.config
Since the assembly of our project is located under ..\Project Name\Bin\ folder and the configuration file is located under ..\Project Name\ folder, we can run the host program by setting the project property options as shown in the figure below:
We can now run the project and see that Visual Studio launches host program seamlessly. The service instance will not start, however, because we have not defined the service endpoint. It is a noteworthy point that the ready-made host program we are using here may not be suitable for all WCF solutions. If you need to access the host instance programmatically, the wcfSvcHost.exe program has no capability to provide it. However, in most other cases, it is an ideal program to use during the development cycle.
13. Add and configure the service endpoint
Now is the time to expose our service class through a service endpoint. This endpoint is defined with the ABC rule (address, binding, contract) and the structure of its entry in the configuration file is as shown below:
<system.serviceModel>

<services>
        <service
name="TConvertAS.Services.TempConverter">

<endpoint address="net.tcp://localhost:8080/TempConverter"
binding="netTcpBinding"

contract="TConvertAS.Contracts.ITempConverter" name="TEMPCONV_SVC_TCP" />

</service>
    </services>

</system.serviceModel>
If you don't want to update the app.config file manually, Microsoft provides a nice configuration utility called svcConfigEditor.exe. It is located under the folder C:\Program Files\Microsoft SDKs\Windows\v6.0A\Bin. Follow the steps below to use it in your project:
- In the solutions explorer window, right-click on the app.config file. If you see the option WCF configuration utility, just click on it and it will open the utility.
- If you do not see the above option, just click on option Open with. It will open a new window that shows the list of programs. Click Add button on that window and you will see the following dialog box.
- Now, click on the browse button and select path for the program svcConfigEditor.exe. Type 'WCF Config Utility' in the Friendly name field and click OK button to close the dialog.
- In the previous window, select the utility name and click OK to open the configuration file in configuration utility program.
- With the service option selected, click the option Create a New Service. As a first step, it will ask you to select the assembly in which the actual service implementation code resides. In our case, we have to select the TConvertAS.Services.dll file.
- A single .NET assembly may contain many services. So, in the second step, the utility prompts us to select the service. Since, we have written only one service as a sample, it will be selected by default.
- Now, we have to choose the communication mode. WCF provides several protocols as options for communication. For our illustration purpose, we will choose the TCP option.
- The next page prompts us to provide the address. An address is the location where the clients will communicate. It consists of the protocol, the host name (or IP address) and the port number. Although, we can choose any port, we will be content with port 8080. So, just enter the value shown below:
- Click Finish button to create the endpoint. Close configuration utility and save the settings.
14. Add and configure the client endpoint
Just as we configured the service endpoint in services project's configuration file, we need to update the configuration file of client project, too. The following basic entries are required to create a client endpoint.
<system.serviceModel>

<client>

<endpoint address="net.tcp://localhost:8080/TempConverter"
binding="netTcpBinding"

contract="TConvertAS.Contracts.ITempConverter" name="TEMPCONV_CLT_TCP" />

</client>
</system.serviceModel>
You can also use the WCF configuration utility to update the configuration file. Just follow the steps outlined below:
- Open configuration utility by right-clicking on the config file and then selecting the utility name from the list. Select Client option and click on the Create a new client link. At this point, the wizard page prompts us to select the configuration file of service project.
- When we click the Next button after selecting the configuration file, the utility finds out the available endpoints and prompts us to choose one from the list. As we have only one endpoint on the service side, it will be selected by default. Click Finish button to save settings and close the wizard.
- Make sure to name the client endpoint as
TEMPCONV_CLT_TCP.
15. Add code to connect service and call methods
Finally, we have to add code on client project to connect to the service and call methods on it.
private void btnFtoC_Click(object
sender, EventArgs e)
{
    try
    {
        ChannelFactory<ITempConverter> TcpFactory = new ChannelFactory<ITempConverter>
        ("TEMPCONV_CLT_TCP");
        ITempConverter tcpProxy = TcpFactory.CreateChannel();
        int tempval = int.Parse(tbxTempr.Text);
        if (tcpProxy != null)
           MessageBox.Show(tcpProxy.ConvertFtoC(tempval).ToString());
    }
    catch (Exception ex)
    {
        if (ex is EndpointNotFoundException)
        {
          MessageBox.Show("The server is either not running or is inaccessible.");
        }
        else
          MessageBox.Show(ex.Message);
    }
}
The logic is implemented in the following 3 steps:
- Create a channel factory object using the client endpoint information.
- Instantiate a proxy object from the channel factory.
- Call methods on proxy instance.
Now, build the solution and run it. You will see that Visual Studio launches 2 projects: a host project that exposes the services and a client project. In the client project form, click on the button and you will see the converted temperature value in response. Wonderful.The biggest advantage of creating a project framework like this is that it is easy to code, debug, and run the project simultaneously. Moreover, it also becomes easy to deploy the service. Just copy the service assembly with proxy DLL and host it on remote machine with properly set configuration file. That's it.
Enjoy working on WCF projects.
History
- 6th January, 2010: Initial version
Mr. G. P. Naik was kicked into the programming world some 18 years back. Over the period of time, his attitude towards programming underwent a complete evolution- from profession to hobby, and from hobby to passion. His background in MBA helped him bridge the two worlds; business domain skills and the technical skills. As a result, he has been successfully providing IT solutions to an array of businesses from diverse industry types.
He knows writing technical stuff and currently he is attending classes to learn how to write a biography. So, in future, you may see more stuff here when he feels he has mastered that skill.


 General
  News
News  Suggestion
  Question
  Bug
Bug  Answer
  Joke
Joke  Praise
  Rant
Rant  Admin
Admin 


