Introduction
This article demonstrates a .NET Framework control for adding rotated text to a form. The control reproduces the behavior of the built-in Label control but allows the text to be rotated. It allows the user to set the text, angle of rotation, text alignment, and auto-size properties in the designer. With these features in place, the control will resize itself and align the text automatically. It will exhibit appropriate behavior for the settings of the Anchor or Dock properties.
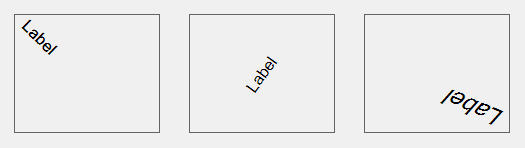
Below are some examples of the label. Each black outline is a label. The text in each label is set to a different angle, text alignment, and font.
Background
The .NET Framework does not seem to have a built-in control for displaying rotated text. There are several examples online of how to produce basic rotated text, however, there doesn't seem to be a fully developed control for doing this. That is, there isn't a control that allows for rotated text and that obeys the Anchor, Dock, TextAlign, and AutoSize properties.
Using the Control
Since the control was designed to feel built-in, its use should be intuitive. It is recommended to add it as part of a control library. In the case of the example code, you will find it in the Toolbox under the Controls Components. Then it can be dragged-and-dropped onto a form.

The control can then be used exactly like a standard Label control, with one difference. In the Properties window, you will find an entry for the Angle, as shown highlighted below. The angle rotates the text in a clockwise direction.
Demonstration
A demonstration project is included in the downloads section. It has two RotatedLabels that can be updated using the controls on the left. The top label is anchored on all four sides and the bottom label has the docking set to Fill. When started, the form appears like the following:
As the controls are updated, the labels will also update accordingly. The labels will also update when the form is resized.
Code
The code contains a few properties. Most of them override the base class to allow the text to be updated when a property changes. An Angle property is added to store the text angle.
Most of the work takes place in the OnPaint event.
protected override void OnPaint(System.Windows.Forms.PaintEventArgs paintEventArgs)
{
SizeF textSize = paintEventArgs.Graphics.MeasureString(this.Text, this.Font,
                                                       this.Parent.Width);
int x                 = Math.Abs((int)Math.Ceiling(textSize.Height * Math.Sin(_radians)));
int y                 = Math.Abs((int)Math.Ceiling(textSize.Height * Math.Cos(_radians)));
Point rotatedHeight   = new Point(x, y);

x                     = Math.Abs((int)Math.Ceiling(textSize.Width * Math.Cos(_radians)));
y                     = Math.Abs((int)Math.Ceiling(textSize.Width * Math.Sin(_radians)));
Point rotatedWidth    = new Point(x, y);
Size textBoundingBox = new Size(rotatedWidth.X + rotatedHeight.X,
                                rotatedWidth.Y + rotatedHeight.Y);
SetControlSize(textBoundingBox);
Point rotationOffset = CalculateOffsetForRotation(ref rotatedHeight, ref rotatedWidth,
ref textBoundingBox);
Point alignmentOffset = CalculateOffsetForAlignment(ref textBoundingBox);
paintEventArgs.Graphics.TranslateTransform(rotationOffset.X + alignmentOffset.X,
rotationOffset.Y + alignmentOffset.Y);
paintEventArgs.Graphics.RotateTransform(_angle);
paintEventArgs.Graphics.DrawString(this.Text, this.Font, new SolidBrush(this.ForeColor),
0f, 0f);
base.OnPaint(paintEventArgs);
}
The first step...
SizeF textSize = paintEventArgs.Graphics.MeasureString(this.Text, this.Font,
this.Parent.Width);
...calculates the size of the text. That is, it calculates the height and width of a "bounding box," a box that surrounds the text.
The height and width are placed into textSize such that textSize.X = H and textSize.Y = W. The next lines...
int x = Math.Abs((int)Math.Ceiling(textSize.Height * Math.Sin(_radians)));
int y = Math.Abs((int)Math.Ceiling(textSize.Height * Math.Cos(_radians)));
Point rotatedHeight = new Point(x, y);
x = Math.Abs((int)Math.Ceiling(textSize.Width * Math.Cos(_radians)));
y = Math.Abs((int)Math.Ceiling(textSize.Width * Math.Sin(_radians)));
Point rotatedWidth = new Point(x, y);
...calculate the X and Y values for the rotated height and width. These are shown in the following image:
The variables correlate to the dimensions in the image as follows:
rotatedHeight.X = h'xrotatedHeight.Y = h'yrotatedWidth.X = w'xrotatedWidth.Y = w'y
From the above image, it is easy to see that the bounding box for the rotated text has height H' = h'y + w'y and W' = h'x + w'x. This is represented in the code as:
Size textBoundingBox = new Size(rotatedWidth.X + rotatedHeight.X,
rotatedWidth.Y + rotatedHeight.Y);
The functions CalculateOffsetForRotation and CalculateOffsetForAlignment then use the three variables, textBoundingBox, rotatedHeight, and rotatedWidth to reposition the coordinate system of the graphics so that the text is drawn in the correct location.
At the end of OnPaint, the graphics are used to draw the text and the base class's OnPaint event is called.
Limitations
Because of the way Windows handles drawing rotated text, the rotated version may appear slightly different than the horizontal version.
References and Acknowledgements
This class is partially based on the concepts posted by users Javed Akram and Buddy at:
History
- October 2019 - First release
- October 2019 - Added examples to the introduction
Lance is a research and development engineer in the area of drilling dynamics in the oil service industry. He holds a Ph.D. in engineering with his graduate work focused is in the area of computational dynamics and mechanics. He has been coding for over 20 years.


 General
  News
News  Suggestion
  Question
  Bug
Bug  Answer
  Joke
Joke  Praise
  Rant
Rant  Admin
Admin 


