Introduction
This tutorial shows how to use the System.Windows.Forms.TreeView control in a way that the end user and the developer can have phun at the end of the day.
Basically, I would like to talk about:
- Load On Demand
- Recursive method calls for hierarchical data structures
- The use of DataProviders
developer view
Before I start to describe the data, I would like to note that all developers like to write code that they don't have to change often. They like to write code which they can reuse later to develop straight forward on a tested code base.
If we now create a TreeView class, for instance, which meets exactly the requirements for our current project, the chances to reuse the same code later in another project are <=0. We have to find a generic way to implement the project related stuff separated and reuse our tested TreeView class which provides only the most common features.
That's where the IDataProvider interface comes in. With data providers, we can reuse our tested TreeView code for new projects which require different specific features and behaviors.
Normally, you will have to fill data into a tree view which reflects a hierarchical data schema. Typically, your data contains a text and ID field, which should be used as underlying data for your tree nodes. This example uses an Access database which is delivered in the sample application and makes use of this schema and data:

As you can see, we have items with a text field identified by an ID field, which can hold sub items identified by a parent_id field. The root items have typically no parent_id or values like null or -1. Now, this looks like real world data to me, I guess there are thousands of data tables like this one out there, and typically these ones are filled into a tree view. But hey, which user would like to wait until all rows have been filled, it's not a good idea to try to load all rows into a tree view. Because...
User view
The user expects a fast and short tree view handling, that you can't provide if you fill all items at once, we have to fill on demand. This means we fill all the items the user expands during his work. The user don't need all items for his work, only a few ones, which he expand automatically during his work. To load only a few items is a fast operation and gives the users a good experience about working with the software.
Design
Overview
After this short analysis, we should notice the following requirements:
- We need to use a fill mechanism that can work on different item levels (for instance root items, sub items...).
- We need a way to assign a + sign to our (empty) parent nodes which we would like to fill later, otherwise the user doesn't realize that he can expand the node.
- We need to declare a data provider interface.
This UML diagram shows the classes created to design the tutorial base classes.
TreeNodeBase | TreeNodeBase inherits from TreeNode and provides methods to handle dummy child nodes for filling on demand operations. |
TreeViewStrategy | The TreeViewStrategy is tree view which aggregates a tree view data provider interface (Strategy pattern). The goal of this design is to provide an easy way to extend or add data providers without changing a single line of tree view code. Basically, the tree view interface will not change so far, but the data providers will change their behavior and features. |
IDataProvider | DataProvider interface is based on TreeViewStrategy and TreeNodeBase and it is responsible to fill a TreeViewStrategy instance with the requested data. |
But, let's take a closer look at the classes now...
Base classes
TreeNodeBase
First, we create a new class which inherits from System.Windows.Forms.TreeNode. Let us add the required handling for dummy nodes to our base tree node class. Dummy nodes are used to assign a + sign to an empty parent node. An empty parent node is a node, which must have a + sign because we exactly know that there are sub items to be filled later.
public class TreeNodeBase : System.Windows.Forms.TreeNode
{
Public Instance Properties
public virtual bool HasDummyNode
{
get
{
return (Nodes.Count>0 && Nodes[0].Text == "@@Dummy@@");
}
}
Public Instance Methods
public virtual void AddDummyNode()
{
Nodes.Add(new TreeNodeBase("@@Dummy@@"));
}
public virtual void RemoveDummyNode()
{
if ((Nodes.Count == 1 ) & (Nodes[0].Text == "@@Dummy@@"))
{
Nodes[0].Remove();
}
}
}
Every TreeNodeBase instance can now be easily made an empty parent node, by calling AddDummyNode(). If we would like to know if a node instance has currently a dummy node assigned, we can determine the return value of HasDummyNode. To get rid of our dummy node, we just call RemoveDummyNode().
TreeViewStrategy
Now, we create a new class which inherits from System.Windows.Forms.TreeView.
public class TreeViewStrategy : System.Windows.Forms.TreeView
{
Public Instance Fields
public EventHandler DataSourceChanged;
private IDataProvider _dataProvider;
Constructor
Because our IDataProvider is responsible to handle the ContextMenu, we have to create and assign a ContextMenu instance to our TreeView.
public TreeViewStrategy()
{
ContextMenu = new ContextMenu();
ContextMenu.Popup += new EventHandler(ContextMenu_Popup);
}
Public Instance Properties
The DataSource property will let us attach a IDataProvider implementation later.
public IDataProvider DataSource
{
get
{
return _dataProvider;
}
set
{
_dataProvider = value;
OnDataSourceChanged(EventArgs.Empty);
}
}
Public Instance Methods
The Fill method is called to fill the root level of the tree view. Note that the Fill method will handle the WaitCursor and clears all the nodes before it calls a method on the IDataProvider interface which really does the work behind the scene.
public void Fill()
{
System.Diagnostics.Debug.Assert(_dataProvider!=null);
Cursor.Current = Cursors.WaitCursor;
try
{
Nodes.Clear();
_dataProvider.RequestRootNodes(this);
}
finally
{
Cursor.Current = Cursors.Default;
}
}
This class provides a DataSourceChanged event. It's a commonly used technique to provide a virtual method which internally fires the event for us. This way, it's possible for inheritors to consume this event in a derived class without subscribing to our delegate, by overriding the method.
protected virtual void OnDataSourceChanged(EventArgs e)
{
if(DataSourceChanged!=null) DataSourceChanged(this, e);
}
Because the IDataProvider interface is responsible to handle the ContextMenu, we should serve a virtual method for the ContextMenu.Popup event which we delegate to the IDataProvider. To do this, we have to create a ContextMenu for our TreeView and consume its ContextMenu.Popup event in our class and call this virtual method.
protected virtual void OnContextMenuPopup(EventArgs e)
{
System.Diagnostics.Debug.Assert(_dataProvider!=null);
TreeNodeBase node =
GetNodeAt(PointToClient(Cursor.Position)) as TreeNodeBase;
if(node==null) return;
ContextMenu.MenuItems.Clear();
_dataProvider.QueryContextMenuItems(this.ContextMenu, node);
}
This event enables load on demand, because the event is fired every time the user expands a node. Because we're only dealing with TreeNodeBase instances, we can safely cast e.Node. If the node has a dummy node, we can fill the node now with the real child nodes. To do this, we remove the dummy node and let the IDataProvider fill the child nodes. Note that this method also handles the WaitCursor.
protected override void OnBeforeExpand(TreeViewCancelEventArgs e)
{
TreeNodeBase node = (TreeNodeBase)e.Node;
System.Diagnostics.Debug.Assert(node!=null);
if(node.HasDummyNode)
{
node.RemoveDummyNode();
Cursor.Current = Cursors.WaitCursor;
try
{
_dataProvider.RequestNodes(this, node, e);
}
finally
{
Cursor.Current = Cursors.Default;
}
}
base.OnBeforeExpand (e);
}
We handle the ContextMenu.Popup event with a private event handler method.
private void ContextMenu_Popup(object sender, EventArgs e)
{
OnContextMenuPopup(e);
}
Don't forget to close the bracket, otherwise your compiler will let you know about messy things :).
}
IDataProvider
Now, we are ready to define the IDataProvider interface. This interface is responsible to fill our TreeView and to query ContextMenu items.
public interface IDataProvider
{
void RequestRootNodes(TreeViewStrategy treeView);
void RequestNodes(TreeViewStrategy treeView,
TreeNodeBase node, TreeViewCancelEventArgs e);
void QueryContextMenuItems(ContextMenu contextMenu, TreeNodeBase node);
}
Now, we can start to write different IDataProvider implementations which work together with the TreeView class without touching the TreeView code in the future to support new features and behaviors.
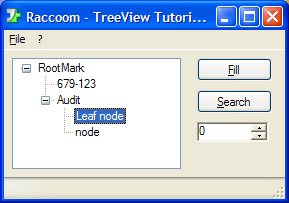
Sample Application
The sample application provides a IDataProvider implementation and a demo form which makes use of our TreeViewStrategy class. I used a strongly typed DataSet class to retrieve the Access database data. Basically, my IDataProvider interface implementation retrieves the data from the DataSet and creates associated nodes for the tree view.
DataBaseNodeInfo
The first step was to create a TreeNode class which reflects the current database schema. The node has to provide ID and text property. The ID property has to be readonly. So, I defined a struct to hold the database text and ID values.
public struct DataBaseNodeInfo
{
Public Instance Fields
public string Text;
public readonly int Id;
Constructor
public DataBaseNodeInfo(string text, int id)
{
Text = text;
Id = id;
}
}
TreeNodeDatabase
And a TreeNode class which inherits from TreeNodeBase which uses the struct as underlying data source. This is a clean way to deal with database items, without referencing any data row class that was generated from the strongly typed DataSet wizard. Note the internal constructor which is only used to create dummy nodes.
public class TreeNodeDatabase : Raccoom.Windows.Forms.TreeNodeBase
{
Public Instance Fields
private DataBaseNodeInfo _dbInfo;
Constructor
internal TreeNodeDatabase(string text) : base(text)
{
_dbInfo = new DataBaseNodeInfo(text, -2);
}
public TreeNodeDatabase(DataBaseNodeInfo dbInfo) : base(dbInfo.Text)
{
_dbInfo = dbInfo;
}
public TreeNodeDatabase(string text, int id) : base(text)
{
this._dbInfo = new DataBaseNodeInfo(text, id);
}
Public Instance Properties
public int Id
{
get
{
return _dbInfo.Id;
}
}
new public string Text
{
get
{
return _dbInfo.Text;
}
set
{
_dbInfo.Text = value;
}
}
}
Now we have completed the basic classes that can deal with the database data in a proper manner. The only thing that is missing is the IDataProvider implementation, and I guess the only reason that you don't have stopped reading is that you would like to know how to implement it, right? :)
DataProviderDatabase
So, let's dive into the code, the code that controls the core process, retrieving data. To give you an example how the data provider can extend the existing TreeView with new features, this data provider contains a search based on node ID.
public class DataProviderDatabase : IDataProvider
{
Public Instance Fields
Raccoom.Sample.DataSet1.treeview_dataDataTable _table = null;
Constructor
public DataProviderDatabase(){}
Public Instance Properties
The filled DataTable which the data provider internally uses as data source:
public Raccoom.Sample.DataSet1.treeview_dataDataTable DataTable
{
get
{
return _table;
}
set
{
_table = value;
}
}
Public Instance Methods
Interface method which calls the private Fill method. To retrieve the child nodes, the database ID provided by the current node, which is the parent node, is used.
public void RequestNodes(TreeViewStrategy treeView,
TreeNodeBase node, TreeViewCancelEventArgs e)
{
System.Diagnostics.Debug.Assert(node is TreeNodeDatabase);
Fill(node.Nodes, ((TreeNodeDatabase)node).Id);
}
Interface method which also calls the private Fill method. Note: this method works for both, root and sub nodes.
public void RequestRootNodes(TreeViewStrategy treeView)
{
System.Diagnostics.Debug.Assert(DataTable!=null);
Fill(treeView.Nodes, -1);
}
Simple create some context menu items for the demo:
public void QueryContextMenuItems(ContextMenu contextMenu,
TreeNodeBase node)
{
contextMenu.MenuItems.Add("&Open " + node.Text);
contextMenu.MenuItems.Add("&Edit "+ node.Text);
contextMenu.MenuItems.Add("&Delete "+ node.Text);
}
This method deals with a TreeNodeCollectoin, because every TreeNode and either the TreeView provides a TreeNodeCollection. It is more generic to pass this collection as a parameter, otherwise you can't use this method recursively. Because, you have to provide a method to deal with the root nodes, and a special one to deal with a specific node. But if you deal with collections, you can call your method recursively, no matter which level you are currently in. This works for n levels.
Maybe, a possible newbie question can be: I can't provide nested for loops for each level, because I don't know at design time how deep my data structure will be. But with this kind of method, you don't have to mess around with such stuff, because the recursive design will work for every level.
public TreeNodeDatabase FindNodeById(TreeNodeCollection col, int id)
{
foreach(TreeNodeDatabase node in col)
{
if(object.Equals(node.Id, id)) return node;
TreeNodeDatabase subNode = FindNodeById(node.Nodes, id);
if(subNode!=null) return subNode;
}
return null;
}
The Fill method also use a TreeNodeCollection as input parameter, this way I can create root nodes and child nodes. It makes no difference, only the parent_id is different. To decide if the currently created node is a parent node, I use a select which determines if there are any children associated with this database item. If there are any child rows, the currently created node gets a dummy node associated.
private void Fill(TreeNodeCollection col, int parent_id)
{
foreach(Raccoom.Sample.DataSet1.treeview_dataRow
row in _table.Select("parent_id = "+parent_id))
{
TreeNodeDatabase node =
new TreeNodeDatabase(row.node_text, row.id);
col.Add(node);
if(_table.Select("parent_id = "+node.Id).Length>0)
{
node.AddDummyNode();
}
}
}
}
Possible improvements
- DataProvider provides
ImageList property.
TreeNodeBase provides Refresh method and a related CanRefresh property.
Conclusions
This is my first tutorial and I hope it is somewhat useful for others. Keep in mind that this doesn't have to be the only or best way to deal with a TreeView, but it's the best I know of. If you would like to see more code based on this design, take a look here.
As always, any feedback or criticism is appreciated.
Links
History
- 12.03.2004 - Initial release.
Have phun...


 General
  News
News  Suggestion
  Question
  Bug
Bug  Answer
  Joke
Joke  Praise
  Rant
Rant  Admin
Admin 


